This section will walk you through the process of Patch installation configurations with more controlled options to Schedule, Approve, Reboot and Enable Maintenance on the devices. You can also have the entire Patch activity from Scan to Install, automated using the Out of the Box Automation feature called Process Definition, which reduces the human intervention completely to perform any Patch related tasks.
To know more about available automation utility for Patch related tasks, see Patch Automation. To know more about remediation and automation capability, see Remediation Automation.
Configure the Patch Management
To deploy Patch Installation Configurations, follow the below steps:
- Login to OpsRamp Portal.
- Select a client from the All Clients list.
- Go to Automation > Patch Management 2.0.
- On the left side of this page, click the Menu bar icon and then Configuration.
- Click + ADD to create a new patch configuration.
The Configuration deployment involves the below 3 steps:
- Resource Selection
- Patch Selection
- Schedule
Resource Selection
On this page, we will choose resources based on the requirements.
- In the Configuration Name field, give the configuration a name.
- Choose resources from the list. There are two options for doing so.
- Dynamic: Choose resources by adding an OpsQL query; if any resources match the query, they will be included in the configurations automatically. This will automate the process and reduce the need for user intervention whenever there are new devices onboarded and required to add new devices to the existing installation configurations.

- Select Resources id: This is a manual process for searching and selecting resources by defining Resource attributes in a simple search query. The selected resources list would not be updated with newly onboarded devices if the installation schedule is saved with this option. Users have to manually update the list for any onboarding or decommission of the devices on the platform.

- Dynamic: Choose resources by adding an OpsQL query; if any resources match the query, they will be included in the configurations automatically. This will automate the process and reduce the need for user intervention whenever there are new devices onboarded and required to add new devices to the existing installation configurations.
- To proceed to the patch selection page, click Next.
Patch Selection
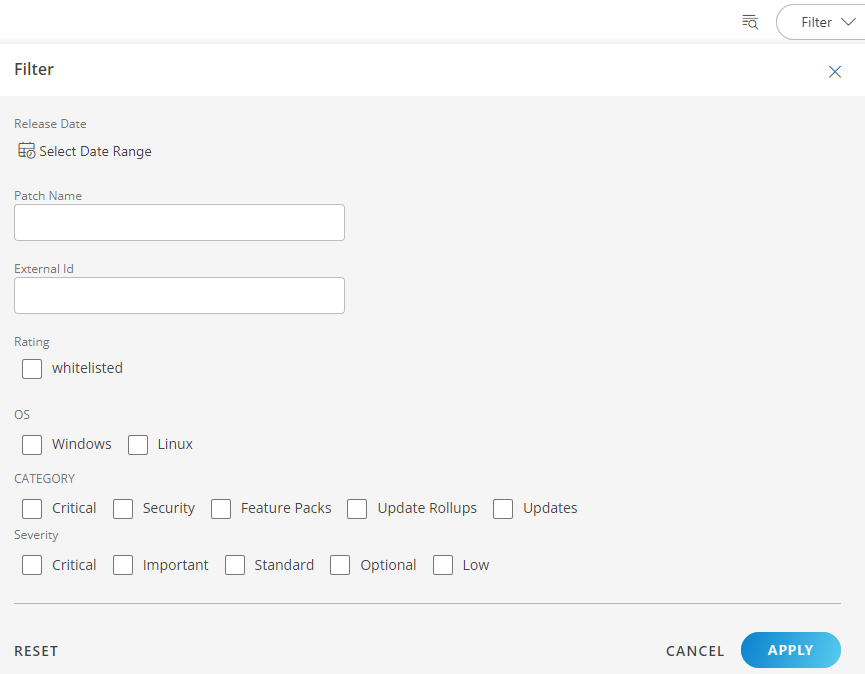
- In the Patch Selection page, select the patches to be configured by using any of the options.
- Approved Patches: Would show the list of Approved Patches
- Dynamic Patches: You can have the Patches selected for the installation Dynamically using the filter criteria. With the next Missing Patch Scan job execution, if there are new patches found as per the filter criteria, those patches would be automatically included for installation under the respective configuration.
- Select Patches: You can select the patched manually from the list or using the Filter criteria
- Once the patch selection process is finished, click Next to proceed to the schedule page.
Schedule
After selecting the resource and patches, you must now define a schedule to run the scan at the desired time.
- On the Schedule section, you could specify when this patch activity should be performed:
- Run On Demand: Select this option, If you want to apply the patch updates right away.
- One Time: Select this option, If you want to apply the patch updates once a time.
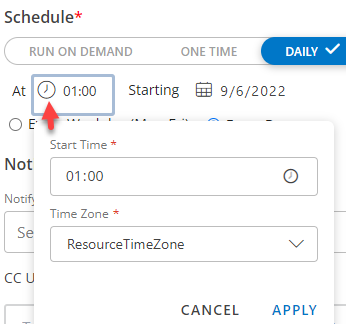
- Daily: Select this option, If you want to apply the patch updates on daily. You can configure this option by choosing: Every Weekday (Mon-Friday) or Every days.
- Weekly: Select this option, If you want to apply the patch updates on weekly wise. Configure weekly schedule by selecting: Time preference, Starting date, and Days.
- Monthly: Select this option if you only want to apply patch updates on a monthly basis. Configure this by selecting: Time preference, Starting date, and number of days in a month.
- Yearly: Select this option, If you want apply the patch updates on yearly once. Choose the option which are the months this should be happened.
- Patch Tuesday: Select this option, If you want apply the patch updates only on Tuesday of every months.
- Resource Time Zone: You can select a specific time zone to patch all the resources in the patch configuration. When you select a time zone, it ignores the different local time zones of resources and instead uses the time zone specified in the patch configuration.
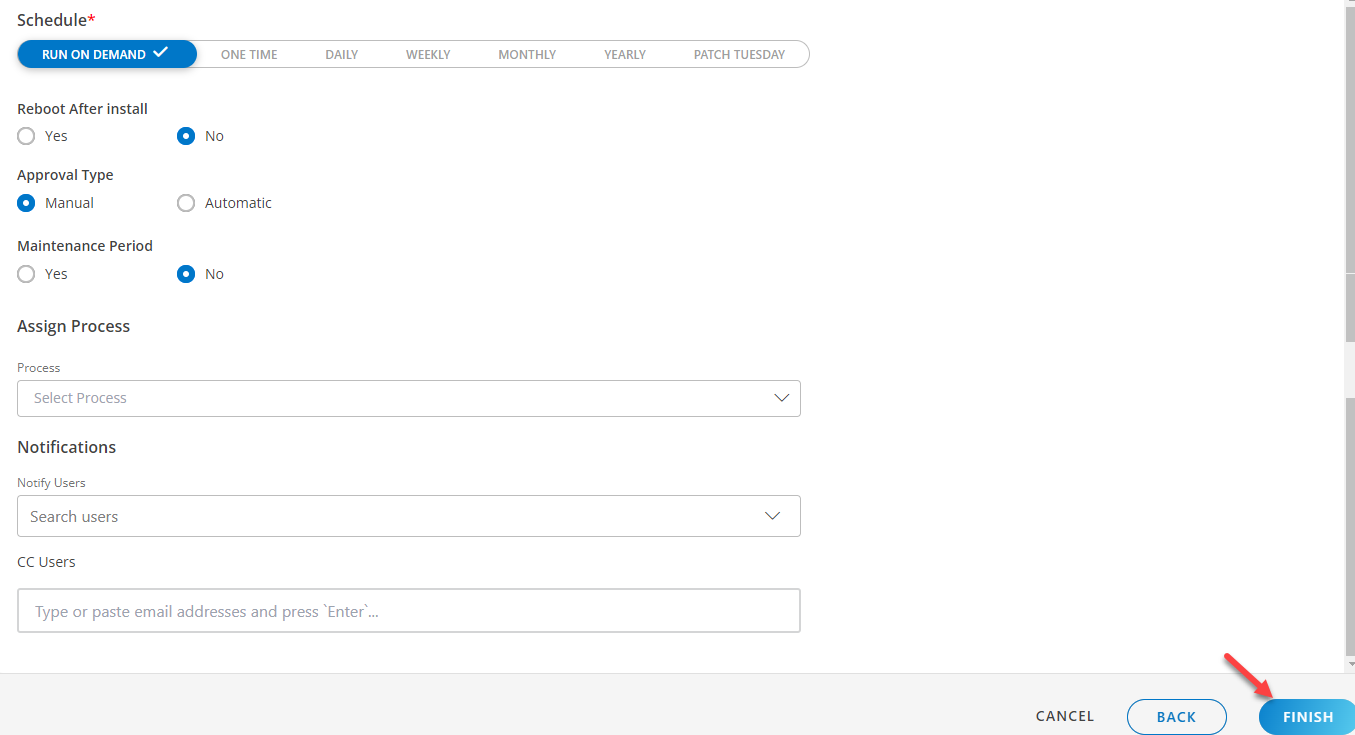
- Reboot After Install: Select the option Yes/No if you want to reboot the system after patch installation.
- Approval Type: Select type of approval of patches whether it will be Manual or Automatic. If you select Automatic type approval; all whitelisted security and critical patches are approved automatically on the selected devices.
- Maintenance Period: This setting creates a maintenance window for all of the selected devices, using the given schedule and duration. To know more about scheduling maintenance period on the resources for other related use cases, see Scheduling Maintenance Period.
- Choose the deployed and enabled Patch Automation Process Definition from the drop down list (if any).
- In the Notifications section, select the users want to be notified about the Patch Installation status. All the platform Users would be listed under “Notify Users”. If the Installation status notifications required to be send to any external email address without having an account on the platform, enter the external email address under “CC Users” and hit enter.
- Click Finish after you configured the scheduled page.
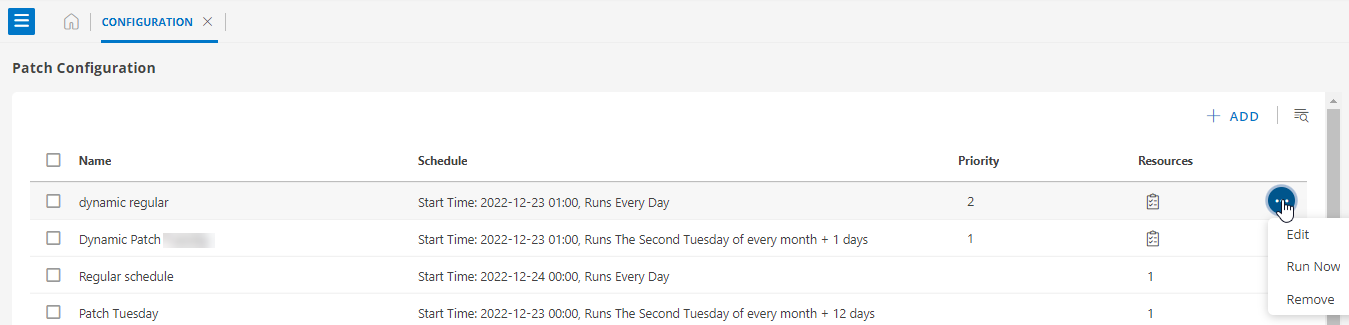
View the Patch Configuration Page
View the list of configured jobs under Patch Management 2.0 > Configuration.
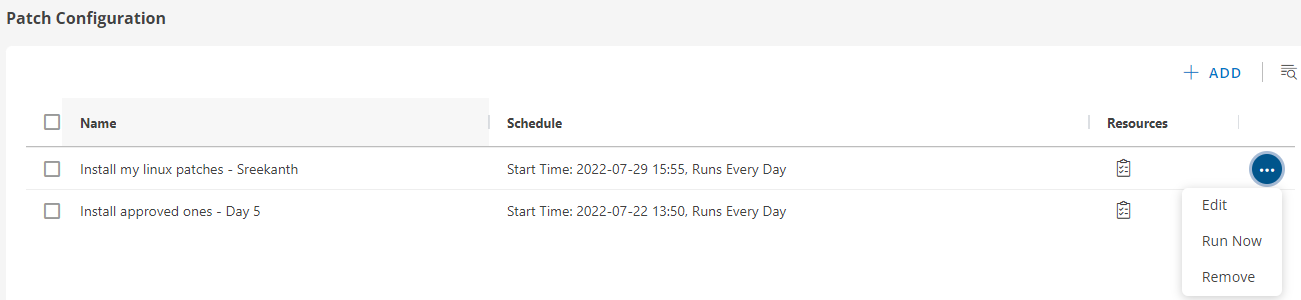
The following table describes the various attributes and actions displayed on the Patch Scan Schedule page:
| Attributes | Description |
|---|---|
| Name | Name of the patch configuration. |
| Schedule | The start date, time, and the selected scheduled configurations. |
| Resources | The number of resources chosen when scheduling a scan job. |
| Search button | Use the search field to find jobs. |
| Edit | Use the edit option to change the current job setup. |
| Run Now | This option allows you to run the job. |
| Remove | Use this option to remove tasks from the list if they are not relevant. |
To see the configuration of the created schedule scan such as: Properties, Resources, and logs, click on the configured jobs listed here.
| Widget | Description | |
|---|---|---|
| Properties | Created By | User who created this patch configuration |
| Updated By | User who updated this patch configuration at last | |
| Created Time | Time when this Configuration was created | |
| Last Updated Time | Time when this Configuration was Last Updated | |
| Operating System | Operating system of the selected Resources | |
| Reboot After Install | Device Reboot options selected after the Patch installation | |
| Approval Type | Type of Approval defined for the Patch Installation | |
| Maintenance Period | The Scheduled Maintenance period defined to ignore the Monitoring alerts generated during Patch Installation | |
| UUID | The unique ID generated for each the Patch Configuration. These UUIDs can be used with OpsQL for any required use cases | |
| Resources | Selected Resources for the Patch Installation Configuration | |
| Logs | Activity Logs of the Patch Configurations | |
| Patches | Selected Patches for the Installation on the selected Devices | |