Introduction
The role-based access control (RBAC) support has been added to the Network Configuration Management (NCM) that permits you to restrict a user according to the user roles and permissions. Using RBAC, you can control which actions an authenticated user is permitted.
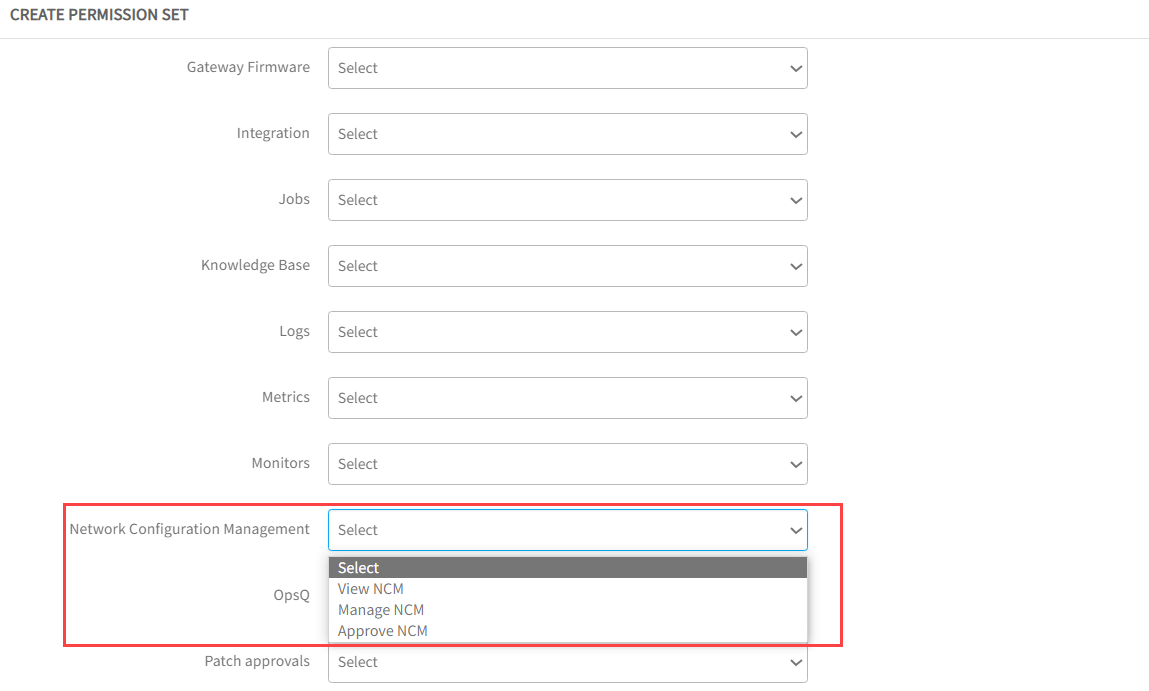
At present, the below permissions have been provided while creating a permission set:
- View NCM
- Manage NCM and
- Approve NCM.
Assign View NCM, Manage NCM, or Approve NCM permissions
This section depicts on how to enable View NCM, Manage NCM, and Approve NCM permissions to a user.
- View NCM: When a user is granted View NCM permission, the user will be able to view the rules, policies, and compliance information on the NCM homepage.
- Manage NCM: When a user is granted Manage NCM permission, the user will be able to view the rules, policies, and compliance information on the NCM homepage. The user can add a new rule or create a new policy and can also add a resource/resource group to the policy.
- Approve NCM: When a user is granted Approve NCM permission, the user will have complete access to the NCM features such as create a new rule or policy. Also, the user can approve the pending tasks from the from NCM homepage.
To grant a permission:
Log in to the OpsRamp portal.
Navigate to Setup > Account > Permission Sets.
Click +Add.You can also edit and modify the existing permission set to select the required permissions. See Create a permission set for more details.
Under Permissions, select View NCM, Manage NCM, or Approve NCM for Network Configuration Management permission type.
For the Devices permission type, you need to select Manage Device from the drop-down list.This will retrieve the available devices while creating a policy.

Click Save.The permission set is created.
Once the permission set is created, you need to map the created permission set to a role.
To create a role:
Navigate to Setup > Account > Roles.
Click +Add.You can also edit and modify the existing role to map the created permission set. See Create a role for more details.
Under the Resource Group Details tab, you need to select All Resources so that the complete list of resources will be displayed while assigning resources in NCM.If you select a specific resource, only those resources will be displayed under assign resource option in NCM.

Under the Assign Credentials tab, you need to select All Credentials. These credentials are required to run a backup configuration job.

Under the Assign Permission Sets tab, you need to select the permission set that you created.

Click Save.The role is now mapped with the created permission set.
To assign a role:
Navigate to Setup > Account > Users.
Click +Add.You can also edit and modify the existing user to map the created role. See Create a user for more details.
Under the Assign Roles tab, you need to select the role created with required permission.

Click Save.The user is now assigned View, Manage, or Approve permissions as enabled.