Overview
Patch management process definitions work with resources and other patch configuration settings already defined in Patch Management to automate some patch management processes.
This tutorial walks you through creating a simple patch management process definition for patching agents. You can then use this process in the Patch Management > Patch Configuration workflow.
The following image shows the simple patch management process definition you create in this tutorial:
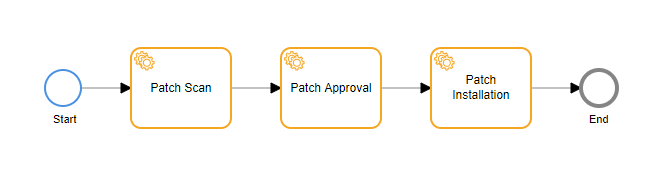
A patch management process allows you to do the following types of patch service tasks:
| Task | Description |
|---|---|
| Run Missing Patches | It will initiate the patch scan in the given resource. |
| Approve patches | Approves patches based on filters. |
| Run Patch Install | Installs the approved patches on the machine. |
| Patch Maintenance | Puts the machine being patched into maintenance mode. When the machine is in maintenance mode, the alerts are sent to the maintenance queue instead of the active alert queue. |
| Run Patch Compliance | Runs a selected patch compliance configuration on the machine to measure patch compliance. The compliance configuration must already exist in the compliance configuration list, Automation > Patch Management > Patch Compliance Configuration. |
| Get Compliance Resource | It will calculate and return the list of compliant resources based on the baseline and compliance name. |
| Search Patches | This will help you to get the desired patches based on the provided filter criteria. |
| Rate Patches | With the help of this task you will be able to rate the patches based on the given criteria. |
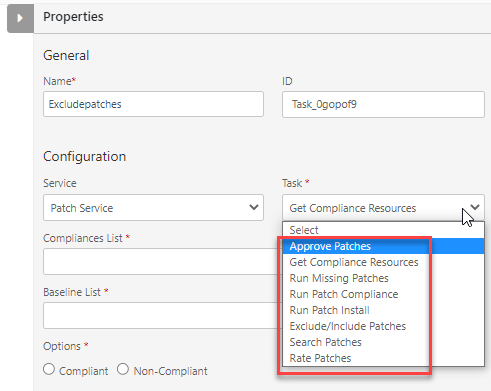
| Exclude/Include Patches | This task will help you in performing patch exclusion/inclusion at the resource level. |
While this tutorial does not include script tasks or platform service tasks, you can add these more advanced tasks to your patch management process definitions.
In the following tutorial, refer to the Process Definition Reference for detailed information about each component type and the properties available for customization.
Prerequisite
Agent: 10.0.0 and above.
Create a New Process for Patch Management
To create a new patch management process definition, follow the below 6 steps:
- Step 1: Define the Process Definition
- Step 2: Define the Start Event
- Step 3: Define the Patch Scan Task
- Step 4: Define the Patch Approval Task
- Step 5: Define the Patch Installation Task
- Step 6: Append the End Event, Save and Deploy
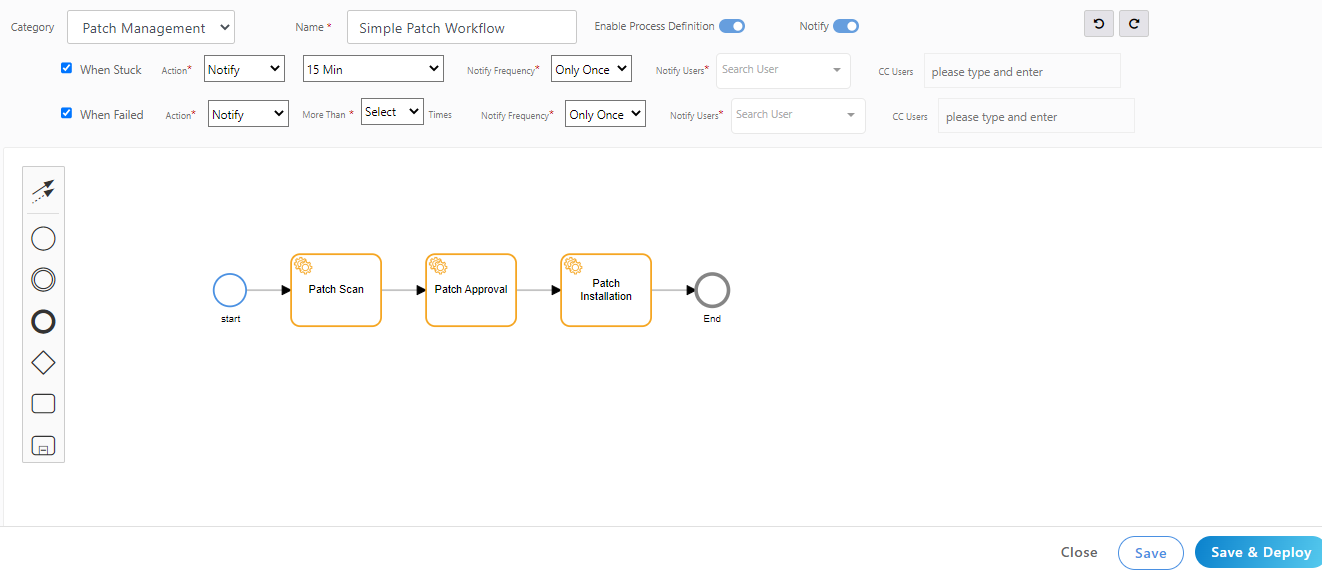
Step 1: Define the Process Definition
In this step, you create a new process definition. Ensure the Remediation and Automation package is enabled for the client.
If not enabled, refer to the “Set up the Process Definition” to know how to enable it.
- Login to OpsRamp portal.
- Navigate to Automation > Process Automation. The Process Definitions home page appers.
- To add a new process definition, click + ADD.
- A new page displays with a canvas and tools for creating a new process visualization.
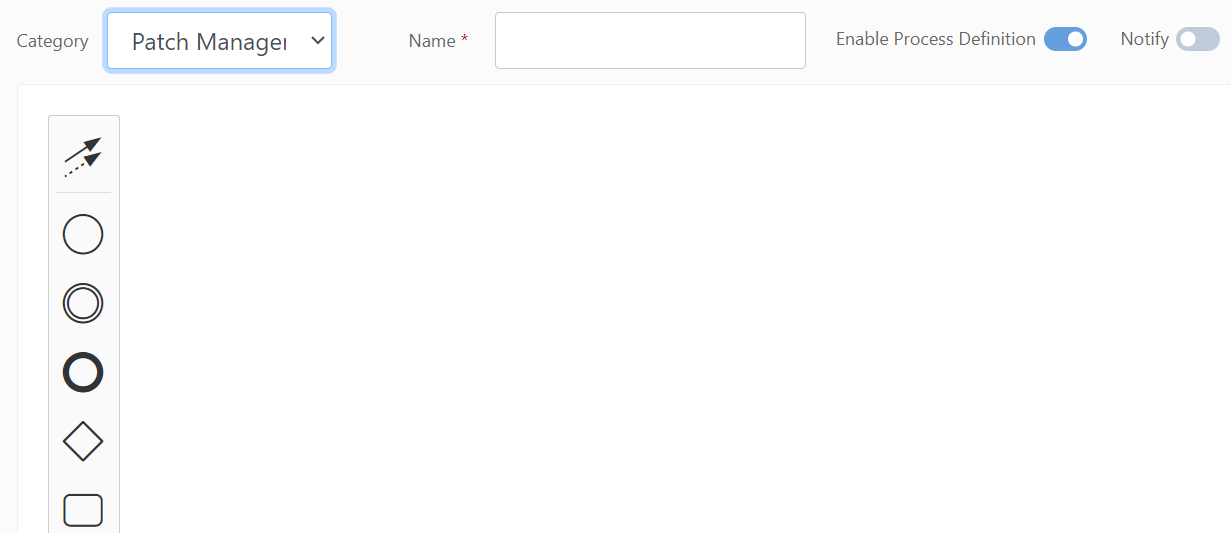
- Select Patch Management in the Category list.
- In the Name. field, enter
Simple Patch Workflowas an example. The name is the process name you select when you use this patch management process definition in the patch management workflow. - Enable the process definition with the Enable Process Definition toggle.
- If you want to get the notifications, enable the Notify toggle and refer here to know how to configure it. This is optional.
Step 2: Define the Start Event
The first step of any process is to define the start condition.
Click the Create StartEvent symbol from the component tools menu, and place it on the canvas with a click.
Click the Start Event symbol to display the start event properties.
In the Properties Name. field, enter
Start. The ID property is automatically populated.For the Input Type select Resource.
You do not need any other start properties because this process is started by the patch management schedule.
When the process definition is used in the patch management workflow, a new process instance is created for each resource, and the process instance receives the resource ID as input.
Step 3: Define the Patch Scan Task
After adding the start event, add tasks to complete the process. The first task is to scan for missing patches.
Click the Start Event, and click Append Task.
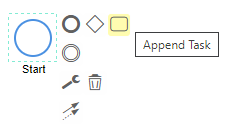
Select the task, click the Change type (wrench) icon and select Service Task.
Click the task on the canvas to display the task properties.
Enter
Patch Scanfor the Name. The name is displayed in the task symbol as you enter it. The task ID is automatically populated.Select Patch Service for the Service.
Select Run Missing Patches for the Task.
The resource field is context sensitive to the objects in the process definition. Enter a value in the Resource ID field in parts, using the following steps:
- Enter a
$, and the name of the start event, displays below the field, select or enterStart. - Enter a period
.after$Startand select or enterresource. - Enter a period
.after$Start.resource, and a list of possible values displays below the field, select or enteruuid.
The value in the Resource ID field should be
$Start.resource.uuid.- Enter a
Step 4: Define the Patch Approval Task
After you scan for missing patches, you decide which patches are approved by filtering the patches on different patch properties.
Click the Patch Scan task, and click Append Task.
Select the task, click the Change type (wrench) icon and select Service Task.
Click the task on the canvas to display the task properties.
Enter
Patch Approvalfor the Name. The task ID is automatically populated.Select Patch Service for the Service.
Select Approve Patches for the Task.
Enter a value in the Resource ID field in parts, using the following steps:
- Enter a
$, and the name of the start event, displays below the field, select or enterStart. - Enter a period
.after$Startand select or enterresource. - Enter a period
.after$Start.resource, and a list of possible values displays below the field, select or enteruuid.
The value in the Resource ID field should be
$Start.resource.uuid.- Enter a
Select the Approval Type: Generic or Emergency.
In the Filter Criteria field enter
patch.name = "update-notifier-common"to include all patches named update-notifier-common.You can add more filters, but for this simple tutorial, one filter will do.
The following table shows patch properties and queries for different filters.
Filter Property and Query Patches based on patch name patch.name = "update-notifier-common" Patches if patch name contains "ABCD" patch.name LIKE "%ABCD%" Patches based on external Id's patch.externalId LIKE '%release-upgrade%' Patches based on severity patch.severity = optional Patches based on category patch.category LIKE "%update%" Patches with rebootRequired flag patch.rebootRequried = false Only windows patches patch.patchType = WINDOWS Only Linux patches patch.patchType = LINUX All missing patches patchStatus = "MISSING" Patches that showed up as missing in the scan in the last 2 hours scanTime < -2h Standard update categories patches patch.serverity = 'standard' AND patch.category LIKE '%update%' Important update categories patches patch.serverity = 'important' AND patch.category LIKE '%update%'
Step 5: Define the Patch Installation Task
After you define which patches is installed, add a task to install the patches.
Click the Patch Approval task, and click Append Task.
Select the task, click the Change type (wrench) icon and select Service Task.
Click the task on the canvas to display the task properties.
Enter
Patch Installationfor the Name. The task ID is automatically populated.Select Patch Service for the Service.
Select Run Patch Install for the Task.
Enter a value in the Resource ID field in parts, using the following steps:
- Enter a
$, and the name of the start event, displays below the field, select or enterStart. - Enter a period
.after$Startand select or enterresource. - Enter a period
.after$Start.resource, and a list of possible values displays below the field, select or enteruuid.
The value in the Resource ID field should be
$Start.resource.uuid.- Enter a
Choose the Installation Type: Generic, Emergency, or Baseline.
Step 6: Append the End Event, Save and Deploy
When you are finished defining the patch management process, add an end event and save and deploy the process definition for use in your patch management schedules.
- Click the Patch Installation task, and click Append EndEvent.
- Click the task on the canvas to display the task properties.
- Enter
Endfor the Name. - Click Save & Deploy. The Simple Patch Workflow displays in the Process Definitions list.
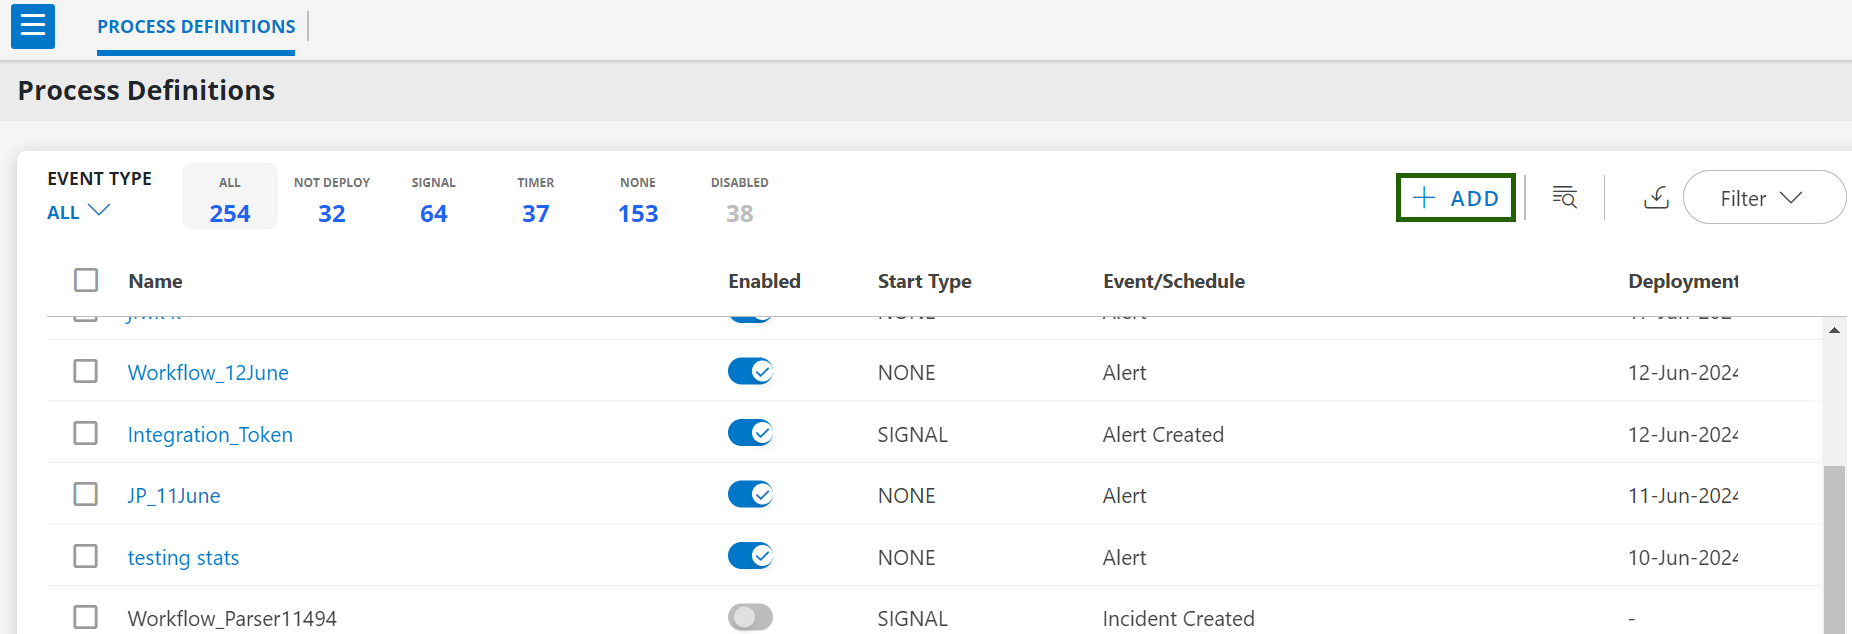
Now, the newly created process has been created and you can view it on the Process Definitions Page.
Next Steps
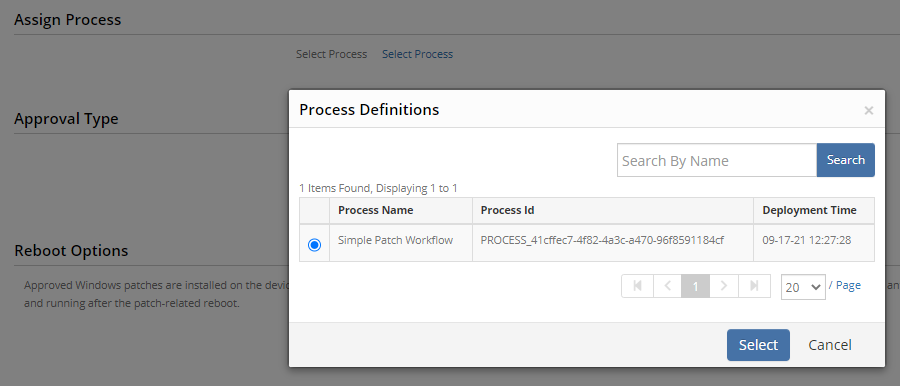
After you create and deploy the Simple Patch Workflow patch management process, you can select the process in patch schedules as shown in the following figure.
See Configure Patch Scan Schedules for information on using a patch management process in a patch management schedule
Refer to the Patch Automation for more information on Patch Process Automation.