Create a Job
This page details the process of creating and scheduling automation jobs within the platform. Follow the steps below to create a job:
- To select your client, click the Client/Partner dropdown at the top-left corner of the My Dashboards screen. Either type your client’s name in the search bar or select your client from the list.
- Navigate to Automation > Jobs. Click + ADD. The Add Job screen is displayed.

- In the Add Job screen, enter the following details:
- General details:
- Name: Enter a name for the job.
- Type: Select the type of job.
Note
The process to create the job and the fields in General Details screen is same for all the job type except Network Configuration Backup.
- Select Resources: Select the resources to assign the job. You can also use search or advance search option to filter the devices from the drop-down menu.
- Schedule for the Job: After selecting the resource, you now define a schedule to run job at the desired time.
- None: Does not apply any scheduling to the job.
- One Time: Apply the job to the resources for one time.
- Daily: Apply the job to the resources daily. Configure daily schedule by selecting: Time preference and Starting date.
- Weekly: Apply the job to the resources on a weekly basis. Configure weekly schedule by selecting: Time preference, Starting date, and Days.
- Monthly: Apply the job to the resources monthly wise. Configure this by selecting: Time preference, Starting date, and number of days in a month.
- General details:
- Queue Job: If you enable this, the agent will execute the job as scheduled or run at the next available opportunity and return a response.
- After configuration, click ADD JOBS.
A job is now created, scheduled and applied to selected resources. You can view the list of resources added to the job.
Info
The configuration is the same for all job types, except that Network Configuration Backup jobs include a few additional fields, which are described below.Network Configuration Backup Job
You can create a Network Configuration Backup job to configure network backups to safeguard data and ensure disaster recovery.
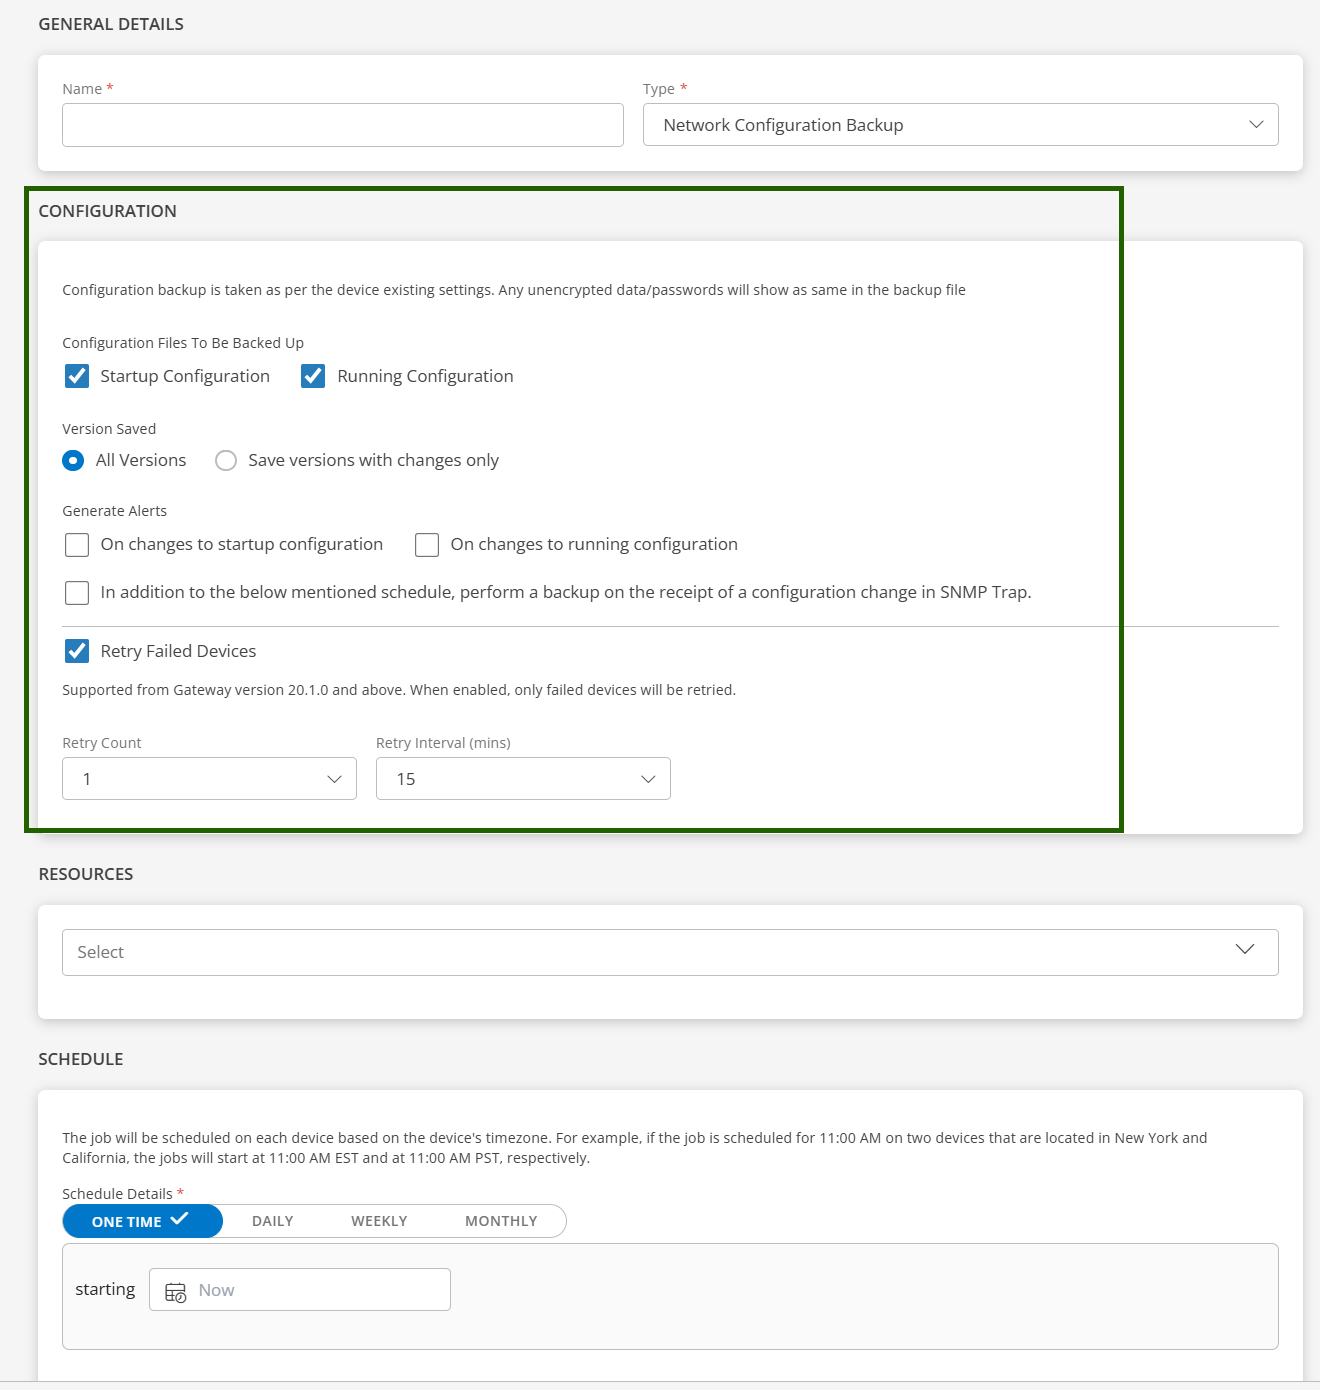
The following table details the configuration fields required to create a Network Configuration Backup job.
| Field | Description |
|---|---|
| Configuration Files To Be Backed Up | Options are: Startup Configuration - Startup configuration files are used during system startup to configure the software. Running Configuration - Running configuration files contain the current configuration of the software, which can be altered temporarily without affecting the saved configuration that will be loaded upon the next system restart. |
| Version Saved | Options are: All Versions - Saves each configuration snapshot. Save versions with changes only - Saves only configuration snapshots with changes. |
| Generate Alerts | Generate configuration alerts. Options are: On changes to startup configuration On changes to running configuration | Select the checkbox to configure backup trigger for a configuration change in SNMP Trap.
| Retry Failed Devices | Automatically retries backup for devices that fail during the process. You can configure the number of retry attempts and the interval between retries. Alerts are raised only after all configured attempts are completed, and only for devices that still fail after the final retry. Supported Values: - Retry Count: 1, 2 - Retry Interval: 15, 30, 60 minutes NoteThis feature is supported from Gateway version 20.1.0 and above. |