Important Note
The old UI and its associated documentation are valid until the 2024.08.U1 release. The new UI and its related documentation will apply starting from the 2024.09.U1 release, see (New UI Document).The synthetic onboard wizard is used to create synthetic resources as well as monitoring data. This only applies to automonitoring clients.
Setup the onboarding wizard
Follow the steps below to setup the onboarding wizard:
- Login to the OpsRamp application with your credentials.
- Go to Setup > Accounts > Clients. Click on Automonitoring Client.
- In the client details page, click on the Onboarding Wizard icon.
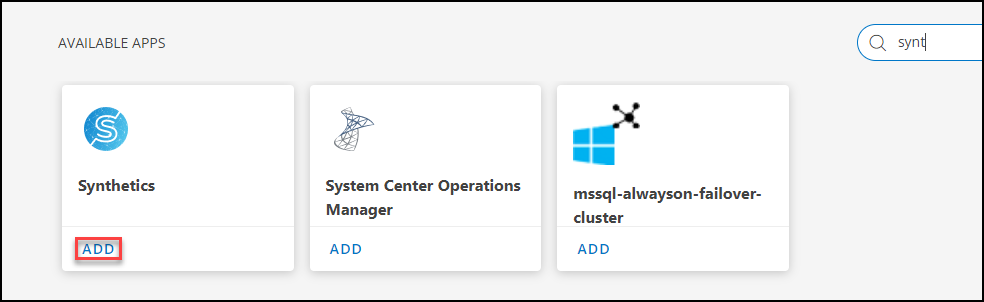
- Click + ADD and search for Synthetic app from the list of integrations.
- Click the ADD button from the Synthetics app to setup the configuration.
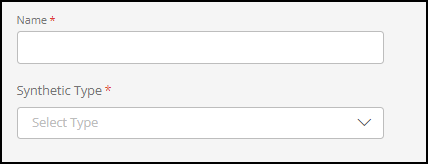
- Add the Name and select the Synthetic Type from the drop down list.
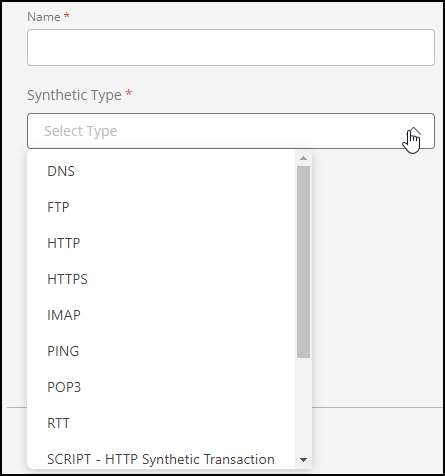
To set up your onboarding wizard, there are 13 different types of automonitoring synthetics available.
| Synthetic Type | Description |
|---|---|
| DNS | Track the time taken to resolve the DNS query. |
| FTP | Monitor FTP server |
| HTTP/HTTPS | Graph response time for your website over time. Drill down on recent outages and verify what is causing the performance degradation. |
| PING | Track response time and packet loss for an entire application. |
| POP3/IMAP/SMTP | Monitor email delivery rates. |
| RTT | Monitor the time taken for the email to drive from the SMTP server to IMAP or POP3 server. |
| SCRIPT-HTTP Synthetic Transaction | Monitor user experience, performance and availability issues during any website transaction running on a web browser. |
| SSL | Replace SSL certificates before the expiration date. |
| TCP/UDP | Monitor the response time taken to connect to a port of TCP/UDP server. |
Example to create DNS automonitoring resources
Complete the resource onboarding flow by following these three steps. Each stage is described in detail below;

Configure
- In the Configure page, add the Name of the resource and select the synthetic type as DNS from the list.
- Click Next to configure the DNS synthetic monitor.
The value entered in the Name field must be unique. If the name is not unique, the screen displays an error message: Name Already Exists.
Setup
- From the Setup page, provide details for the following parameters.
- URL: URL of your host.
- Server Name: Name of the server.
- Expected Server: Name of the expected server.
- Click Next.

Settings
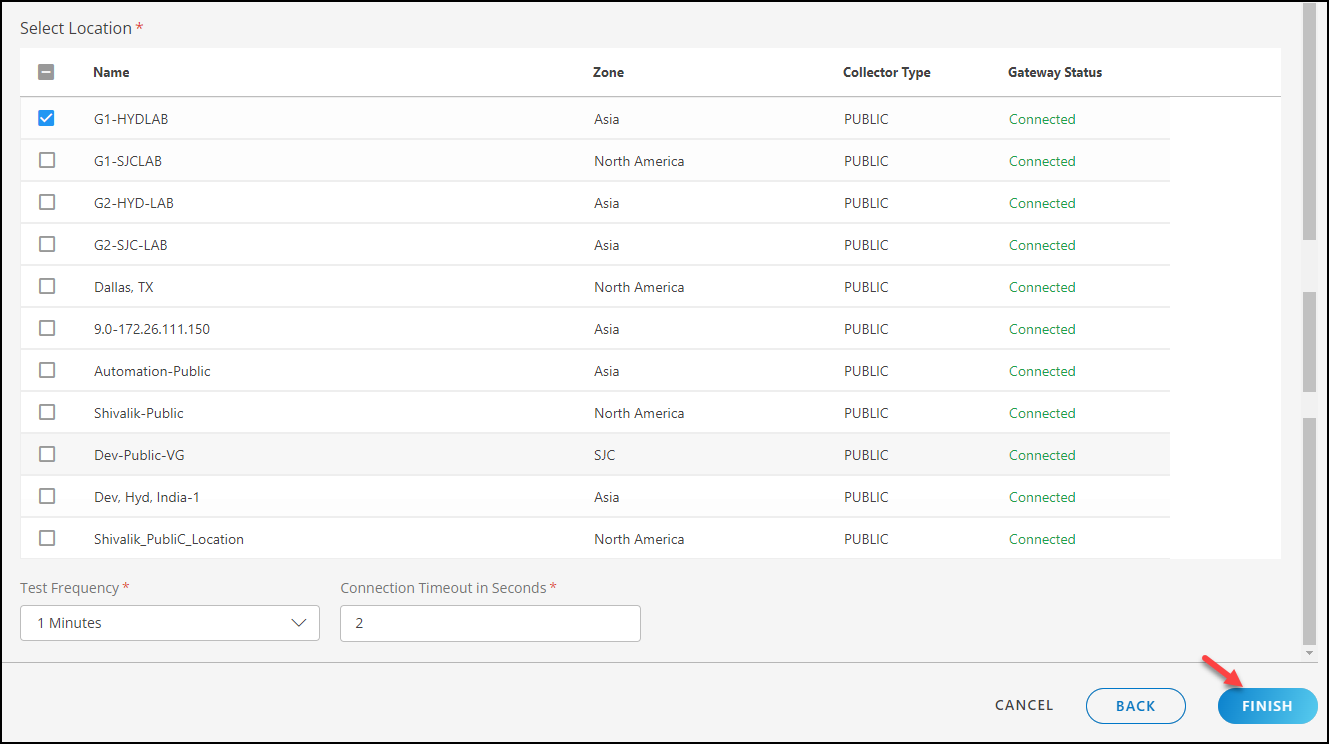
- From the Setting page, do the below configurations:
- Select the Location from the list.
- Select the Test Frequency of monitoring from the drop down list.
- Select the Connection Timeout in Seconds.
- Click on Finish button.
Navigate to Infrastructure > Resource > Synthetics, the Synthetics page displays the configured synthetic monitor resources.
Example to create FTP automonitoring resource
Complete the resource onboarding flow by following these three steps. Each stage is described in detail below;
Configure
- In the Configure page, add the Name of the resource and select the synthetic type as FTP from the list.
- Click Next to configure the DNS synthetic monitor.
The value entered in the Name field must be unique. If the name is not unique, the screen displays an error message: Name Already Exists.
Setup
In the Setup page, add the following details:
- Provide details in below properties fields.
- URL: URL of your host.
- Port: Select the Port values from the list
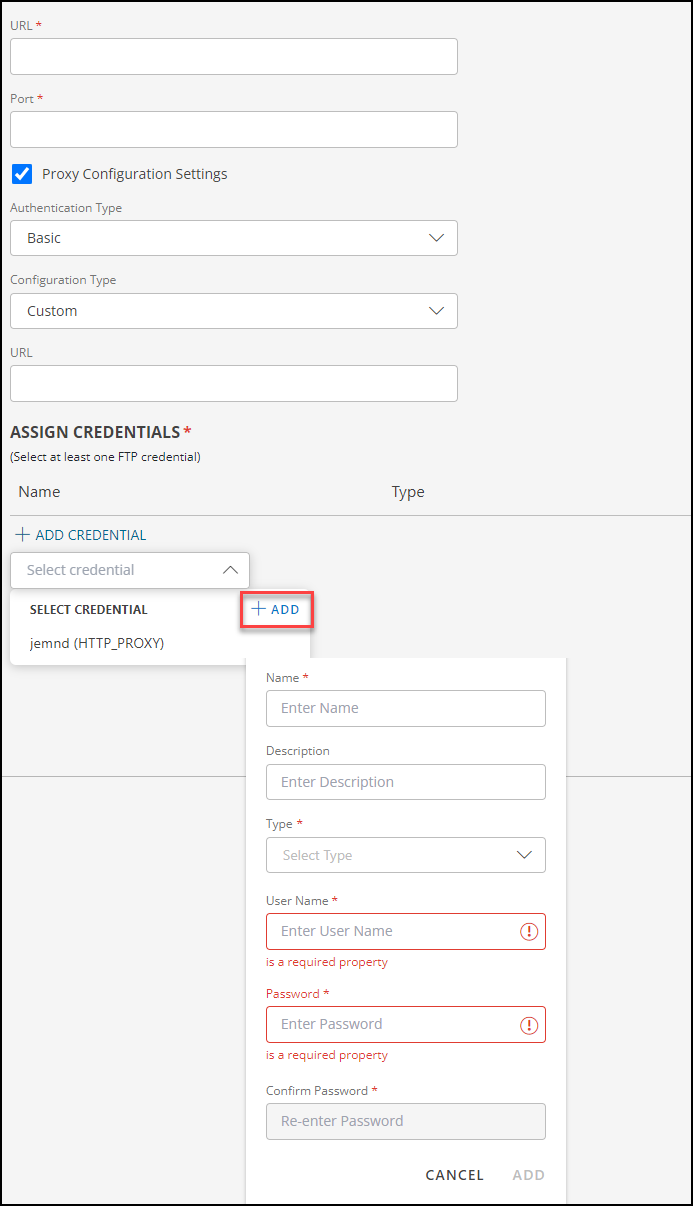
- Proxy Configuration Settings: If you want to do the proxy configuration, click on Proxy Configuration Settings and enter the details in below properties fields:
- Authentication Type: Select the Proxy Server Authentication type from the list
- Configuration Type: Select the Proxy Server Configuration type from the list
- URL: Proxy Server URL (eg:http://hostname:port or https://hostname:port)
- In the ASSIGN CREDENTIALS section, select at least one FTP credential.
- Click on +ADD CREDENTIAL and then click +ADD button to add the new credentials details as below.
- Name: Enter the required name.
- Description: Enter the required description.
- Type: Select the type credential.
- User Name: Enter the username.
- Password: Enter the password.
- Confirm Password: Enter the re-enter password.
- Click ADD.
- Finally, click Next to move for the Setting page.
Settings
- From the Setting page, do the below configurations:
- Select the Location from the list.
- Select the Test Frequency of monitoring from the drop down list.
- Select the Connection Timeout in Seconds.
- Click on Finish button.
Navigate to Infrastructure > Resource > Synthetics, the Synthetics page displays the configured synthetic monitor resources.
Note
The process for creating auto-monitoring resources for other types of synthetics will be similar to that described above.View the created automonitoring resource
- Navigate to Infrastructure > Resource > Synthetics.
- Select the successfully created synthetics from the list to get the response time graph based on the selected frequency.
- Click on Name of resource to get all the details.
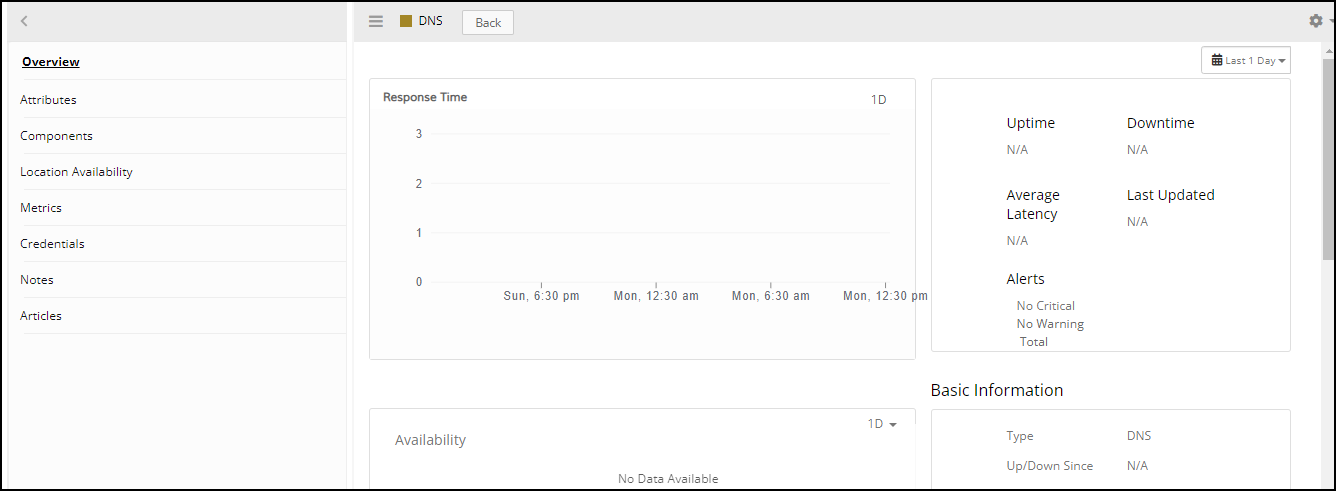
- From the Overview page, you will have the below informations:
- Response time graph
- Availability Log: Displays the synthetic’s availability in the availability bar.
- Recent Log: Each data point will be recorded here in accordance with the frequency. The graph will display the same data points.
- A widget which will show the Uptime in percentage, Down Time in hours, Average Latency in milli seconds, and Last Updated times respectively.
- Basic Information: Displays the information like- Type of the synthetic, UP/Down since, Response time, URL which was configured, Alert Policy, Locations, and service configured.
- From the Attributes page, you will have the below informations:
- Basic Information: Resource Name, URL, type of resource, Resource UUID, Resource type etc.
- Custom Attributes
- Assigned SKUs
- External Resource IDs
- The Location Availability page, displays the location-specific availability, including start and end times and durations based on availability.
- From the Notes section, see the list of notes. Click on +ADD to add and remove the notes for the synthetic.
- From the Articles section, click on +ADD which is used to add the KB articles for the synthetic and in the same way you can remove the articles by clicking the modify link.