A First Response policy is used to auto-suppress alerts and to trigger process automation as a first response for non-significant alerts.
Prerequisites
You must have OpsQ View, OpsQ Manage, and also require process automation permissions to manage first response policies.
A training file is required to suppress or snooze specific alerts. The training file includes examples of alerts to be suppressed. See Alert Management Training File for more information.
Step 1: Policy name, scope, and mode
Define the policy name, scope, and mode.
Go to Setup > Alerts > First Response.
Select a client.
Click Create New or + Add, depending on whether you have any existing policies.
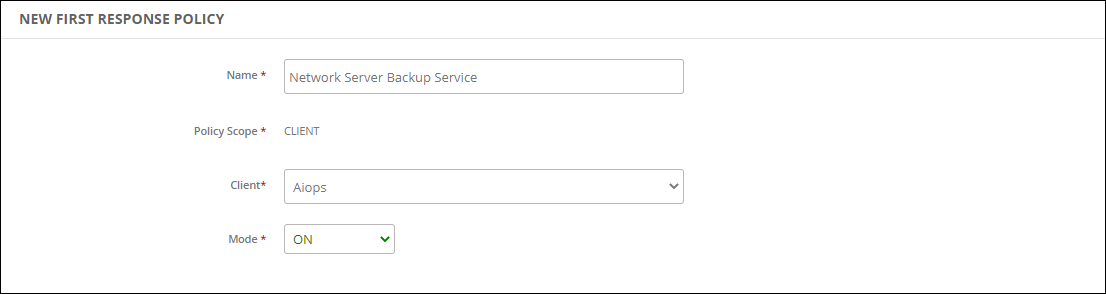
Enter a Name for the policy.
Ensure the Policy Scope is CLIENT.
Ensure you have the correct Client selected.
From the Mode list, select a policy mode.
Policy Mode Description ON The policy drives automated actions on alerts. OFF The policy is inactive and does not affect alerts. You can use this mode to review a newly defined policy before choosing one of the other modes. Recommend The policy creates a recommendation for actions that you should take on the alert. Recommendations are based on learned patterns in historical alerts. The recommendation includes a link to take the action. Observed This mode permits you to simulate a policy without affecting alerts.
The policy creates an observed alert, which simulates the original alert. The observed alert shows the actions that would be taken on the original alert if the policy were inOnmode. The observed alert includes a link to the original alert.Recommend and Observed modes apply to incident actions.
Step 2: Filter criteria
Select the filter criteria for the alerts.
Select Filter Criteria.

Choose from Any or All of the defined conditions to apply a filter for the alerts.
Select the attribute type to narrow the attribute list to one of the following types:
- Native Attributes: Select from the list of native attributes.
- Resource Custom Attributes: Select from the list of custom, user-defined attributes.
- Alert Custom Attributes: Select from the list of alert custom user-defined attributes.Note:
- The Alert Custom Attributes are shown if they are available to the selected client.
- As of now, this feature is enabled to client scope policies only. This means, the Alert Custom Attributes option is not displayed for the policy assigned to All-Clients.
Select the required attribute, logical operator, and enter the value.
Not Contains: Filters only the alerts that do not contain the input string provided in the field.
Not Equals: Filters only the alerts that are not equal to the input provided in the field.
Not Contains/Not Equals: If the selected property is not there in the alert, it is considered as matched.
Example: Property value is “ABC”.
Resource “A” belongs to two resource groups - ABCDEF AND XYZ. In this case, there is No Match.
Resource “B” belongs to resource group - PQRS. There is Match.
Resource “C” belongs to no resource group. There is Match.Click + to add multiple filter conditions.
Suppress Alerts by Time
An additional Roster custom attribute has been added to help in executing actions that are mentioned in the policy definition (either suppress, snooze or run a process automation) only when Roaster is Active or Inactive.
The Roster filter condition is supported for both Partner and Client level policies. Hence for client level First Response policy, you can only add client specific rosters. And for partner level First Response policy, you can only add partner specific rosters.
To select the Roster custom attribute:
- Select Filter Criteria.
- Select Roster from the Native Attributes drop-down.

- Select Active or Inactive.
- Click Save. The alerts, which occur during the specific date and time configured in the selected roster, will be suppressed.
Step 3: Policy definition
The continuous learning option is only available for client-level policies. To apply first-response actions using machine-learning, ensure Continuous Learning is enabled by default to suppress alerts using historical data. If you do not want machine-learning suppression, disable the toggle button.
Note that if the alert payload has a source time that is older than the suppression time, the First Response recommendation or suppression is not applied.
Alert pattern actions
Train the system to suppress alerts that have a common pattern:
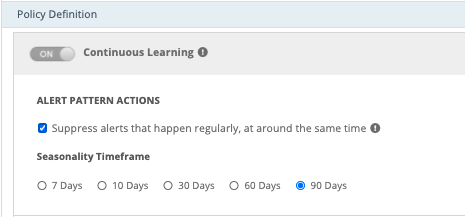
- Select Suppress alerts that happen regularly, at around the same time to suppress alerts that happen regularly at around the same time.
- Specify the Seasonality Timeframe.
- Click Save.
Alert attribute actions
Assign the first-response actions or train the system to apply the selected first-response actions on the alerts with specific characteristics:
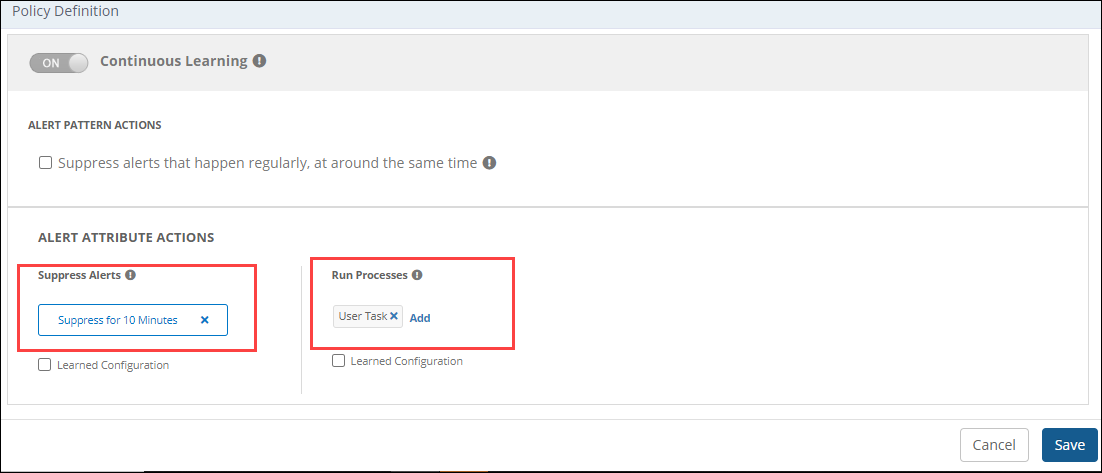
- Suppress Alerts: To manually suppress alerts, from the Suppress Alerts drop-down, select the required suppress action, and click Save.
- Run Processes: To manually add a process definition, from the Run Processes section, click Add, select the required process definition and click Save.
- Learned Configuration: To train the system to run first-response actions on the alerts. This option applies to both the Suppress Alerts and Run Processes options.
Use a training file or machine learning
Use a training file for machine learning.
Select Learned Configuration.
To add a training file, click Drop the training data file here, or browse to upload a training file.
One client can upload only one training file. Changing the training file affects all the learned policies of the client.
Select the file from your local folder. When the file is loaded, Input and Output columns are displayed.
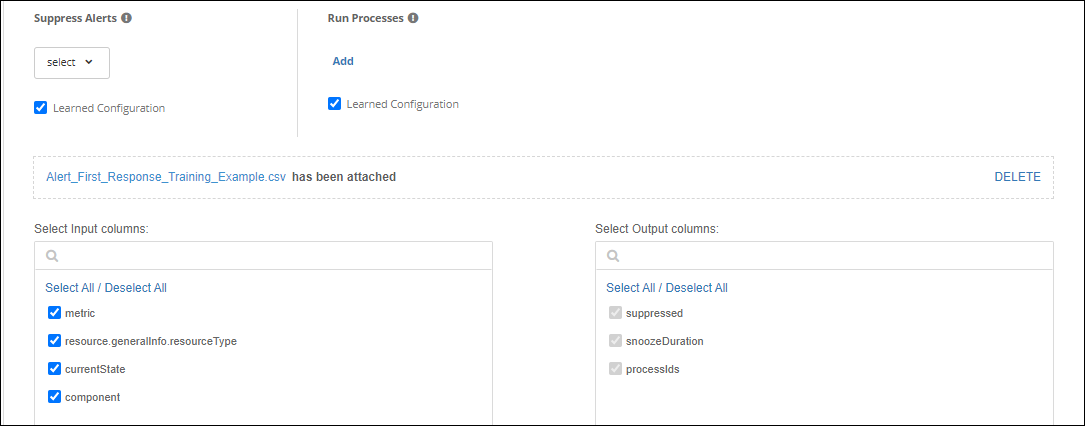
Verify the Input and Output columns.
If you want to make changes to the Input and Output columns, click Edit and modify the values provided in the training file.

- Once you modify the values in Input and Output columns, click Save CSV to save the modified data.
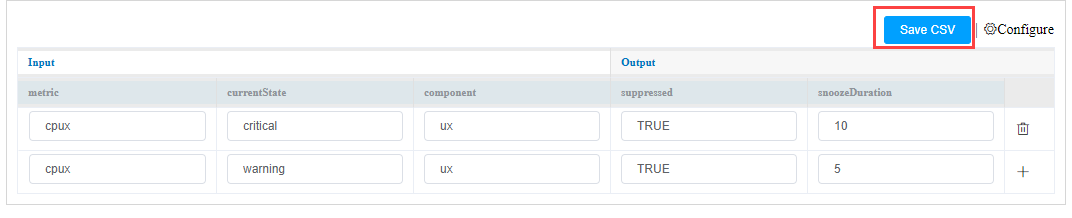
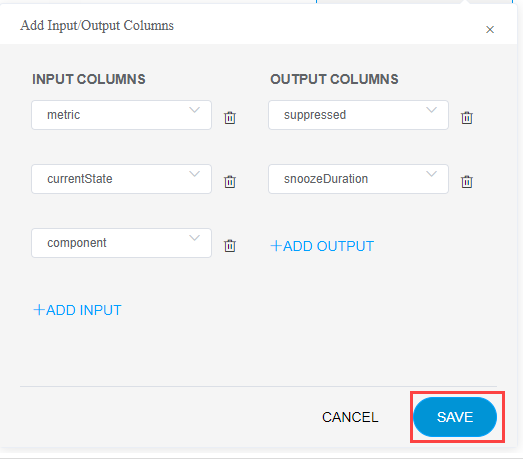
- Click Configure to create a new CSV file.

- You can add new Input and Output columns with the values in the Add Input/Output Columns page.
- Click Save once you added the data to save the new training file.
- Once the Input and Output columns is confirmed, click Continue to Model Training.
- Click Train Model. The accuracy of the trained first-response policy is displayed in the Summary section.
- Click Review.
- Click Save.
The first response policy is created and displays on the First Response Policies page. Click the Number of suppressions to view detailed information.
Training file Requirements
The training file should meet the following requirements:
- All column names must match the names displayed in the UI section of the portal.
- Each column value is case-sensitive and should contain only the values displayed in our portal (for example, names, group names, resource names, and other values).
- Validate any regular expressions used in column values before uploading.
- Do not provide multiple empty values.
- The file must be uploaded in CSV format.