Learning-based alert escalation is a method that automatically routes incidents to appropriate groups, priorities, or categories. The model requires a training file (in CSV format) that includes example incident assignments for different types of alerts.
Machine-learning is applied to learn patterns from the input training file and uses the learned pattern to drive learning-based alert escalation. The learned models are applied against the incoming alerts.
Configuring alert escalation is a manual configuration that requires incident information like incident assignee name, category, and priority as required fields.
Permissions
Following permission required to to access Alert Escalation ML policies:
| Category | Permission Type | Permission Value |
|---|---|---|
| Alerts | OpsQ | View/Manage |
Follow these steps to enable the above permission set:
- Navigate to Setup > Account > Users and Permissions.
- Click the Permissions Sets tab.
- Click + ADD. The Add Permission page is displayed.
- Under Permission Set Details screen, enter a Permission Set Name and short Description.
- Select the above mentioned permissions and click Save.
Refer to the Permission Sets document for more details on obtaining the necessary permissions.
Prerequisites
Before defining rules to escalate alerts as an incident, configure the name, scope, and resources for the alert escalation policy.
Step 1: Define name and scope
In this step, define the name, mode, and partner or client for the escalation policy.
Ensure the partner you want to create an alert escalation policy is selected in the Partner list (upper-left corner).
Go to Setup > Alerts > Alert Escalation.
Click Create New or + Add, depending on whether you have any existing policies.
Enter the Alert Escalation Name and Description.
You can set the Precedence for the alert escalation policies. Enter a value in the Precedence field.
Note:
This is an optional field and accepts only integer value.
This value determines the order in which to handle alert escalation policies according to the alert precedence value. When an alert matches more than one policy, the policies that have precedence will be executed first.
Also, if multiple policies have the same precedence value, the policies that are created first will be executed. This allows users to streamline alert management and ensure critical actions or notifications are prioritized.
From the Mode list, select a policy mode.
Policy Mode Description ON The policy drives automated actions on alerts. OFF The policy is inactive and does not affect alerts. You can use this mode to review a newly defined policy before choosing one of the other modes. Recommend The policy creates a recommendation for actions that you should take on the alert. Recommendations are based on learned patterns in historical alerts. The recommendation includes a link to take the action. Observed This mode permits you to simulate a policy without affecting alerts.
The policy creates an observed alert, which simulates the original alert. The observed alert shows the actions that would be taken on the original alert if the policy were inOnmode. The observed alert includes a link to the original alert.Recommend and Observed modes apply to incident actions. Select a client from the Select a Client list.
If you are creating a learning-based escalation policy you must select a client because learning-based escalation policies are client-based policies.
Click Next: Select Resources.
Step 2: Select Resources
In this step, select resources for the client.
Select resources for the escalation policy.
Add up to 100 resources.
Click Next: Define Alert and Resource Conditions.
Step 3: Define alert and resource conditions
Filter the type of alerts which occur on the selected resources. If no conditions are defined in this section, all alerts on the selected resources will match this policy.
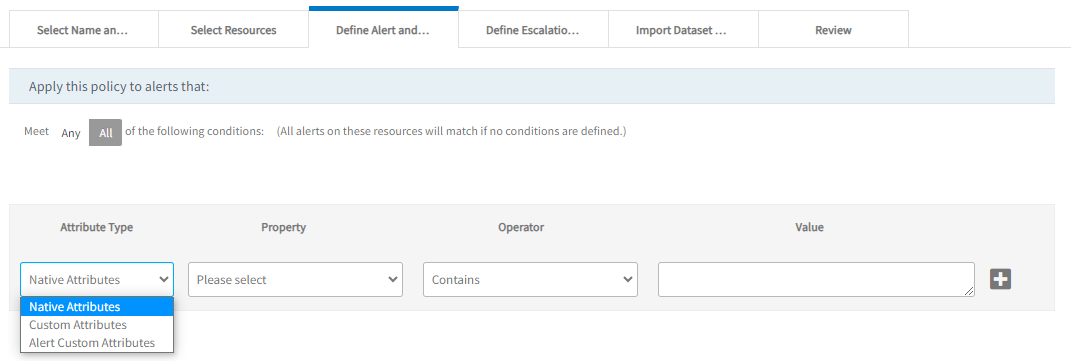
Choose from Any or All of the following conditions to apply a filter for the alerts.
Select the attribute type to narrow the attribute list to one of the following types:
- Native Attributes: Select from the list of native attributes.
- Resource Custom Attributes: Select from the list of custom, user-defined attributes.
- Alert Custom Attributes: Select from the list of alert custom user-defined attributes.Note:
- The Alert Custom Attributes are shown if they are available to the selected client.
- As of now, this feature is enabled to client scope policies only. This means, the Alert Custom Attributes option is not displayed for the policy assigned to All-Clients.
- Select the required attribute, logical operator, and enter the value. Click + to add multiple filter conditions.
- Click Next: Define Escalation Rules.
The alert property Client: Service Name is applicable only to the partner scope policy. As an example, to escalate alerts of a service named Windows Maintenance Support, add the condition Client: Service Name:
Not Contains: Filters only the alerts that do not contain the input string provided in the field.
Not Equals: Filters only the alerts that are not equal to the input provided in the field.
Not Contains/Not Equals: If the selected property is not there in the alert, it is considered as matched.
Example: Property value is “ABC”.
Resource “A” belongs to two resource groups - ABCDEF AND XYZ. In this case, there is No Match.
Resource “B” belongs to resource group - PQRS. There is Match.
Resource “C” belongs to no resource group. There is Match.
Step 4: Define escalation rules
In this step, the escalation rules define the escalation as an incident.
Select one of the following options:
- Escalate alert automatically until Acknowledged, Closed, Suppressed, or Ticketed
- Escalate alert automatically until Acknowledged, Closed, or Suppressed
In the Escalate as list, select Incident.
Enable Continuous Learning with the toggle for machine learning to continuously learn patterns from alert data.
- If continuous learning is enabled, machine learning models are continuously retrained on a weekly basis and are based on recent alert data (past three-month alert data).
- The continuous learning complements user-provided training data, using training files. Patterns learned from user-provided training data and continuous learning are both incorporated into auto incident creation actions.
- In the combined data set (recent alert data and user-provided training data), the user-provided training data is considered first followed by recent alert data.
Specify the options For New Incident:

- Select Modify to change the incident Subject or Description.
- Enable machine-learning for attributes with the Learned configuration toggle to learn patterns from the training file.
Machine-Learning can be applied to the following attributes:
- Assignee GroupNote:
- You can assign a Roster to an assignee group in the escalation policy. While creating a new ticket based on the shift defined in the roster, the corresponding assignee group will be assigned to the Incident.
- The machine learning uses the Unique Identification value mentioned against the Roster in the CSV file for assigning the incident to the corresponding assignee group.
- Category
- Sub-Category
- Business Impact
- Urgency
- Priority
- Notify Roster
- Cc
- Assignee GroupNote:
Specify the options For Created Incident:

- Enable Update Incident with the toggle to update the incident as the alert changes.
- Select one of the following options:
- Update incident with the latest alert description when alert state changes
- Update incident with every repeat alert’s description.
- Resolve incident when alert heals
- Select Update incident priority and you can either select any of the below options:
Update priority by ML ConfigurationNote: Enabling the Learner Configuration for Business Impact, Urgency, and Priority allows for dynamic adjustments in incident priorities. If there is a change in the alert state linked to it, the Business Impact, Urgency, and Priority of the incident will also be modified. This update is done as per the values specified in the training file, ensuring that incident prioritization remains aligned with predefined criteria set by ML.
Update priority by these rules
- Configure the notifications.
Click Import a Dataset and Train Model.
Step 5: Import datasets and apply a training model
Upload a training file. Only one training file can be uploaded per client.
See Alert Management Training File for more information.
- You can also create multiple alert escalation policies by filtering specific alert and resource attributes in the Resources and Alert Condition tabs, but the machine-learning model is just one that simplifies the alert escalation configuration.
- Changing the training file affects all learned policies of the client.
- If a change is made to the training file, you must delete the existing file and upload it again.
- Alerts that are already escalated are NOT impacted by the changes.
To import the dataset and apply the training model:
- Click Drop the training data file here or browse to upload the training file.
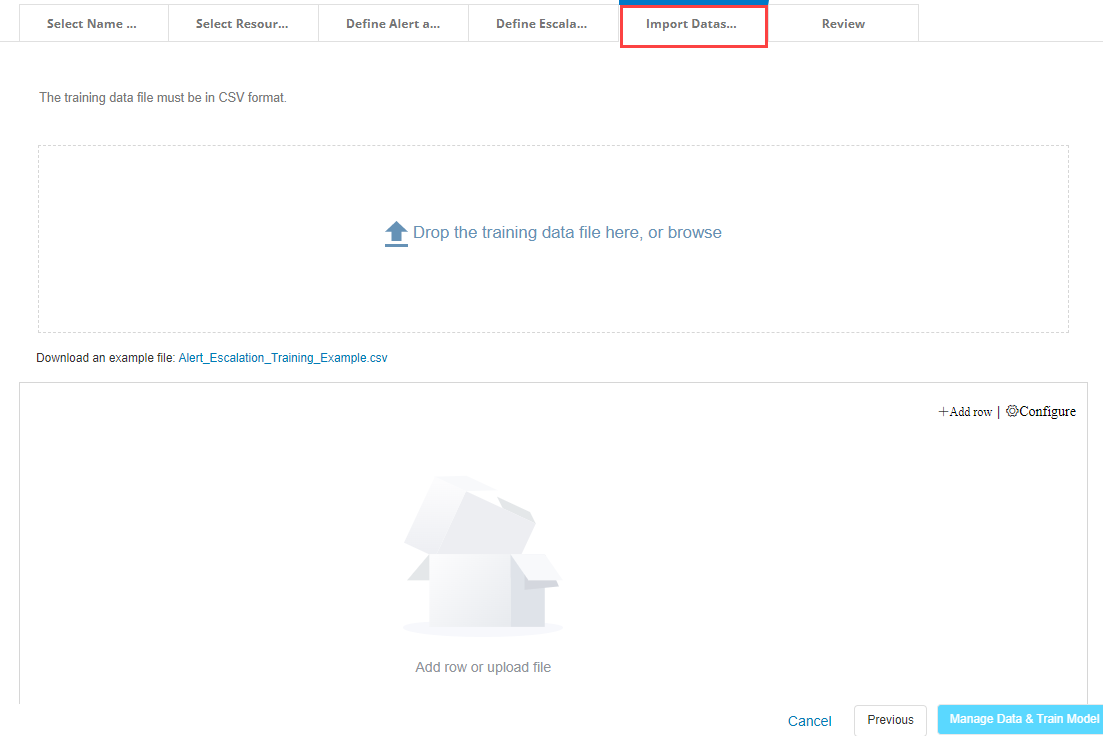
Select the file from your local folder. After uploading the file, click Manage Data and Train Model.
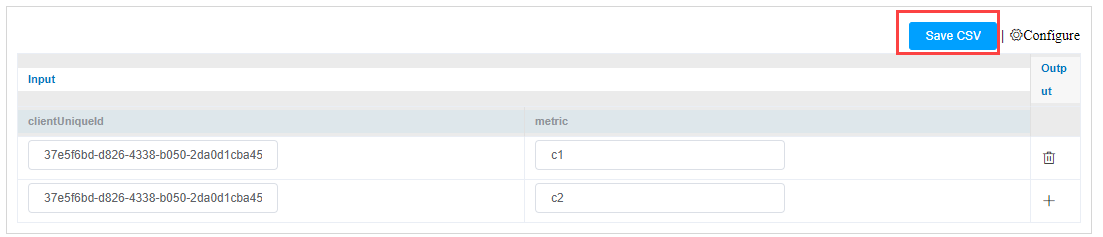
Select the Input and Output Columns for Model training.
- Input columns are the columns specified in the training file.
- Output columns are the learned configurations on which machine learning is enabled.
If you want to make changes to the Input and Output columns, click Edit and modify the values provided in the training file.

- Once you modify the values in Input and Output columns, click Save CSV to save the modified data.
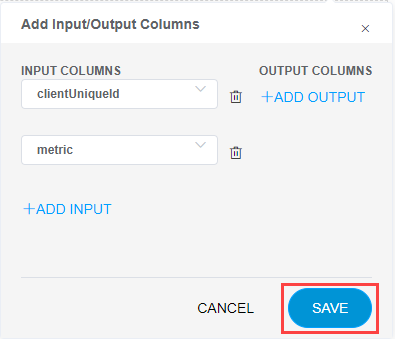
- Click Configure to create a new CSV file.

- You can add new Input and Output columns with the values in the Add Input/Output Columns page.
- Click Save once you add the data to save the new training file.
- Once the Input and Output columns are confirmed, click Continue to Model Training. The accuracy of the trained alert escalation model is displayed in the Summary section.
- Click Manage Data & Train Model.
- Click Review.
Training file Requirements
The training file should meet the following requirements:
- All column names must match the names displayed in the UI section of the portal.
- Each column value is case-sensitive and should contain only the values displayed in our portal (for example, names, group names, resource names, and other values).
- Validate any regular expressions used in column values before uploading.
- Do not provide multiple empty values.
- The file must be uploaded in CSV format.
Step 6: Review
Review and save the alert escalation policy.
- Click Review. A summary of all sections of the escalate alert policy is available for review and editing.
- Click Edit to edit any sections.
- Click Save.
View alert escalation policies
The alert escalation policy is created and is displayed on the Alert Escalation Policies page. ML indicates that policy is based on a machine-learning algorithm rather than a user-defined model.
- If the ML icon is blue: Accuracy of trained alert escalation model is above 80% and the policy is used for alert escalation.
- If the ML icon is red: Accuracy of trained alert escalation model is below 80%.
- If the accuracy is below 80%, the policy is temporarily disabled until the accuracy of the model moves above 80% after the next training.
- If a modal accuracy is low, an Incident is created using the default values mentioned in the escalation policy. For example, in a certain alert escalation policy, the default value provided for the field Priority is High and Continuous Learning is also enabled for the policy.
- If the accuracy of the trained model is low, the default value is considered in creating an Incident. In the above example, the value for Priority is considered High.