An alert escalation policy can be created to support operational requirements. For example, a policy can be created to escalate critical network issues to a network engineer.
Prerequisite
Both OpsQ View and OpsQ Manage permissions are required to access the Alert Escalation Policy.
A training file is required to suppress specific alerts or to snooze specific alerts. The training file must include examples of alerts that need to be suppressed. See the Alert Management Training File for more information.
Step 1: Define name and scope
In this step, define the name, mode, and partner or client for the escalation policy.
Ensure the partner you want to create an alert escalation policy is selected in the Partner list (upper-left corner).
Go to Setup > Alerts > Alert Escalation.
Click Create New or + Add, depending on whether you have any existing policies.

Enter a Name and Description.
You can set the Precedence for the alert escalation policies. Enter a value in the Precedence field.
Note:
This is an optional field and accepts only integer value.
The policy precedence is determined by the policy scope. Client-level policies take precedence over partner-level policies. For example, if there are escalation rules defined at both the client and partner levels, the alert will follow the client’s rules for escalation before considering any partner-level rules.
This value determines the order in which to handle alert escalation policies according to the alert precedence value. When an alert matches more than one policy, the policies that have precedence will be executed first.
Also, if multiple policies have the same precedence value, the policies that are created first will be executed. This allows users to streamline alert management and ensure critical actions or notifications are prioritized.
From the Mode list, select a policy mode.
Policy Mode Description ON The policy drives automated actions on alerts. OFF The policy is inactive and does not affect alerts. You can use this mode to review a newly defined policy before choosing one of the other modes. Recommend The policy creates a recommendation for actions that you should take on the alert. Recommendations are based on learned patterns in historical alerts. The recommendation includes a link to take the action. Observed This mode permits you to simulate a policy without affecting alerts.
The policy creates an observed alert, which simulates the original alert. The observed alert shows the actions that would be taken on the original alert if the policy were inOnmode. The observed alert includes a link to the original alert.Recommend and Observed modes apply to incident actions. Select the partner that receives escalations from this policy.
Click Next: Select Resources.
Step 2: Select resources
Select the resources where alerts match a policy:
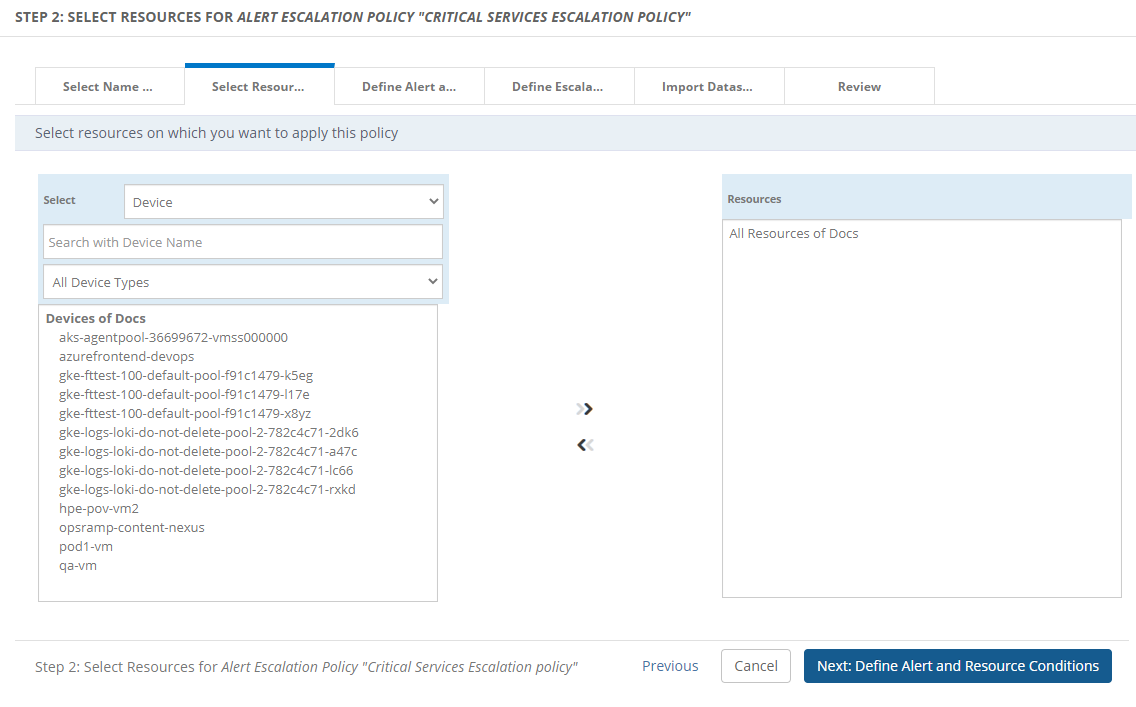
Select resources for the escalation policy.
- Resources can be selected from one or more clients.
- Add up to 25 resources.
- To escalate alerts for users of a specific client, add only resources from that client.
(Optional) Filter the resources by:
- Resource Name
- Resource Type
- Service Group
- Device Group
- Site
Click Next: Define Alert Conditions.
When choosing a parent service group or parent resource group, select all of the child group resources that form the escalation policy.
Step 3: Define alert and resource conditions
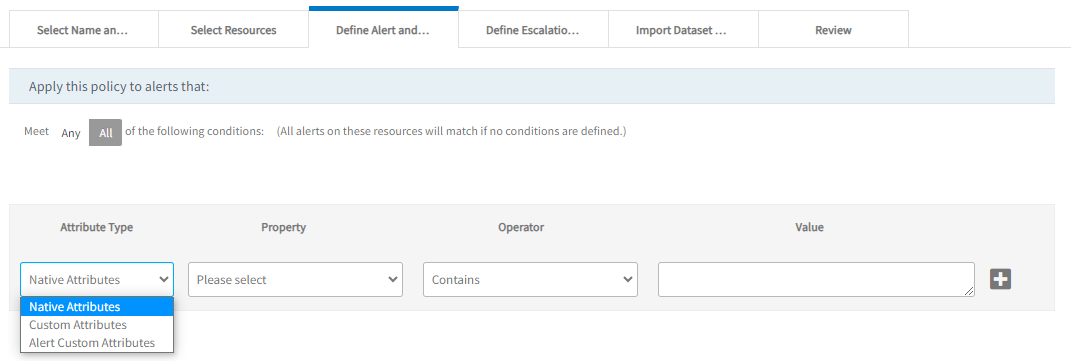
Filter the type of alerts that occur on the selected resources. If no conditions are defined in this section, all alerts on the selected resources will match this policy.
Choose from Any or All of the following conditions to apply a filter for the alerts.
Select the attribute type to narrow the attribute list to one of the following types:
- Native Attributes: Select from the list of native attributes.
- Resource Custom Attributes: Select from the list of custom, user-defined attributes.
- Alert Custom Attributes: Select from the list of alert custom user-defined attributes.Note:
- The Alert Custom Attributes are shown if they are available to the selected client.
- As of now, this feature is enabled for client-scope policies only. This means the Alert Custom Attributes option is not displayed for the policy assigned to All-Clients.
- Select the required attribute, logical operator, and enter the value. Click + to add multiple filter conditions.
- Click Next: Define Escalation Rules.
The alert property Client: Service Name is applicable only to the partner scope policy. As an example, to escalate alerts of a service named Windows Maintenance Support, add the condition Client: Service Name:
Not Contains: Filters only the alerts that do not contain the input string provided in the field.
Not Equals: Filters only the alerts that are not equal to the input provided in the field.
Not Contains/Not Equals: If the selected property is not there in the alert, it is considered as matched.
Example: Property value is “ABC”.
Resource “A” belongs to two resource groups - ABCDEF AND XYZ. In this case, there is No Match.
Resource “B” belongs to the resource group - PQRS. There is Match.
Resource “C” belongs to no resource group. There is Match.
Escalate an Inference of Alert Correlation Policy
You can use a specific Alert Correlation policy name to escalate the inference alerts further. In addition to the Native Alert Attribute Inference (Yes or No), you can use the ON or Observed mode correlation policy names to escalate the required Inference alerts.
To escalate an inference:
- Select Attribute Type as Native Attributes.
- Select Property as Inference Alert from the drop-down list.
- By default, the Operator is selected as Is.
- Select Value as Yes.
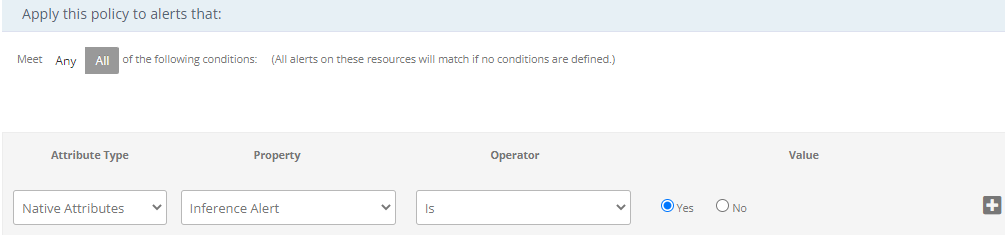
- Click + to add multiple filter conditions.
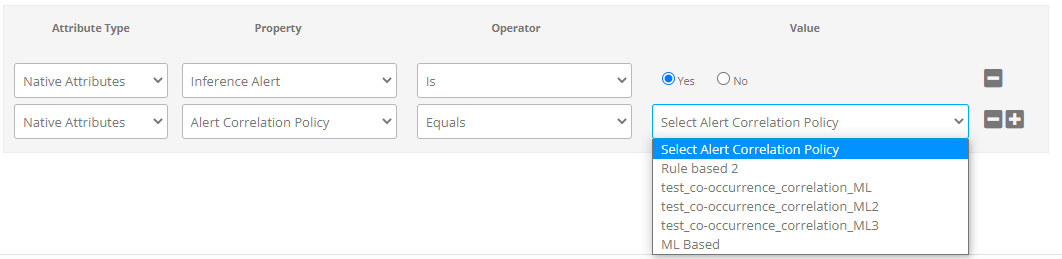
- Select Attribute Type as Native Attributes.
- Select Property as Alert Correlation Policy from the drop-down list.
- Select the Operator.
- Under Value, you can find the Alert Correlation Policy inferences for which the Mode status is ON or Observed. Select the inference that you want to escalate further.
Step 4: Define escalation rules
Escalation rules are actions to be taken when an alert is not acknowledged within a time period.
List of escalation rules including the description:
| Escalation rule | Description |
|---|---|
| Escalate directly as needed | Select the users who should be directly contacted on an on-demand basis. Escalating directly is a manual process. No automatic actions are taken. If you select Escalate directly as needed, you only select users who get notifications. |
| Escalate alert automatically until Acknowledged, Closed, Suppressed, or Ticketed | Escalate an alert as a notification until an action is taken. No further level of escalation can be added since the alert escalation will end as soon as the incident is created. |
| Escalate alert automatically until Acknowledged, Closed, or Suppressed | Escalate an alert as notification even if an incident is created. |
To configure escalation rules with actions:
Alert Elapsed Timeline: Configure the time interval to escalate an alert after it is generated.
- Select Immediately on the timeline to escalate an alert as soon as the alert is generated. If the alert does not have correlation or first response policies, the algorithm moves the alert to Alert Escalation. If the alert does have correlation and first response policies, the algorithm starts the escalation process and finishes after the correlation is complete.
- Select Wait Minutes/Hours on the timeline to escalate after the alert
has elapsed and the policy conditions are met.
For example, if a user configured 5 minutes delay escalation and the alert is triggered at 11:00 AM, the alert must be escalated at 11:05 AM. But, based on the design, an additional processing time in between 01 second to 02 minutes is added and the alert will be escalated between 11:05:01 AM to 11:07 AM.
Note: The additional processing delay is applicable for the SLA durations provided under “Define escalation rules” of the alert escalation policy.

Escalate as Notification: Select to send continuous notifications until an action (acknowledge, suppress, close, or create Incident) is taken on the alert.
For example, if an alert arrives at 10:00 AM, a notification is sent to the user. If the user does not acknowledge the alert, another notification is sent after five minutes (10:05 AM). Notifications are continuously sent every five minutes. When the user acknowledges the alert at 10:20 AM, no further notifications are sent.
Escalate as Incident: Select to escalate the alert as an incident. The escalation stops and no more escalations are sent.
Escalate as notification
You can escalate an alert as a notification.
Select Escalate As Notifications to send periodic notifications to users to make sure that an alert is acknowledged.
Send Alert Notifications to: Configure the users who are sent the notifications. To select the users, click Select Users.If the customer selects User Group, the system sends notifications to the email addresses of the individual users within that group.If User Group (DL) is selected, the system uses the email address defined for the group itself (the distribution list).
Notification Priority: An escalation notification carries a priority to determine which channel for delivery of notifications. As an example, policy P1 is configured to send Normal priority notifications for all the matching alerts to user A. User A can specify that all normal notifications are received using email (and not using SMS or Voice).
Send Notifications:
- Repeat Notification Frequency: Configure repeat notification frequency for selected users.
The repeat notification is sent to the user as Set Repeat Frequency even if an alert is escalated
to a higher level. The user will no longer get notifications after a certain number of repeated notifications.
- The default repeat frequency is 15 minutes and the number of notifications is 2.
- The minimum number of notifications is two and the maximum is 10.
- Alert State Transition: Alerts can be escalated based on the alert state transition which allows notifications on selected alert state changes. For example, you can escalate alerts as a notification when the alert state changes from warning to critical. The notification is a one-time notification sent at the time of the state transition.
- Notifications for OK alerts:
- When a notification is sent for a critical or a warning alert, a notification for an OK alert is also sent irrespective of whether an action (except Suppress action) is taken on the alert or not.
- The OK Notification is sent only when a critical or warning notification is triggered for an alert. If there is no critical or warning notification on an alert, the OK Notification is not triggered even if the policy is matched.
- Repeat Notification Frequency: Configure repeat notification frequency for selected users.
The repeat notification is sent to the user as Set Repeat Frequency even if an alert is escalated
to a higher level. The user will no longer get notifications after a certain number of repeated notifications.
Add Escalation: Adding escalation levels will escalate the alert to the next level if it is not acknowledged at a prior level.
- A policy can have multiple escalation notifications.
- When a level 2 escalation is added to notify users, level 1 and level 2 users get repeated notifications according to the repeat notification frequency.
Escalate as incident
You cannot escalate an alert that displays an OK state as an incident.
Select Escalate As Incident to automatically create an incident from an alert and assign it to the user.
For New Incidents: Configure the incident’s properties that are created when an alert condition matches this policy.
- A new incident is created for an alert if there is no open incident existing for the alert.
- The incident property tokens available in the auto incident form can be used to customize the subject and description of the incident.
- Enable Continuous Learning to automatically escalate incidents to appropriate groups, priority, or categories using machine learning.
Note: You can assign a Roster to an assignee group in the escalation policy. While creating a new ticket based on the shift defined in the roster, the corresponding assignee group will be assigned to the Incident.
For Created Incidents: If an open incident (an incident in any state other than Closed) is available for the alert, the incident is updated instead of creating a new incident.
Update Incident: Configure how to update existing incident of an escalated alert. The incident gets updated every time an escalated alert repeats with a state change.
Update incident with latest alert description when alert state change: The latest alert description is appended to the conversation of the incident. No change to the status of the incident is made based on the escalated alert state.
Update incident with every repeat alert’s description: The incident is updated with every repeated alert’s description irrespective of the alert state.
Note: When you select Update incident with every repeat alert’s description option, the screen displays a confirmation message as shown below:

Click Yes to enable this option.
Update incident subject while updating the description: The alert subject can now be updated when the alert state changes for an existing incident.
Resolve incident when an alert heals: The latest alert description is appended to the conversation of the incident. The incident status is changed to Resolved when an escalated alert state changes to OK.
Resolve unassigned incident when alert heals: You can now automatically resolve unassigned incident tickets when the associated alert heals. If an incident is not assigned to any user or user group, it will be automatically marked as resolved when the alert heals.
Note
This activity is triggered only when the Unassigned Heal option is enabled in the Service Desk settings.Update incident priority based on these rules: The priority of an incident is updated according to the rule configured for the alert severity change.
Step 5: Review
Review and save the alert escalation policy.
Click Review.
A summary of all sections of the escalate alert policy is available for review and editing:
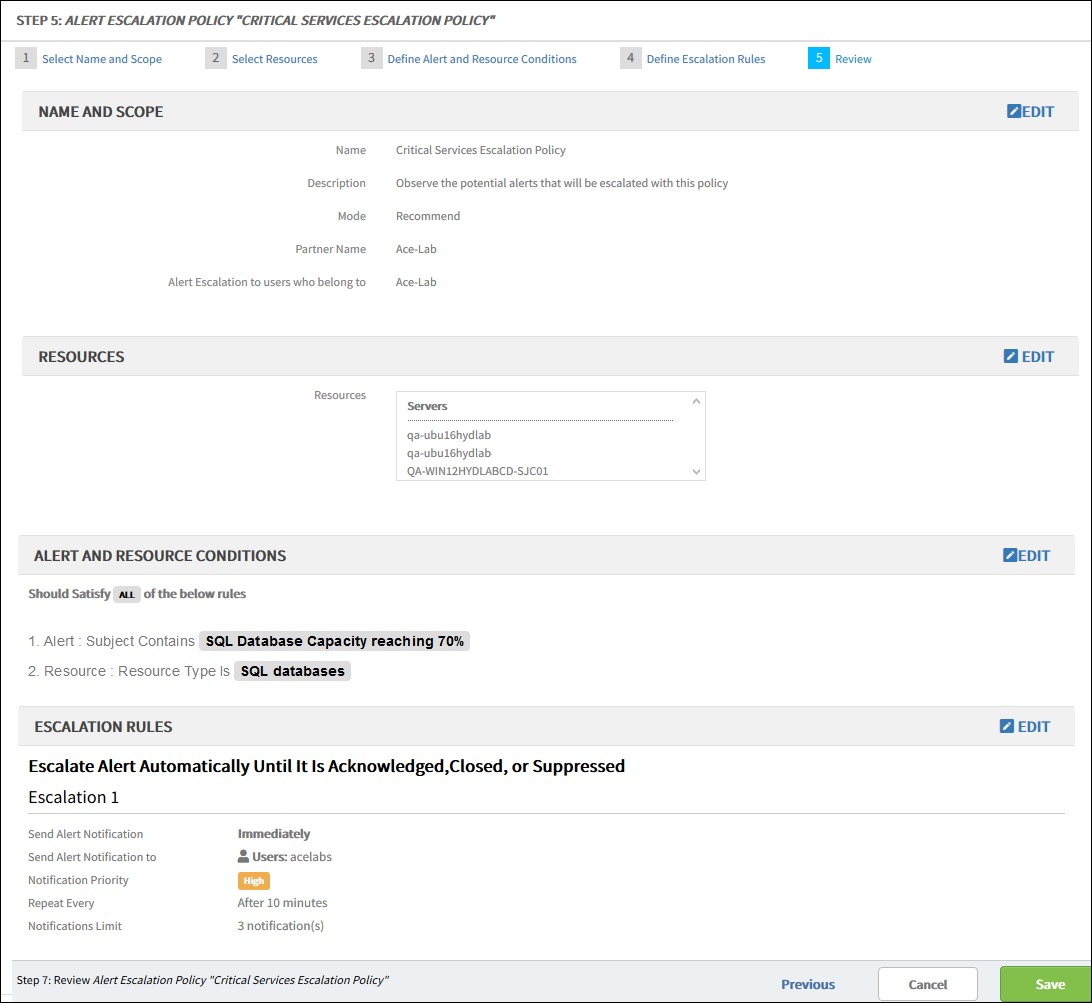
Click Edit to edit any sections.
Click Save.