Overview
OpsRamp’s collector bootstrap is a small and flexible tool designed to simplify and automate day-0 onboarding of all OpsRamp’s collector technologies - agent, gateway into myriad of IT environments - bare-metal, virtualized, containerized and cloud-native environments on various host Linux OS be it either on-prem or in the public cloud.
Once you download the right binary from the cloud platform into your target operating system - Linux, you can instruct the tool via its command line interface (CLI) to kickstart the collector installation. In a single command, the tool not only verifies the host environment that will eventually house the collector but also automates what are currently manual steps around authentication and registration of the collector with the cloud platform. The tool can be optionally instructed, in the same command, to start infrastructure discovery automatically without requiring any additional configuration on the cloud side.
Download the Collector Bootstrap Tool
While the collector bootstrap tool can be downloaded into any machine (into your laptop, for example), the tool is expected to be executed from the same host as you will eventually run the collector.
To download the Collector Bootstrap Tool, follow these steps:
From All Clients, select a client.
Go to Setup > Account > Collector Profile.
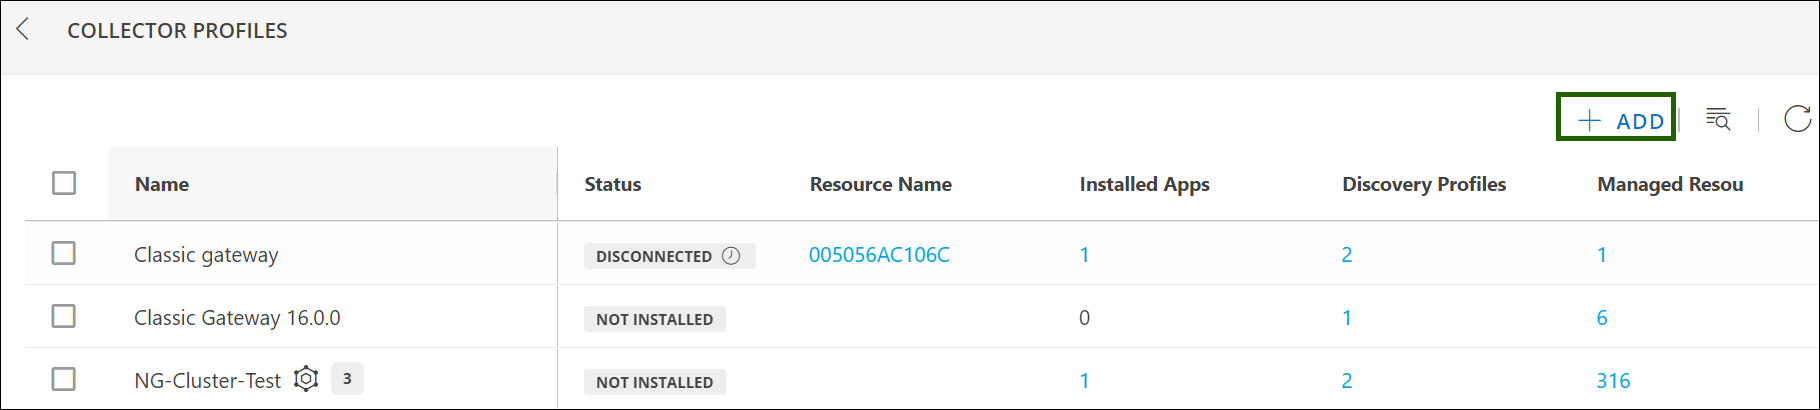
Click + ADD on the COLLECTOR PROFILES page.
Enter the Profile Name and Description.
From the Gateway collector list, click the CLOUD-NATIVE APPLICATION (INSTALLER) NEXTGEN tile.
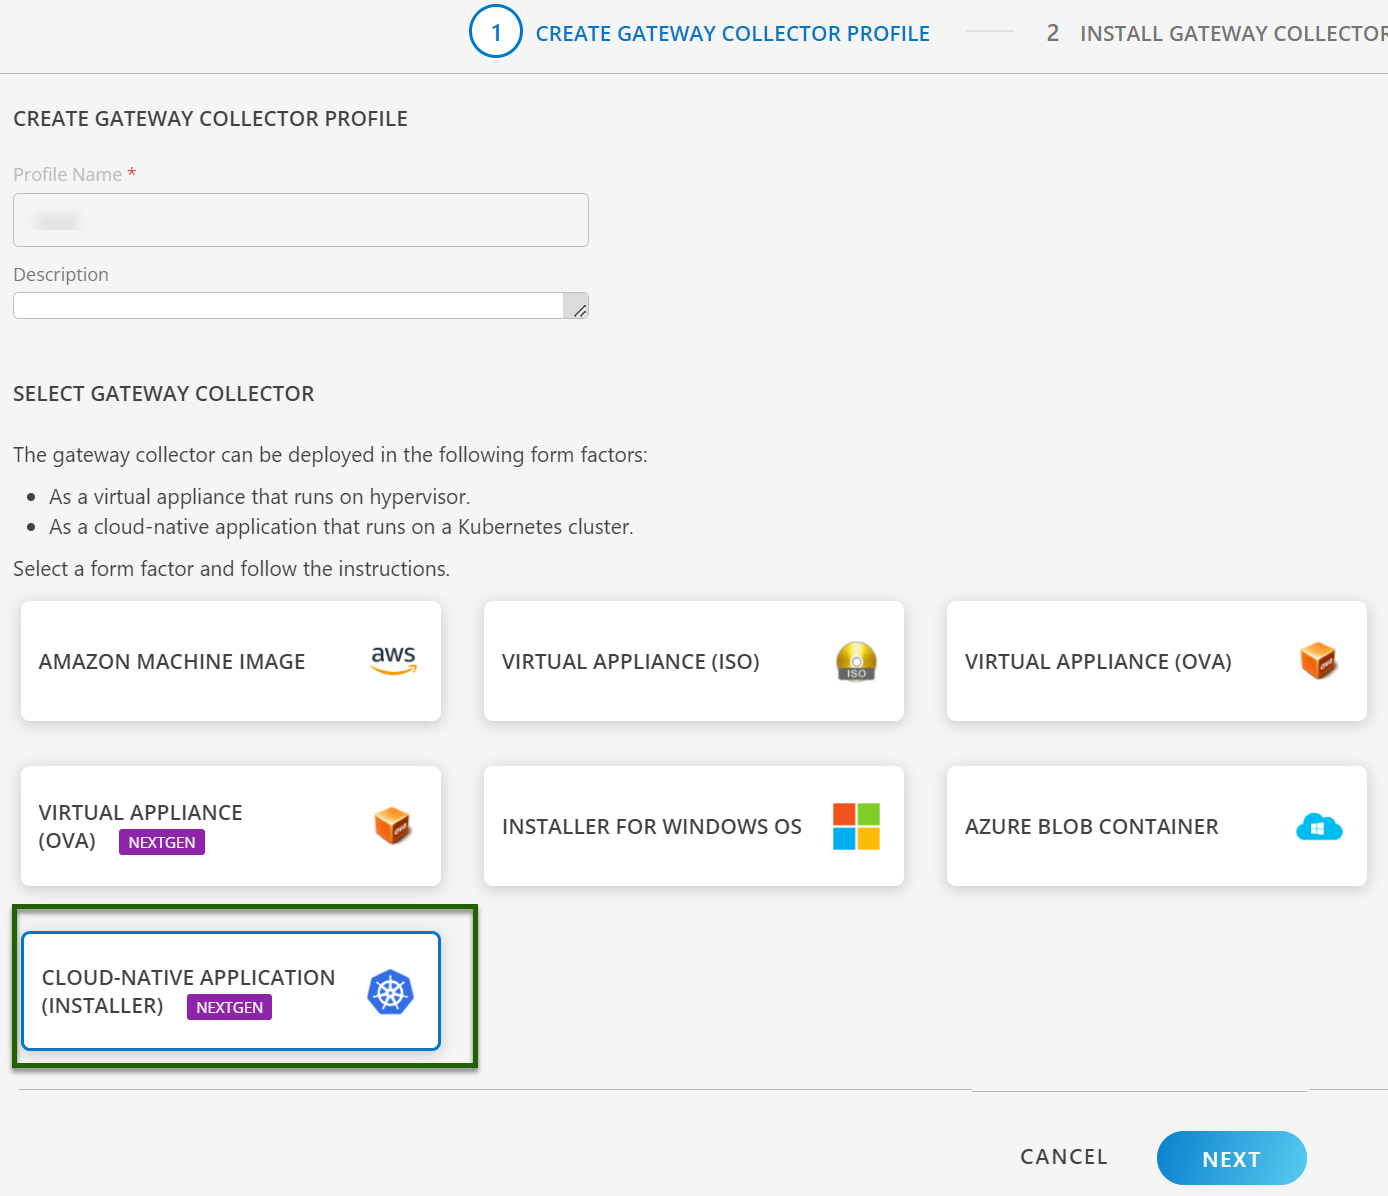
Click NEXT. The instructions page appears.
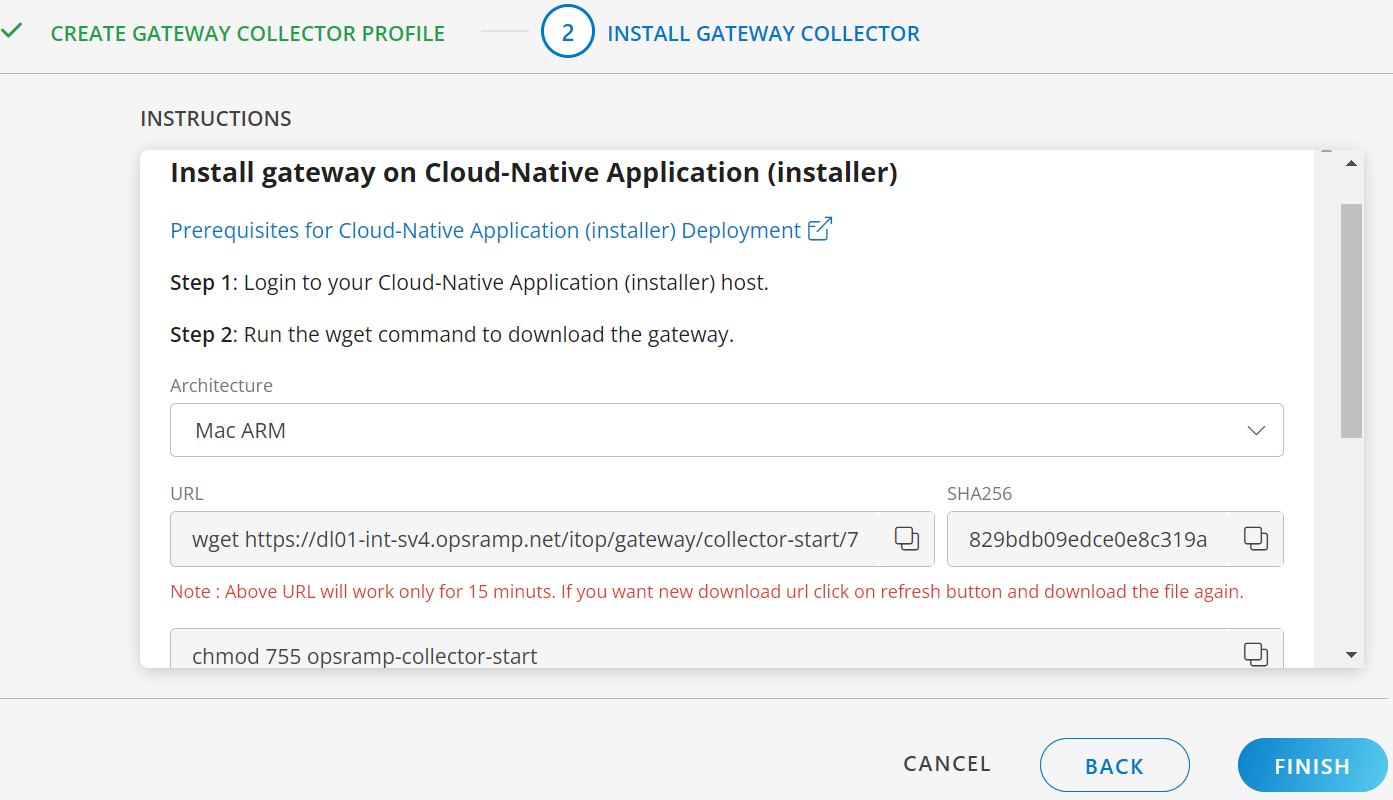
Login to your Cloud-Native Application (installer) host.
Select the Architecture from below:
- Linux ARM
- Linux AMD
- Mac ARM
- Mac AMD
- Windows AMD
Run the wget command provided on the instruction page to download the gateway. The command varies based on the selected architecture.
Note
The URL will work for 15 minutes. Click the refresh button for a new download URL if needed11. Use the following command to check the bootstrap tool version.
opsramp-collector-start --version
Available Commands
| Commands | Description |
|---|---|
| generate | Generate heapdumap and threaddump in OpsRamp gateway |
| install | Download and register the collector (agent, gateway) |
| uninstall | Unregister and delete the collector |
| setup | Setup kubernetes and high availability |
Available Flag
| Flags | Description |
|---|---|
| --version (-v) | It is used to check the collector version |
Use Bootstrap Tool to Install the NextGen Gateway
This section describes how to install and uninstall the NextGen gateway using the bootstrap tool.
Step-1: Available flags for installing nextgen gateway
Use the following command to see the available flags. The collector bootstrap needs sudo privileges.
opsramp-collector-start install --helpFlags for installation commands
| Flags | Description |
|---|---|
| --debug | Enable debug logging (true/false) |
| --environment (-e) | Environment to install OpsRamp gateway |
| --url (-u) | It is used to specify OpsRamp url |
| --key (k) | Gateway unique authentication token |
| --skip-prechecks | Skip prechecks while gateway registration (true/false) |
| --gateway-name (-N) | Gateway name to show in management profile |
| --helmchart-version (-V) | Helm chart version to deploy in k8s environment |
| --namespace (-n) | Namespace to deploy gateway in k8s environment |
| --proxy-protocol (-r) | Proxy server communication protocol |
| --proxy-ip (i) | Used to get the proxy server ip address |
| --proxy-port (-p) | Used to get the proxy server port |
| --proxy-username (-u) | Used to get the proxy server username |
| --proxy-password (p) | Used to get the proxy server password |
| --squid-proxy (-S) | Enable squid proxy service (enable/disable) |
| --third-party-app (-t) | Enable or disable third party app integration |
| --config (-c) | Initial discovery configuration |
| --repository (-R) | Pull helm charts and images from custom repository (default "us-docker.pkg.dev") |
| --repo-user (-a) | It is used to get repository username |
| --repo-password (-s) | It is used to get repository password |
| --read-repopass-from-file (-f) | It is used to read the repository password from a file |
| --registration-config (-F) | It is used to read the registration configuration data from a yaml file |
| --storage-class (-C) | Storage class name for dynamic provisioning of persistent volumes |
| --webprobe-version(-w) | Synthetics version to deploy in k8s environment |
Step-2: Get the activation token
To find the activation token and API server url, navigate to Setup > Resources > Management Profile and click on the name of your newly created profile.
Activation auth token: 55c803a1-2e2f-4c07-be95-479dc8fdf7ff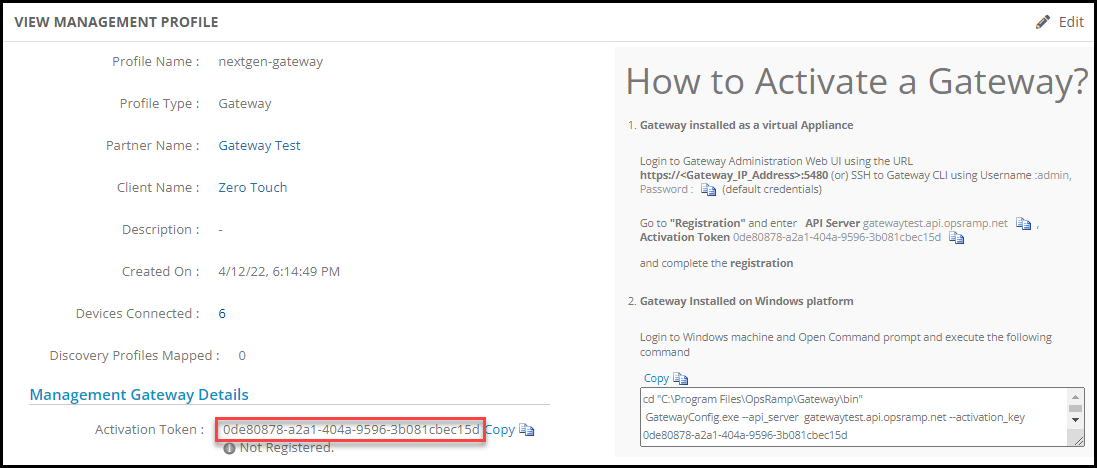
Cloud url API server: gatewaytest.api.opsramp.net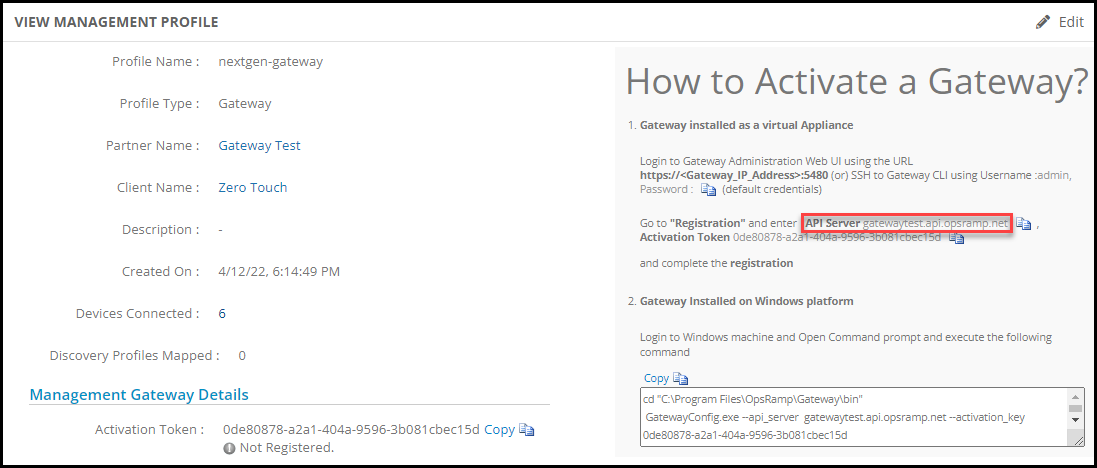
Step-3: Registering the nextgen gateway
Note
When you are using theopsramp-collector-start binary, by default it will deploy the latest version of the NextGen gateway from the OpsRamp repository. However, if you want to install a specific version of the NextGen gateway, you need to specify the version using --helmchart-version (-V) flag during the gateway installation process.Option 1: Registering the nextgen gateway without proxy
opsramp-collector-start install --environment k8s --url {OpsRamp Server URL} --key {Gateway unique authentication token}Installing gateway in a kubernetes environment:
Pod status:
Option 2: Registering nextgen gateway through proxy
Often customers will not be allowed to connect to their network directly for security reasons, customers will install proxy in their environment and will allow the third party users to connect to their network through proxy.
OpsRamp Gateways are deployed in customer environments, so in order to connect to an outside network from Gateway it needs to pass through a proxy.
The customers who have proxies installed in their environment, need to use the below gateway installation command for registration.
The examples below show how to register the gateway through proxy method. The collector will try to register the gateway, once it’s installed, through the proxy. The tool supports registration with or without credentials as shown below:
- Register through proxy with credentials.
opsramp-collector-start install --environment {Environment} --url {OpsRamp Server URL} --key {Gateway unique authentication token} --proxy-protocol {Proxy Protocol http/https} --proxy-ip {Proxy IP Address} --proxy-port {Proxy Port} --proxy-username {Proxy Username} --proxy-password {Proxy Password} - Register through proxy without credentials.
opsramp-collector-start install --environment {Environment} --url {OpsRamp Server URL} --key {Gateway unique authentication token} --proxy-protocol {Proxy Protocol http/https} --proxy-ip {Proxy IP Address} --proxy-port {Proxy Port}
Option 3: Registering nextgen gateway by using yaml config file
Users can register the NextGen gateway by using registration flags within a YAML file.
To complete the registration process, follow these steps:
- Generate a YAML file based on the provided sample YAML below and make the required modifications:
Sample YAML
config:
squid-proxy: disable
third-party-app: disable

proxy:
  proxy-protocol:
  proxy-ip:
  proxy-port:
  proxy-username:
  proxy-password:

helmchart-version:

repo:
  repository:
  repo-user:
  repo-password:
  read-repopass-from-file:

gateway-name:
storage-class:

#Pass the snmp_v3 credentials in below format. Put 2 spaces under the "snmp_trap_v3_credentials" and pass the keys after those spaces (spaces are for yaml intonations)
#snmp_trap_v3_credentials: |-
#  key1
#  key2
#  key3
# Refer https://docs.opsramp.com/platform-features/feature-guides/monitoring-using-snmp-traps/#configure-snmp-v3-traps for more details on configuring SNMP credentials.

snmp_trap_v3_credentials: |-

vprobe:
  resources:
    limits:
      memory: "4096Mi"

nativebridge:
  resources:
    limits:
      memory: "500Mi"

squid:
  file-descriptors: 4096
  resources:
    limits:
      memory: "500Mi"

postgres:
  resources:
    limits:
      memory: "1024Mi"

#Add service types based the requirement and if the servicetype is not passed then by default gateway will use LoadBalancer serviceType.
#Use either LoadBalancer or Cluster-IP types.
squidproxy-servicetype: "LoadBalancer"
gateway-servicetype: "LoadBalancer"
Note
If you want to update the memory limits of the NextGen gateway pod, use the “–registration-config” flag and ensure that you specify these values within the YAML configuration file.Step-4: Check for successful gateway registration
Once the CLI returns successfully, navigate to Setup > Resource > Management Profile to check if the gateway registered successfully.
Gateway connection status:
Use Bootstrap Tool to Uninstall the NextGen Gateway
Use the following commands to uninstall the NextGen gateway using bootstrap tool.
sudo opsramp-collector-start uninstall -e {Environment}Available Flags
| Flags | Description |
|---|---|
| --debug | Enable debug logging (true/false) |
| --environment (-e) | It is used to specify on which environment nextgen gateways is available |
| --namespace (-n) | k8s namespace (This is used only in kubernetes environments) |
Uninstallation of kubernetes.
Once the CLI returns successfully, navigate to Setup > Resource > Management Profile to check if the gateway is de-registered successfully.
Gateway connection status: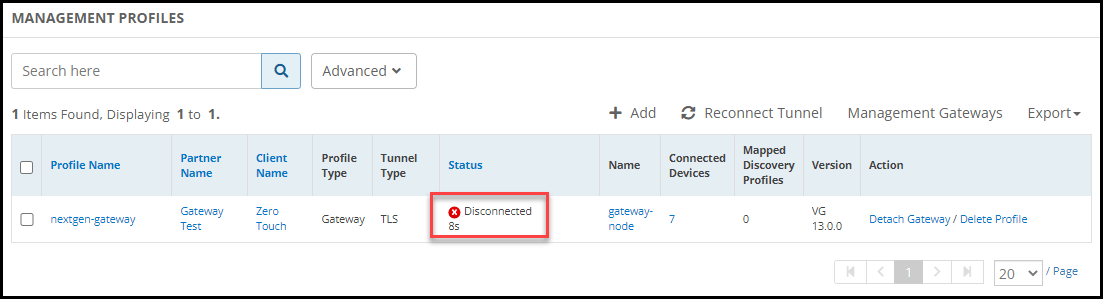
Troubleshooting
Following are the errors if any CLI failures.
- If you are providing the incorrect cloud api server url:
root@opsram-gateway:/home/gateway-admin# opsramp-collector-start install --url invalid-url.opsramp.com --key xxxxxxxxx Get "https://invalid-url.opsramp.com/saregandlicdownload.do?action=registrationRequirements&activation_token=1688e815-20fb-4967-9357-107e73b89970": dial tcp: lookup invalid-url.opsramp.com on 127.0.0.53:53: no such host - If you are trying to re-registering gateway:
root@opsram-gateway:/home/gateway-admin# opsramp-collector-start install --url xxx.opsramp.com --key xxxxxxxxx Gateway is already registered to cloud - If the Kubernetes server is not reachable:
root@opsram-gateway:/home/gateway-admin# opsramp-collector-start install --url xxx.opsramp.com --key xxxxxxxxx
Unable to get helm status exit status 1: Error: Kubernetes cluster unreachable: Get "https://127.0.0.1:6443/version": dial tcp 127.0.0.1:6443: connect: connection refused