Registering the gateway infers connecting the gateway with the console after deploying the virtual machine.
Create a management profile
To create a management profile:
Go to Setup > Resources > Management Profiles.
Click +Add.
From Management Profile, provide details for the following:
- Client Name: Select the client for gateway registration.
- Profile Type: Select
Gateway. - Profile Name: Enter a unique name.
- Description: Enter a brief description of the management profile.
Click Submit.
The activation token is automatically generated.
Copy the API server and activation token.
Register the gateway
After creating the management profile, initiate gateway registration using one of the following methods:
- Gateway serial user interface
- Gateway web user interface
Register using the serial user interface
To configure the gateway using the serial user interface:
Log into the gateway Virtual Machine(VM) using the username and password.
For default login credentials, use the user name and password displayed in Setup > Downloads > Gateway to log into the gateway administration account.The gateway console prompts you to change the default password after the first login.
From the left pane, click General.
Verify that the Registration Status is
Not Registeredand the Tunnel Status isNot Established.Go to the Network tab. Ensure that the IP address and network settings are properly configured.
To configure the gateway using a proxy server, use
CTRL+Pto navigate to Proxy Settings. By default, Direct connection to the Internet is selected.Go to the Registration tab.
Enter an API server and activation token. Copy the API server and activation token from Management Profile.
Click Update Now to register the gateway to the console.
The registration process takes a few minutes to complete. After the registration process, from the console, go to Setup > Resources > Management Profiles to verify the gateway connection status.
Register using the web user interface
To configure the gateway using the web user interface:
From the web browser, enter the URL using the following syntax:
https://<enter Gateway IP address>:5480.From the gateway login screen, provide a default username and password. The gateway console prompts you to change the default password after the first login.
From the Appliance Administration Panel page, go to Administration Menu > Network. Ensure that the IP address and network settings are correctly configured.
From Network, go to Network Connection Settings to configure the gateway using Proxy server. By default, Direct connection to the Internet is selected.
From the Administration Menu > Registration , provide details for the following, copying the API server and activation token from Setup > Resources > Management Profiles:
- Activation Key
- OpsRamp Server
Click Activate.
Verify that the Registration Status displays a Registered and Success status.
The registration process takes a few minutes to complete. After the registration process, from the console, go to Setup > Resources > Management Profiles to verify the gateway connection status.
Detach gateway
If you decide to detach the gateway from the cloud, use the Setup > Resource > Management profile > Detach Gateway procedure.
After detaching the gateway, the following occurs:
- The gateway stops monitoring resources and disconnects from the cloud.
- The gateway is reset to factory defaults, including network settings, static IP, routes, proxy setting, and date and time.
- If you are using the gateway as a proxy for agents, connectivity is lost.
- Passwords are reset to the default values.
- SIP and SYNTHETICS monitoring is stopped.
Agent is uninstalled on the gateway.
Note: When you detach the gateway, OpsRamp will generate a critical Gateway Deregister Alert. This alert is not mapped to the gateway resource, and you will need to locate these alerts in the alert browser. The alert contains the hostname of the detected gateway.
Gateway Management Profile Deletion Process
This document provides information related to deletion of Gateway Management Profile for (Classic Apps/SDK 1.0 Apps).
Prerequisite
While performing these actions, the gateway must be attached to the specific management profile.
Follow the steps mentioned below:
Navigate to Setup > Integrations > Integrations.
Search for the installed integration and click the integration name.
From the Configuration/Discovery Profile section, select the configuration/discovery profile and click Remove.
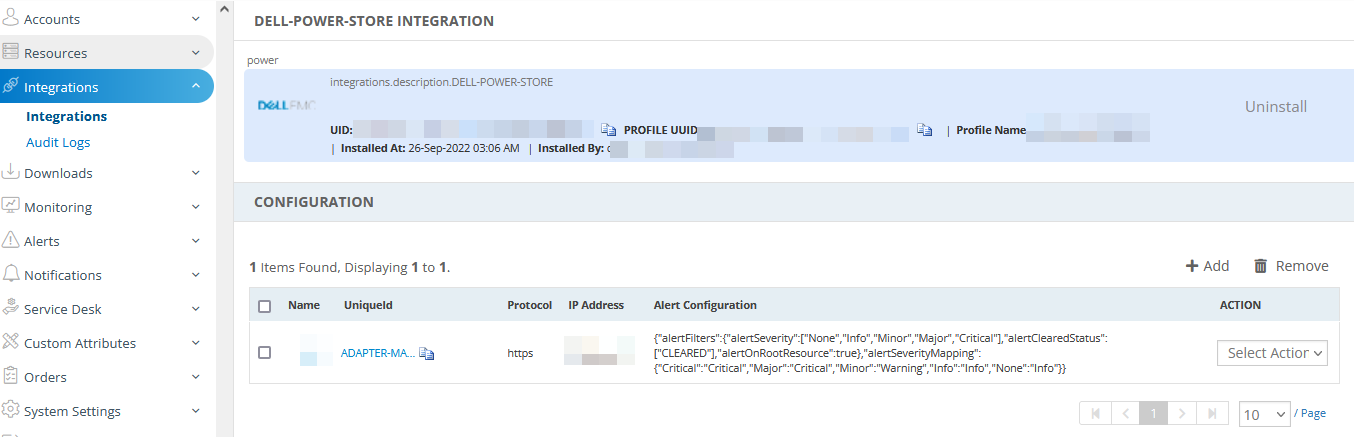
From the confirmation dialog box, click Yes to delete the configuration.
After removing all the configurations from the Integration (SDK or Classic app), uninstall the integration.
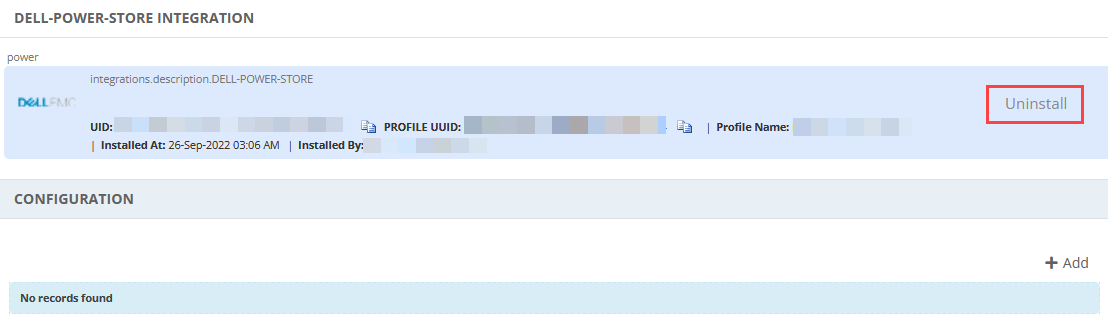
Click Uninstall and provide the reason in the Uninstall Integration(s) dialog box.
Click Ok to uninstall the integration.
After uninstalling the Integration, wait for some time (10 to 15 mins).
Navigate to Setup > Resources > Management Profiles
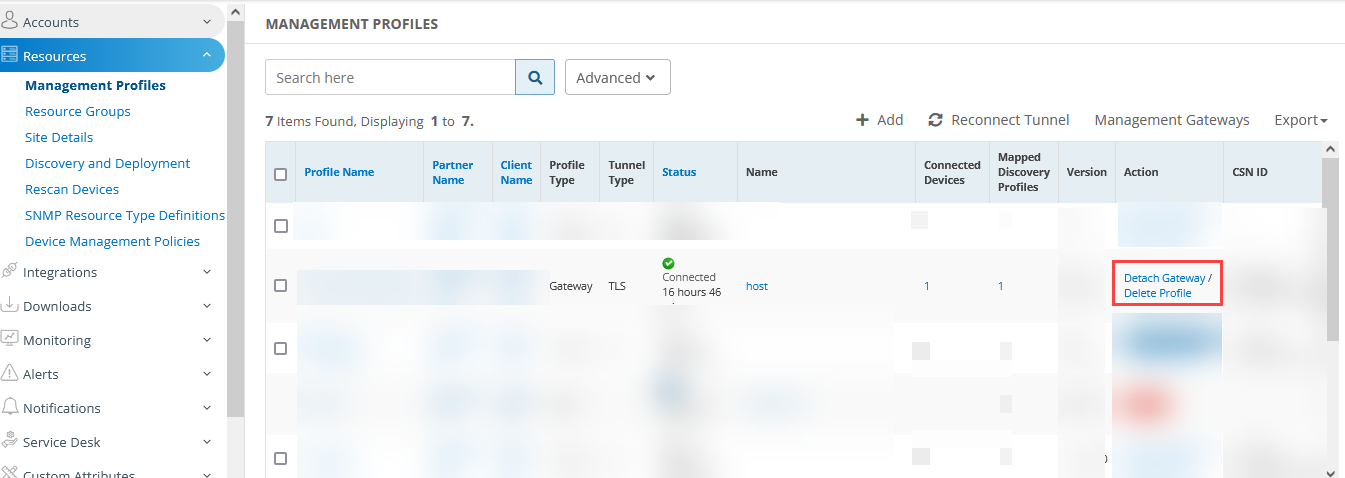
Click Detach Gateway from the management profile. This will detach the gateway from the management profile.
Click Delete Profile to delete the management profile.
Note: Before deleting the management profile, the connected devices and mapped discovery profiles counts must be zero.