This page documents the workflow to deploy OpsRamp Classic Gateway on HPE VME using ISO image and then proceed with standard gateway registration.
Prerequisites
Before deploying the Gateway virtual machine on HPE VME using the OpsRamp-provided ISO, ensure that your environment meets all the necessary requirements to support a successful installation and connection to the OpsRamp Cloud platform.
1.System and Server Requirements
Verify that your infrastructure meets the minimum hardware and software specifications required to run the Gateway VM.
For detailed information, refer to the Deployment Requirements document.
2. Access
You must have access to your HPE VME environment.
This page documents the workflow to deploy OpsRamp Classic Gateway on HPE VME using ISO images, and then proceed with standard gateway registration.
Procedure
This page documents the workflow to deploy OpsRamp Classic Gateway on HPE VME using ISO images, and then proceed with standard gateway registration.
Step 1: Verify/Enable Required HPE VME Cloud Settings
You need to ensure that the following cloud settings are enabled for a smooth installation of OpsRamp Classic gateway.
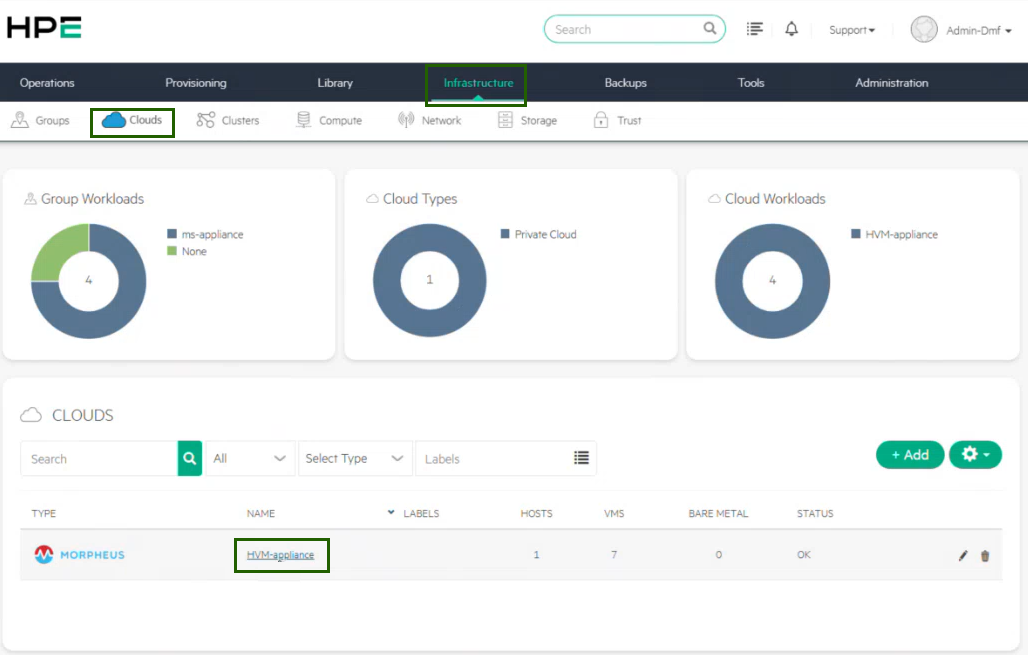
- Log in to HPE VME.
- Navigate to Infrastructure > Clouds. In the Clouds type, you will see the cloud configuration entry (here, HVM-appliance).
- Click HVM-appliance.
Click Edit.
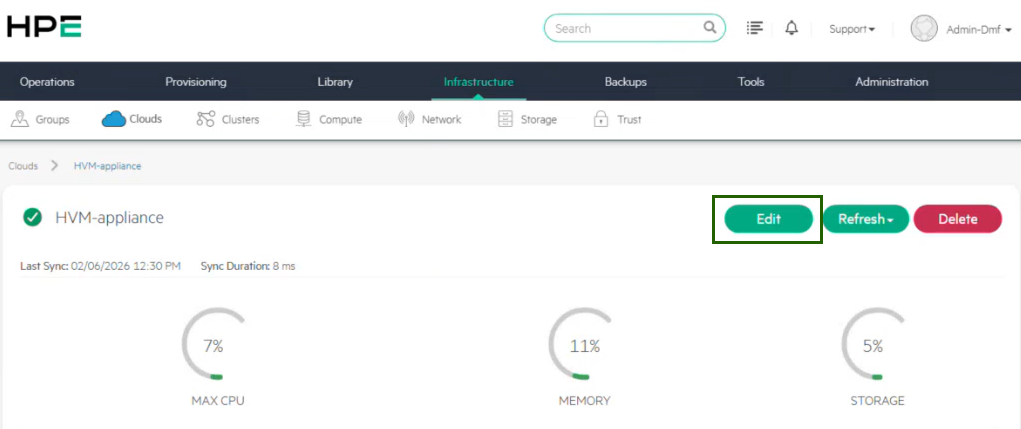
In the EDIT CLOUD page, ensure all the required options are enabled (as per your VME environment), listed in the table below.
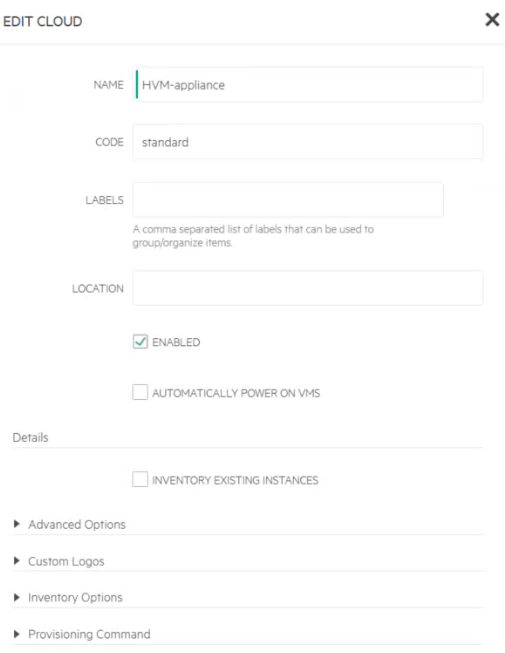
| Field | Select |
|---|---|
| Location | Enabled |
| Advanced Options |
|
Step 2: Download the Classic Gateway ISO
To download the Classic Gateway ISO from OpsRamp Portal, follow the steps below:
In the OpsRamp portal, select your client from All Clients.
Navigate to Setup > Account > Collector Profile.
On the Collector Profiles page, click + ADD.

On the configuration page, enter the following details:
- Profile Name: Provide a name for the profile you are creating.
- Profile Type: By default, the Standard profile type is selected.
- Description: Add a short description for the profile. (Optional)
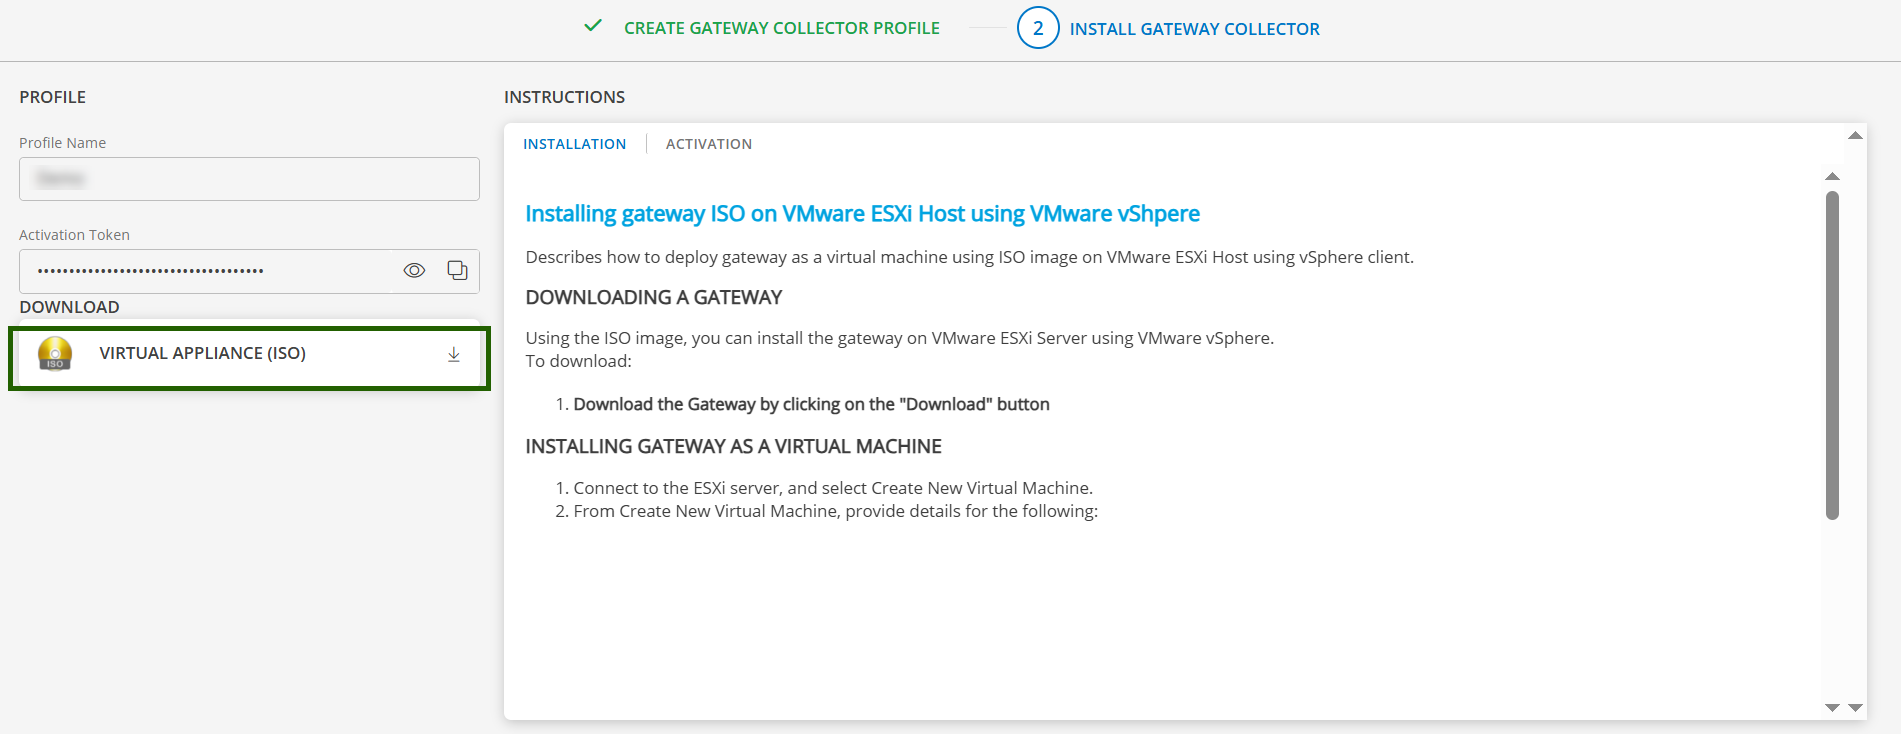
- Gateway Collector (Classic): Select the VIRTUAL APPLIANCE (ISO) tile. You can also choose the desired Gateway version from the available options from the dropdown.
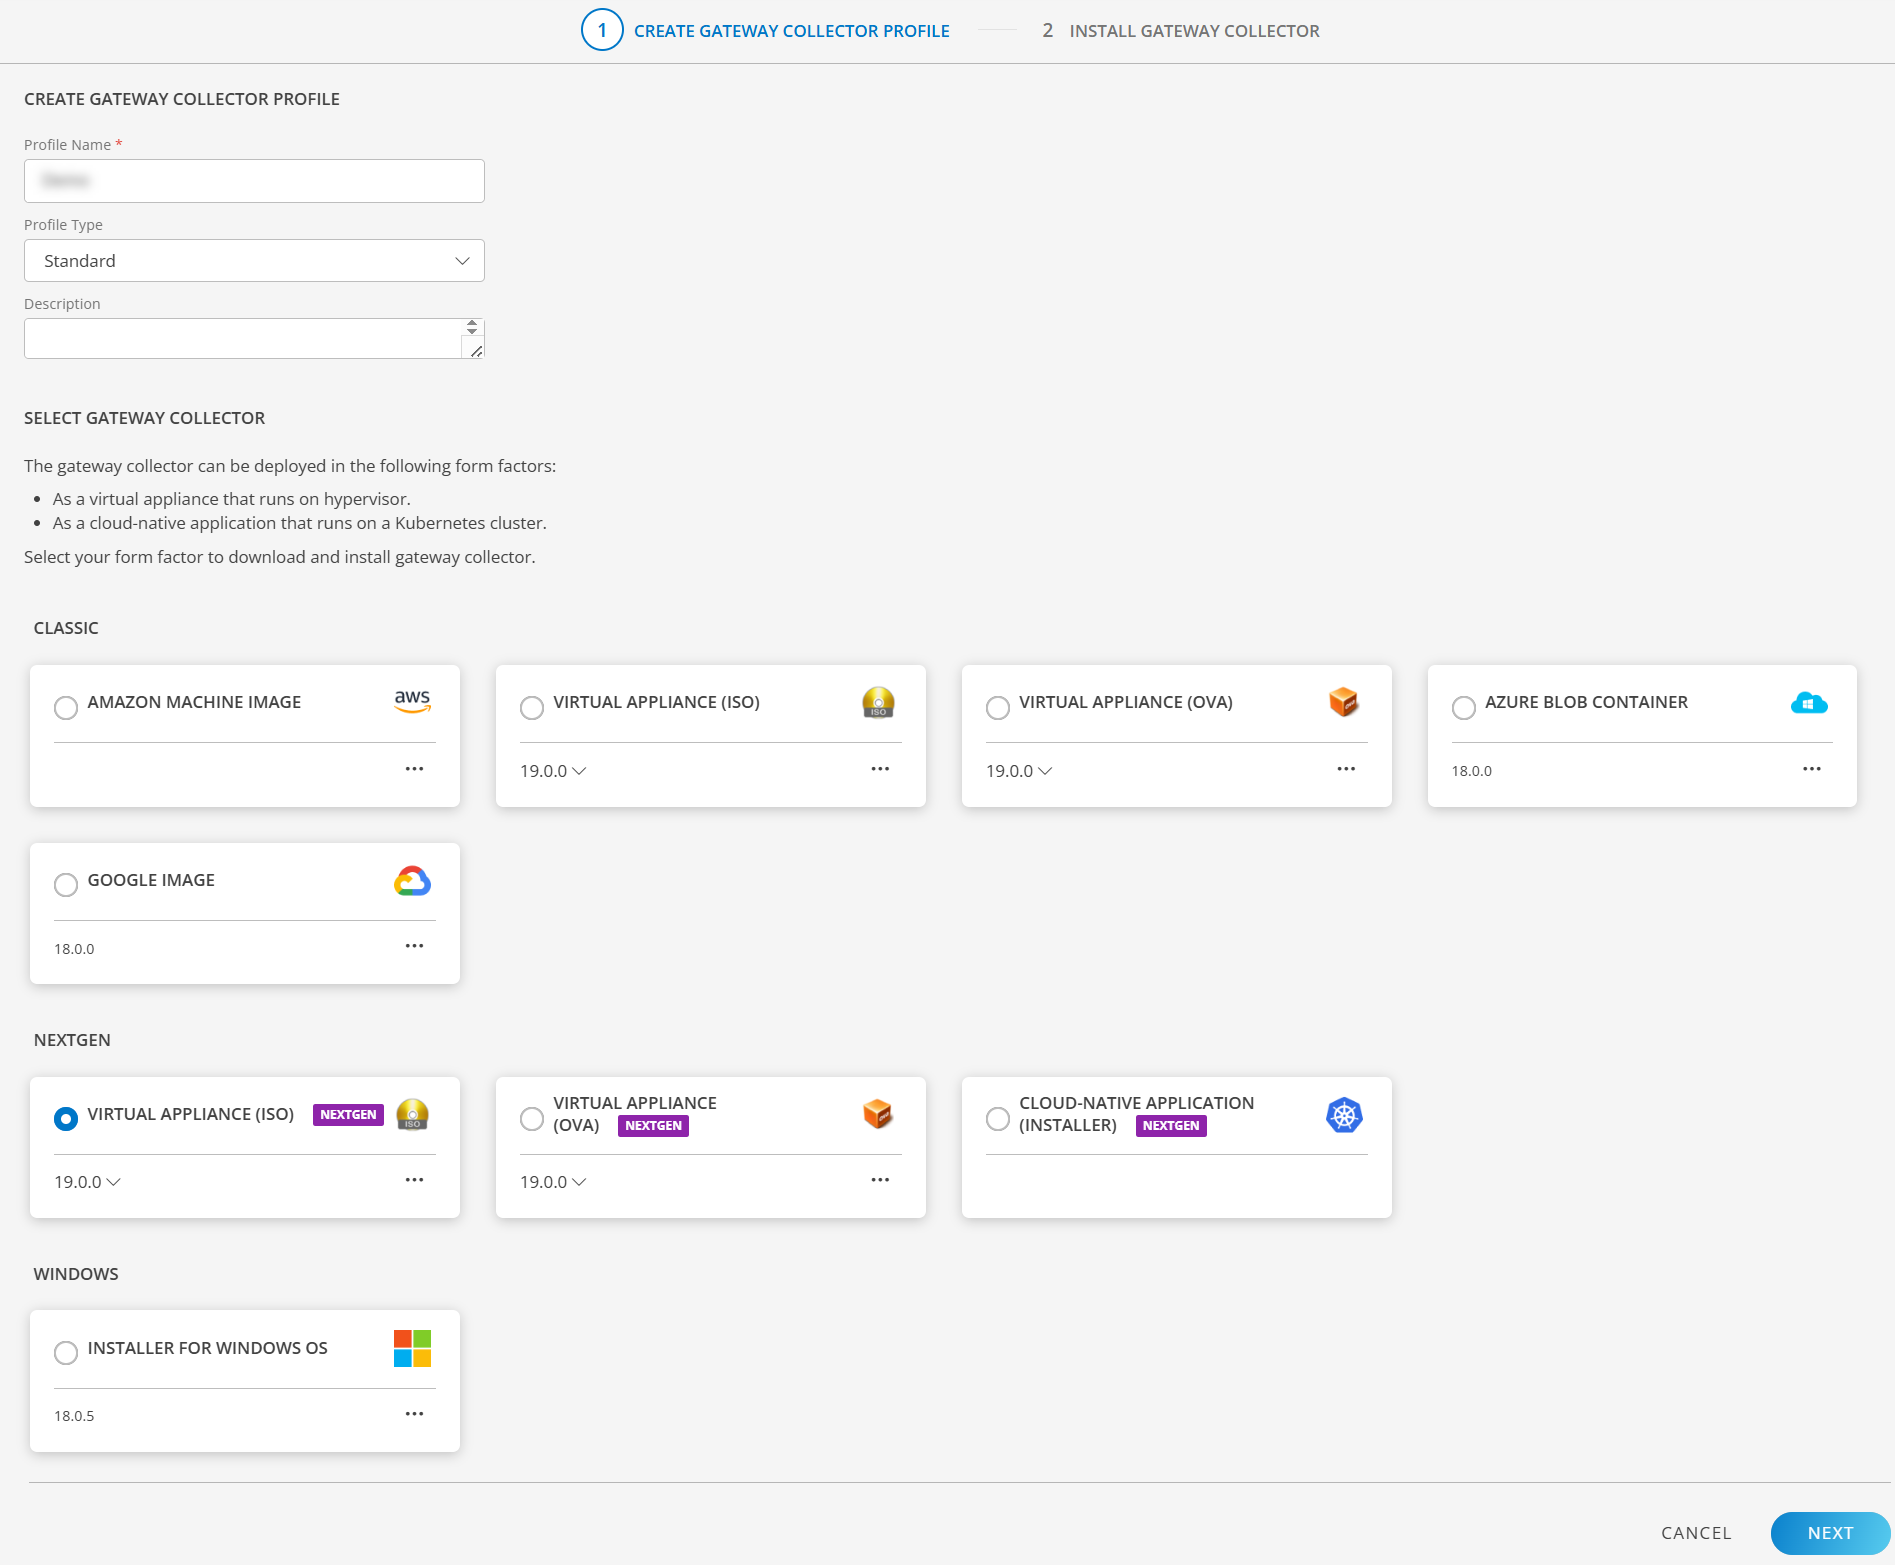
- Click NEXT.
- Download the Classic Gateway ISO by clicking on the VIRTUAL APPLIANCE (ISO) tile.
- Once the ISO is downloaded, you can proceed to the installation Step.
Step 3: Create ISO image in the VME Library
Navigate to Library > Virtual Images.
The Virtual Images page displays multiple image types.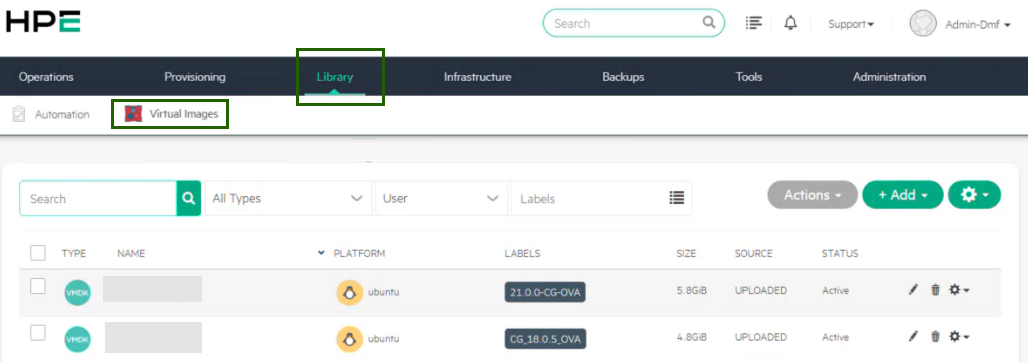
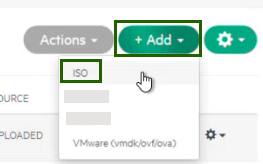
Select +Add > ISO.
In the UPLOAD VIRTUAL IMAGE page, enter the following details:
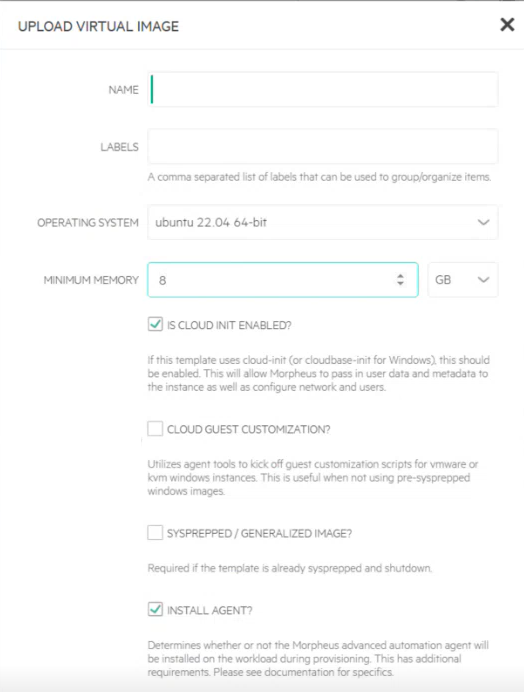
- Name: Name for ISO image.
- Labels: A short label/description.
- Operating System: Ubuntu 22.04 (64-bit)
- Minimum memory: 8 GB
- Select IS CLOUD INIT AVAILABLE? and INSTALL AGENT?
- Select File for Create Image type.
- Click Add File.
- Upload the downloaded Gateway ISO file.
- In the Advanced drop-down, select VIRTIO DRIVERS LOADED? and VM TOOLS INSTALLED?.
- Click Save Changes.
You have now created the ISO image, which is available in the Library list.
Step 4: Deploy (spin up) the Gateway VM (Instance)
In VME environment, navigate to Provisioning > Instances.
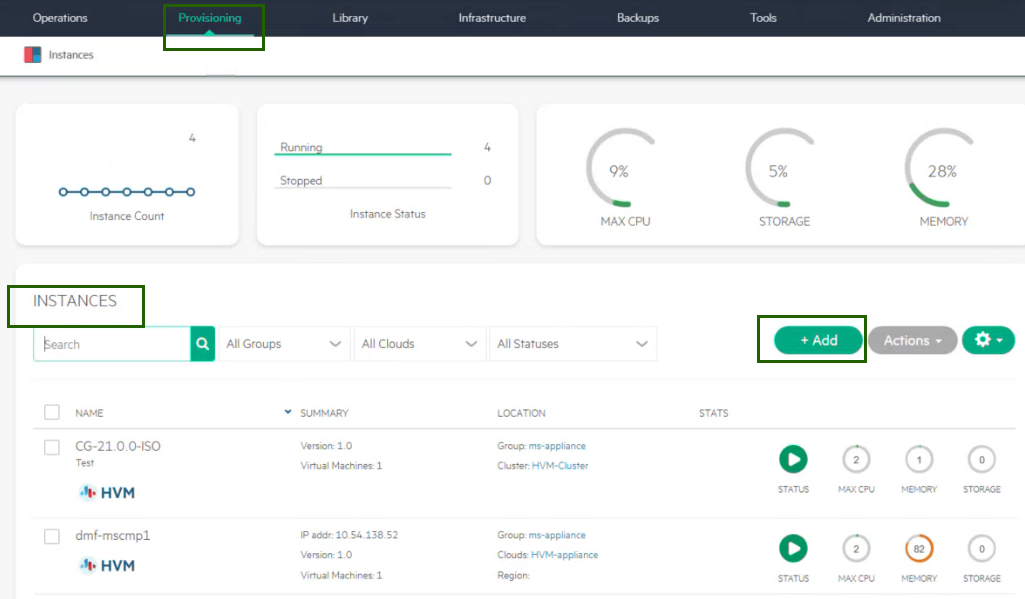
Click Add. The CREATE INSTANCE page is displayed.
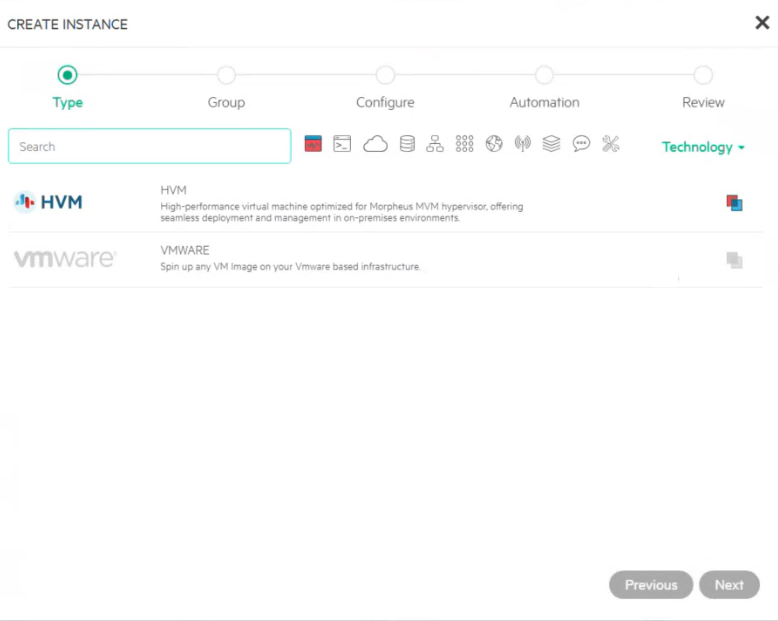
Select the HPE VME / HVM option.
Enter instance name in the CREATE INSTANCE page.
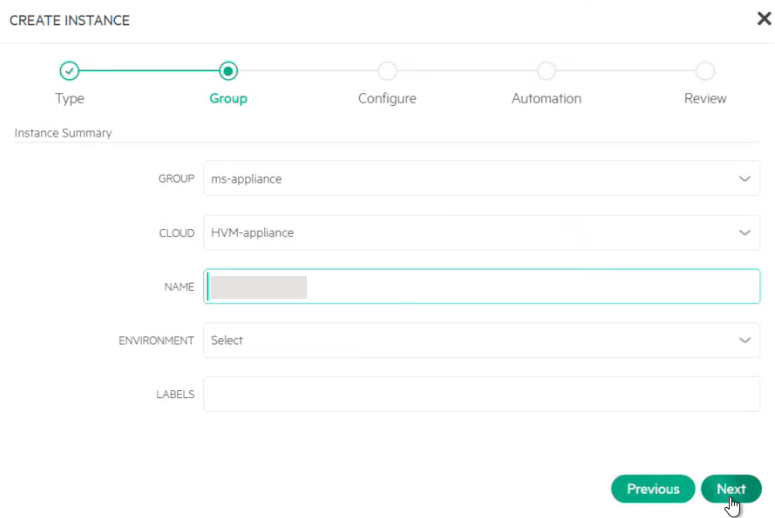
Click Next.
Enter the following configurations:
- Plan: 4 CPU / 16 GB Memory
- Resource Pool: HVM Cluster
- Volumes: root/60 GB/Standard
- Networks: Management
- Image: Select the ISO image you just created.
- Select Host from the drop-down.
- In Advanced Options drop-down, select:
QEMU ARGUMENTS - ATTACH VIRITO DRIVERS
- Click Next. You can skip the automation configuration options and click Next.
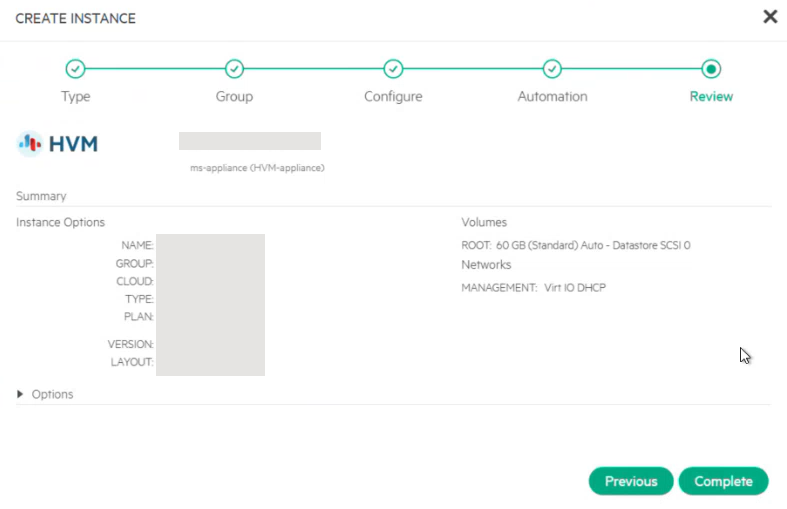
- Review the complete configuration and then click Complete.
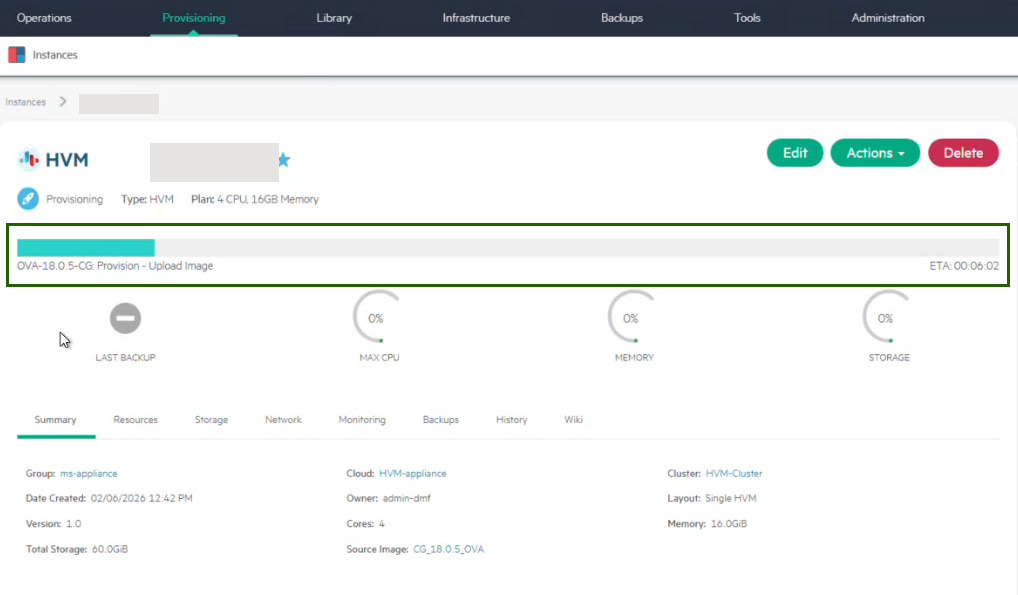
Step 5: Monitor Deployment and Confirm VM Status
After submission, the VM will show as Creating in the Library list. Click the VM and you can see the progress. When complete, status will show as green.
Step 6: Get the Gateway IP address (for Registration)
- In Instances, click the instance name.
- From Actions, select Open Console.
- Locate the IP address shown in the console.
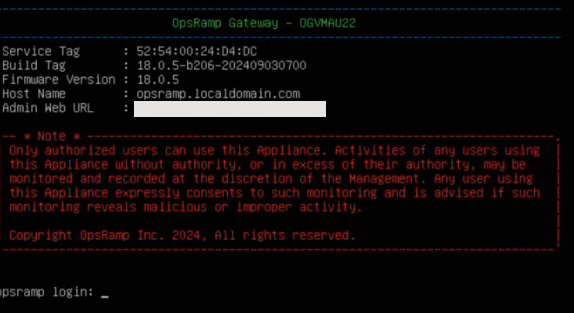
4. Use this IP for the standard OpsRamp gateway registration flow.
Step 7: Register the Gateway
Refer to the Register the Gateway page for step-by-step instructions for completing the Gateway installation.