A stock-keeping unit (SKU) is a label that allows the partners to automatically track the movement of inventory. The partners provide their services to the end clients based on the type of the resources. SKU helps track different types of resources and licenses that the Service Provider can limit to the end clients.
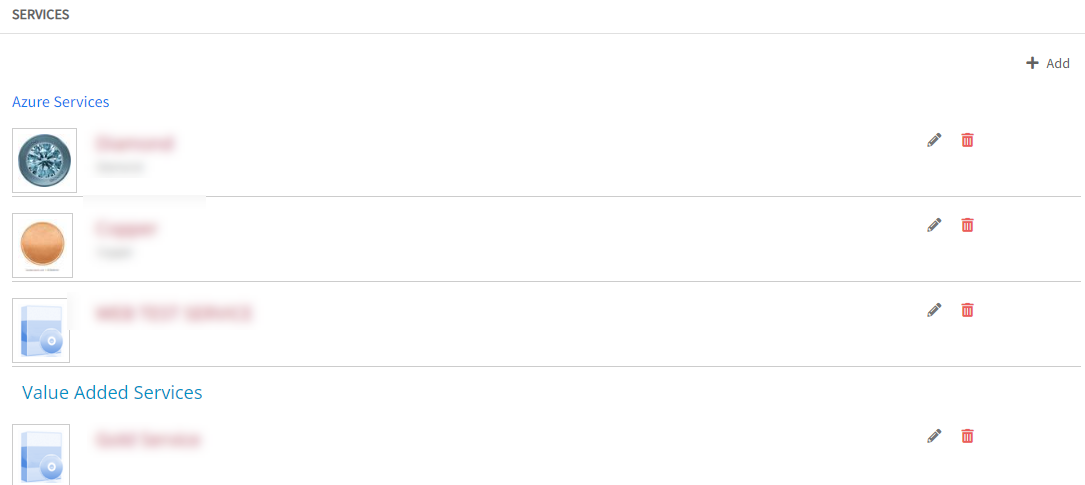
Services
To create a service:
Log in to OpsRamp.
Navigate to Setup > Orders > Services.
Click +Add.
Enter all the information on the Add Service page.
Click Save.
The service is created and displayed on the Services page.
You can perform the following actions after a service is created.
Edit: Click the edit icon to edit a service.
Delete: Click the delete icon to delete a service.
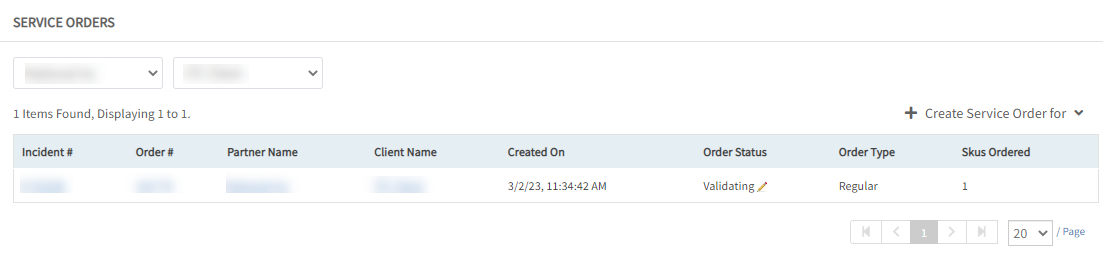
Service Orders
Service Orders have the information related to the resources. They provide information on different types of services provided by the partner to the end clients as per the signed agreement.
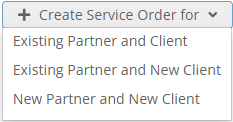
To create a Service Order:
Log in to OpsRamp.
Go to Setup > Orders > Service Orders.
Select the Partner and Client from the dropdown.
Click +Create Service Order and select the type of Service Order. The following options are displayed:
Select the required option and enter the details to create the Service Order.
The service order that is created is displayed on the Service Orders listing page.
The status of the order is displayed in the Order Status column as Validating. Other statuses are: On Hold, Rejected, Canceled, and Accepted. An order can be either accepted, kept on hold due to some reasons, rejected, or canceled.
Click the Edit icon in the Order Status column to change the order status.
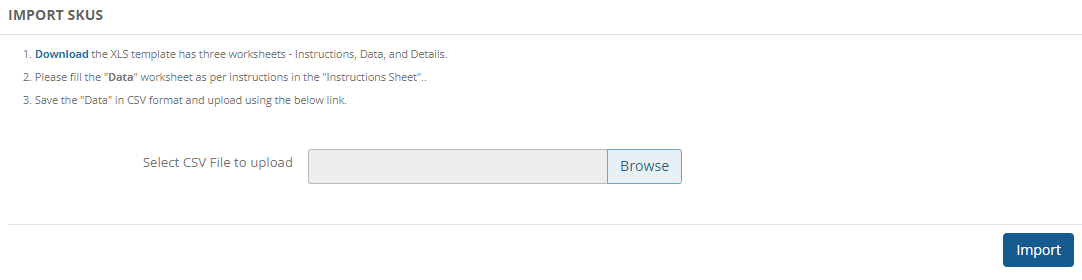
Import SKUs
Customers can import the SKUs through a predefined excel/CSV sheet. Import the SKUs or the SKU orders from local devices in CSV format as below:
Go to Setup > Orders > Import SKUs.
Follow the instructions to import the SKUs.
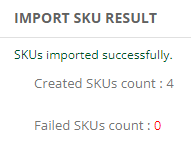
Click Import to upload the information to the server for orders.
The following success message is displayed:
Note: If there is any issue while importing the CSV file, a failure message is displayed. Upload the CSV file with the updated details.
Import SKU Orders
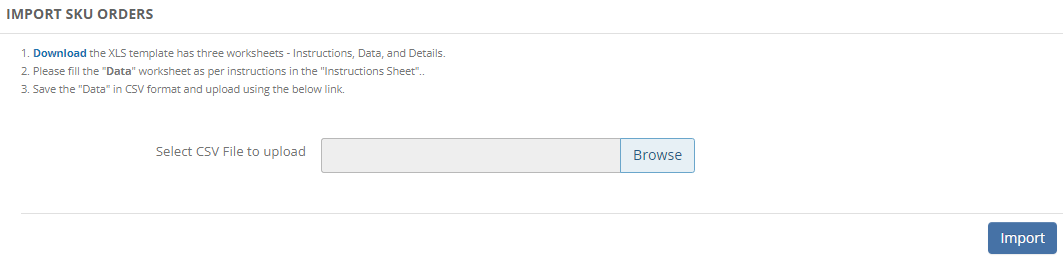
Import the SKU Orders from a local device in CSV format as mentioned below:
Navigate to Setup > Orders > Import SKU Orders.
Follow the instructions to import the SKU Orders.
Click Import to upload the information to the server for orders.
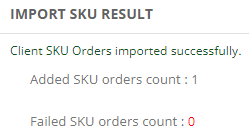
The following success message is displayed:
Note: If there is any issue while importing the CSV file, a failure message is displayed. Upload the CSV file with the updated details.
Manage End Client SKUs
SKUs created for the customers are managed to restrict the licenses or the resources allocated to them as per the signed agreement, and also to identify the differences between the devices and the billing properties provided.
To manage end client SKUs:
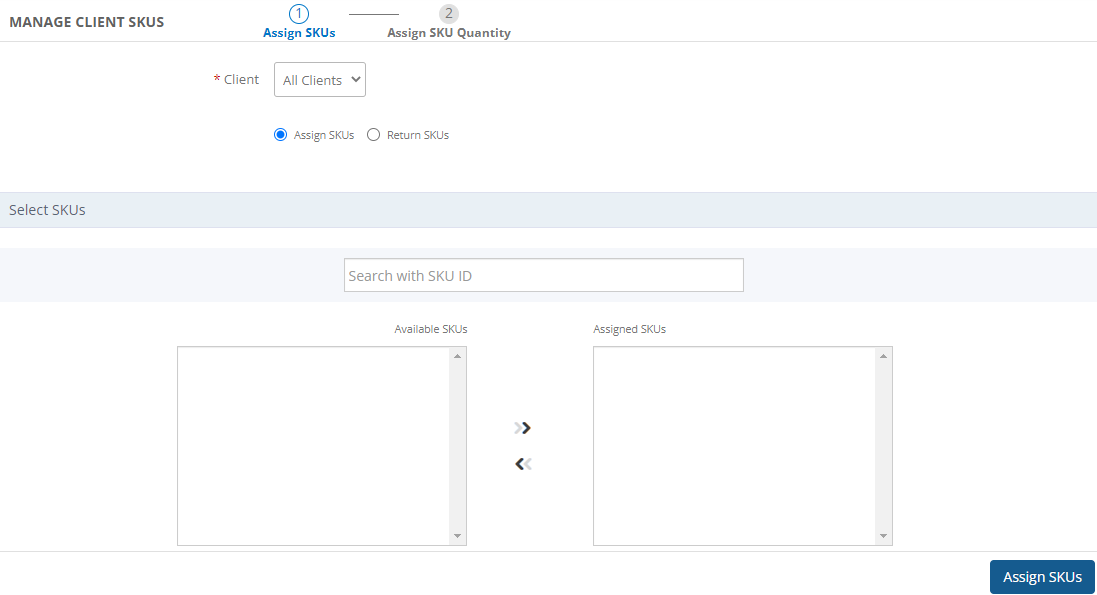
Navigate to Setup > Orders > Manage Client SKUs.
Select an end client from the dropdown.
To assign SKUs:
Select the Assign SKUs option.
Use the search box to search for the SKUs.
Select one or more SKUs from the Available SKUs section and then click the right arrow. The SKUs move to the Assigned SKUs section.
Click Assign SKUs.
From Assign SKU Quantity, review the details.
From the Assign SKU to client column, enter the number of SKUs you want to assign to the end client, and click Assign SKU Quantity. A message appears, “SKUs successfully assigned”. The partner and end client balance information is displayed.
To return SKUs:
Select the Return SKUs option.
Use the search box to search for the SKUs.
Select one or more SKUs from the Assigned SKUs section and then click the right arrow. The SKUs move to the Return SKUs section.
Click Return SKUs.
From Return SKU Quantity, review the details.
From the Return SKU Quantity column, enter the number of SKUs you want to return to the end client, and click Return SKU. A message appears, “SKUs successfully returned”. The end client balance information is displayed.
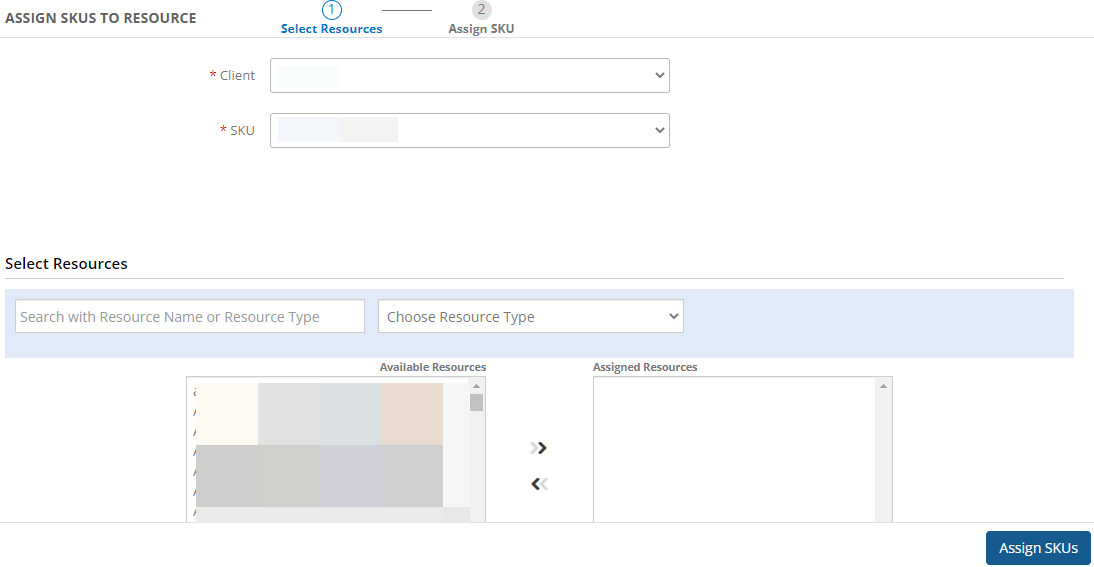
Assign SKUs to Resource
The platform that is being used does not offer any restriction with respect to the number of devices assigned. To control them, SKUs are assigned to the resources to identify the devices that come under the service orders.
To assign the SKUs to a resource:
Navigate to Setup > Orders > Assign SKUs to Resource.
Select the end client and the SKU from the dropdowns.
Use the search box to search for resources. You can also search using the Resource Type from the dropdown.
Select one or more resources from the Available Resources section and click the right arrow. The resources move to the Assigned Resources section.
Click Assign SKUs.
From Assign SKUs to Resource, enter the number of SKUs you want to assign to the resource, in the Select SKU Count column. To remove a resource, click the remove resource icon.
Click Assign. A message appears, “SKUs successfully returned”. The SKU information at the end client level is displayed.
SKU Inventory
SKU Inventory displays the inventory information at the partner and end client levels. Details like SKU Id, SKU Name, SKU Assigned to partners and clients, devices, partner and end client balance are displayed.
To view the SKU Inventory:
Navigate to Setup > Orders > SKU Inventory.
Select a client from the dropdown. The inventory details are displayed.
Click the SKU Id to view the SKU Attribute(s) and its value(s).
Click the number under the Assigned to Devices column to view the SKUs assigned to the devices.
Information like device name(s), type of device, and the number of SKUs assigned to the device is displayed.
SKU Report
SKUs are packages that define the level of services that are rendered to the end client.
This report is a partner-level report that provides details of SKUs assigned to each end client and each device under management.
This can be viewed under the Reports section.
Partner provides the SKU report when requested by the end client. To generate the SKU Report:
Go to Reports > Reports to view the reports section.
Navigate to Inventory and click on the SKU Report.
Select the client from the dropdown and click Create Schedule. The Create Scheduled Report page is displayed.
Enter the details and click Save.
The report generated is then sent to the end clients.
The generated report contains data related to the SKUs assigned to the end clients. The report also contains information about the number of SKUs assigned to the devices (along with the device type) and the end client balance.