Introduction
Change management ensures the seamless deployment of new changes while minimizing disruption and downtime. ITIL-based change management follows a structured process to prevent unintended interruptions and capture essential details before implementation, such as the reason for the change, planning, and approval.
It closely integrates with incident management, problem management, and configuration management to oversee infrastructure and Configuration Items (CIs) impacted by or changing.
Sources of Change Requests
Change requests typically originate from:
- Problem reports identifying bugs that need fixing.
- System enhancement requests submitted by end users.
- Modifications in underlying infrastructure, standards, or policies.
Change Assessment & Planning
Effective change management begins with thorough assessment and planning, which includes:
- Prioritization: Analyze the reason for the Request for Change (RFC), categorize it based on risk and impact, and determine the change type.
- Scheduling: Define the planned start and end dates, ensuring no conflicts with other scheduled activities.
- Rollout Planning: Outline the implementation steps and approach.
- Stakeholder Identification: Identify the key personnel responsible for executing the change and the approval authorities.
Change Approval Process
The approval process varies based on the type of change:
- Major Changes require approval from the Change Approval Group and senior management.
- Standard Changes are pre-approved and do not require Change Approval Group approval.
- A change request is approved only if all designated approvers provide consent. If rejected, it undergoes reassessment, review, and resubmission.
Change Implementation
Once a change is approved, it proceeds to the implementation phase, which includes the following:
- Change Plan: The approved change is deployed with assistance from the release management team.
- Test Plan: The release team follows predefined testing and validation procedures to ensure stability.
- Rollback Plan: A contingency plan is in place to restore services to the previous version if the change fails.
By following this structured process, organizations can effectively manage changes, reduce risks, and maintain operational stability.
Configure Change Request Settings
You can customize change request details by customizing available fields alongside predefined fields.
To Configure Change Request Settings:
Navigate to Setup > Account > Service Desk.The Settings page is displayed.
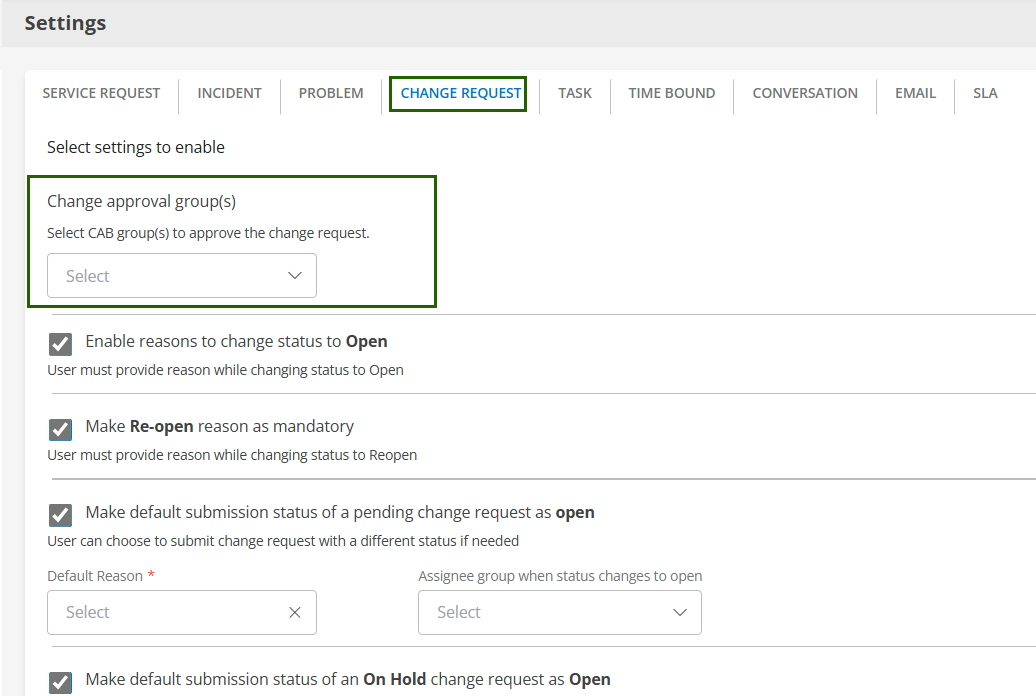
From the top navigation tabs, select CHANGE REQUEST and configure the required settings.

Click SAVE to apply the changes.
Change Request Settings
To apply the settings to all users within a specific client, select the client. If no client is selected, the settings apply to all clients under the partner account. Configure the Change Approval Group using user groups created for the organization.
Change Approval Group
The Change Approval Group defines the users responsible for reviewing and approving change requests. You can assign these groups based on organizational requirements.
Create a Change Request
Change requests can be initiated using the following methods:
- Service Desk - Users can create change requests directly within the Service Desk module. This method ensures proper tracking, categorization, and assignment of change requests within the system.
- Email - Users can also create change requests via email, offering an alternative method for submitting requests.
Create a change request with Service Desk
- Navigate to Command Center > Tickets.The Tickets page is displayed.
- Click ADD + and select Change.The ADD CHANGE page is displayed.
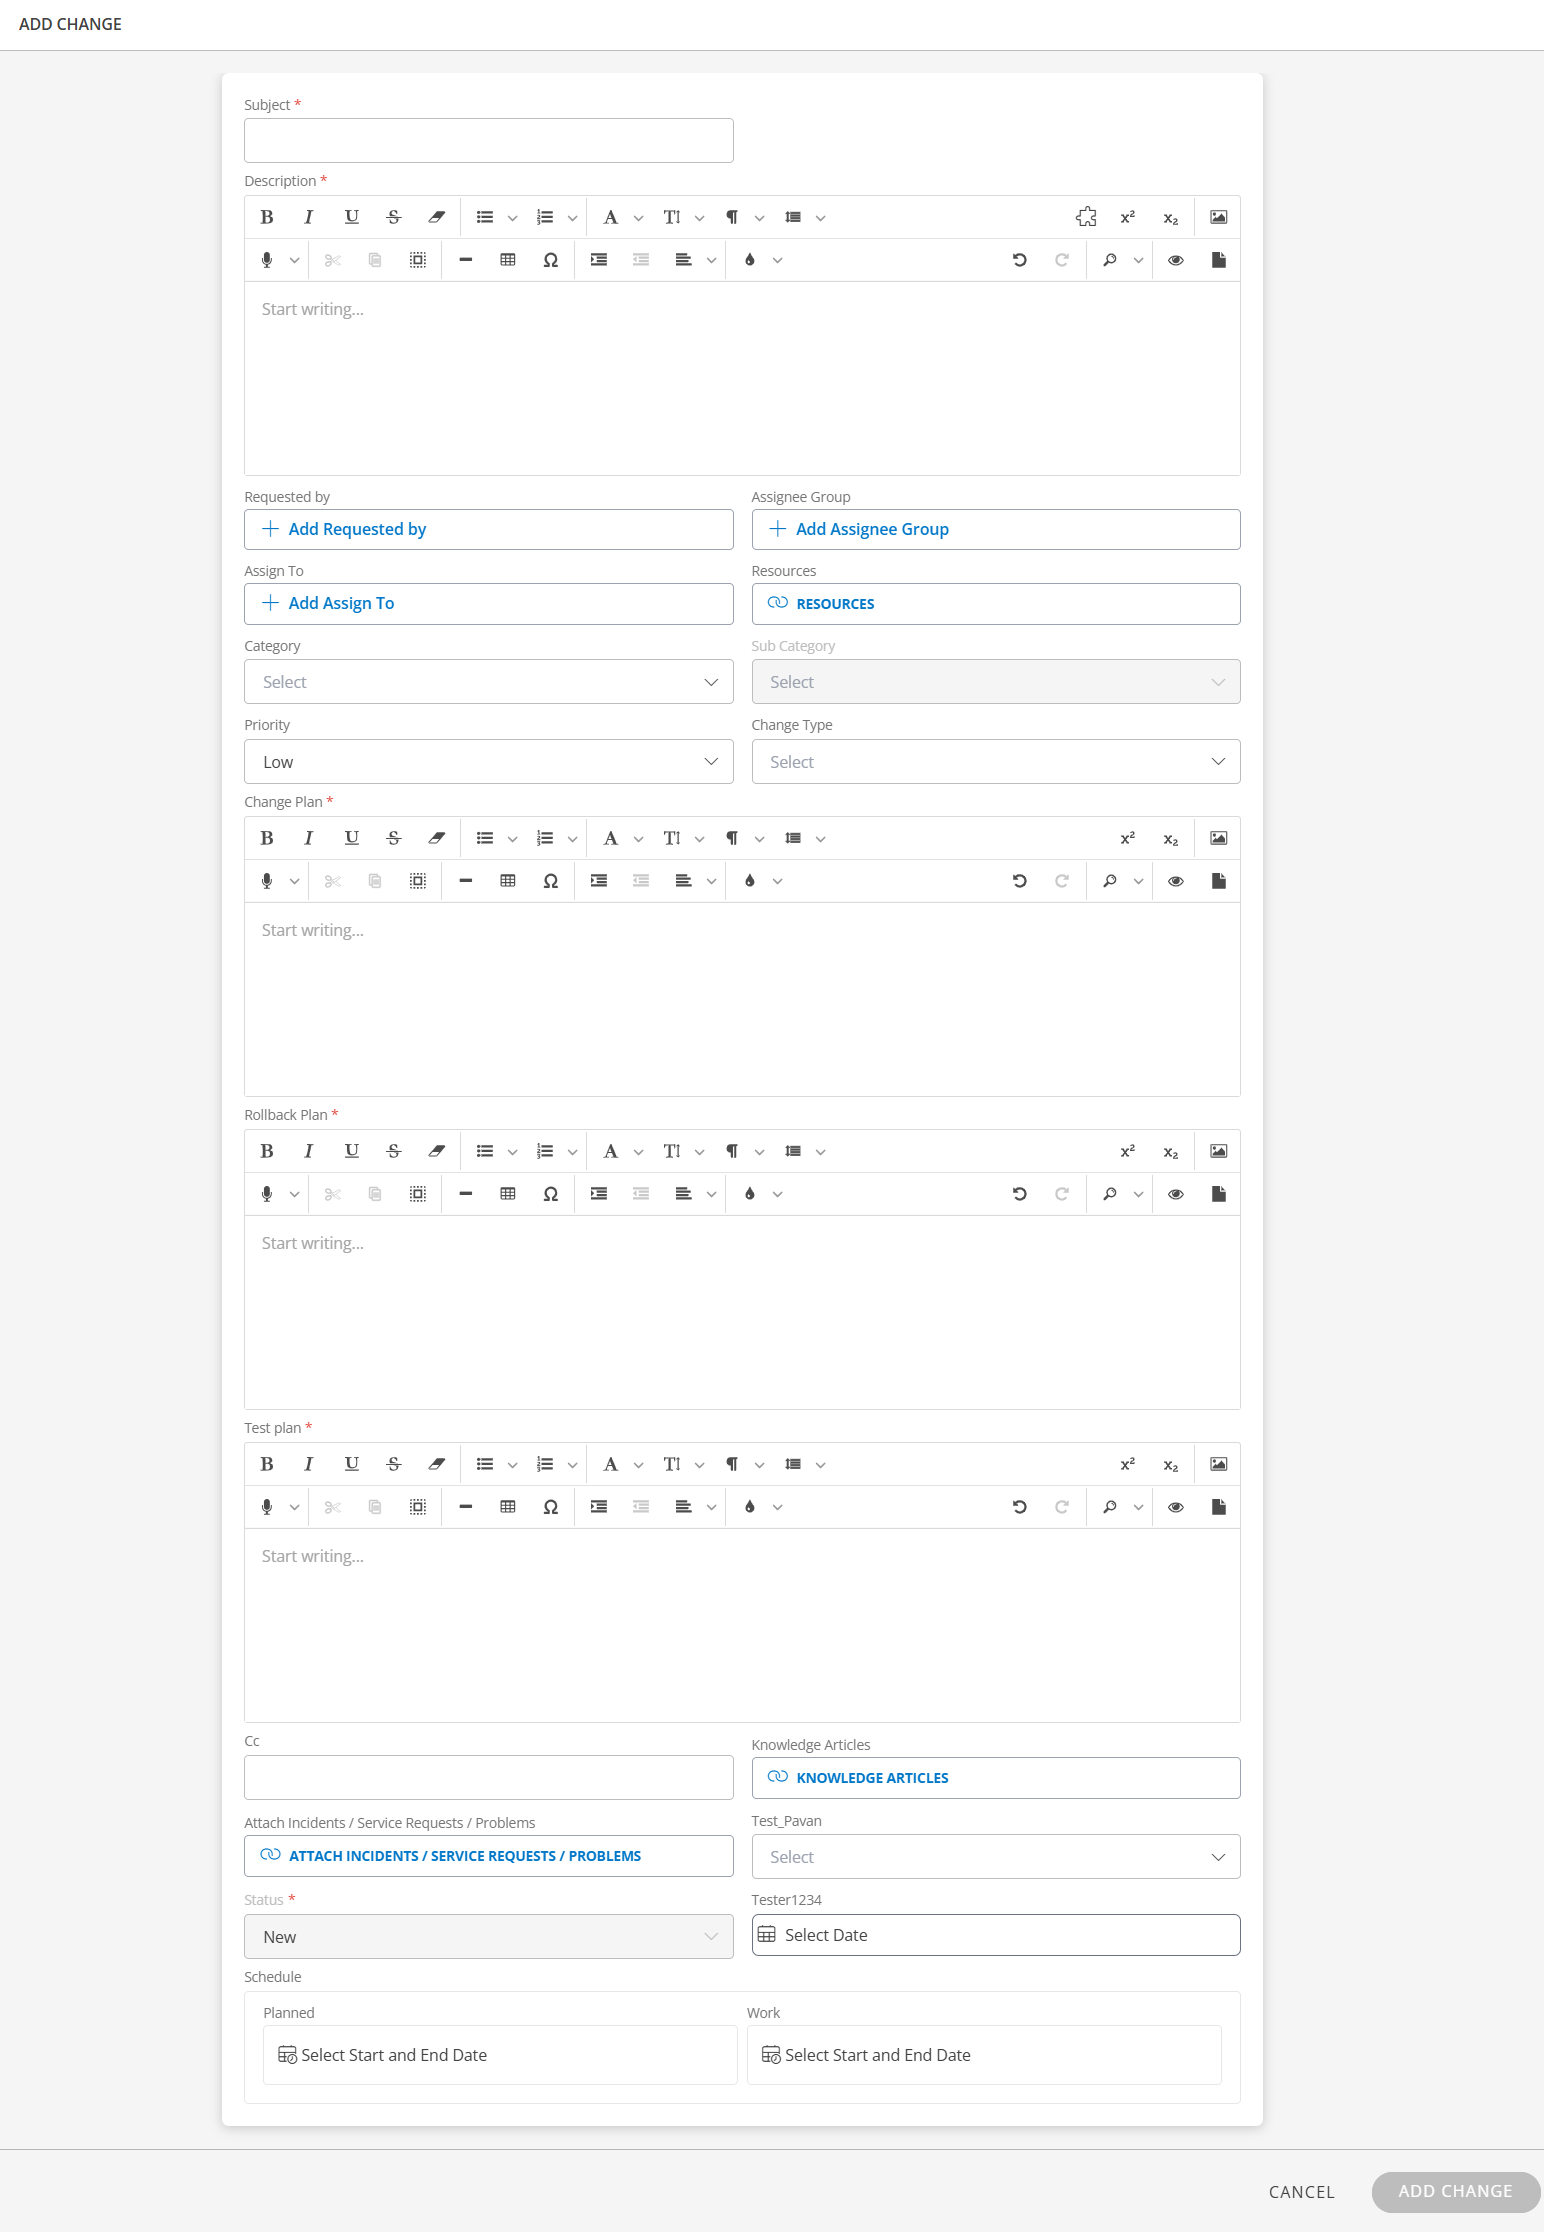
- Enter the following information:
| Field name | Description |
|---|---|
| Subject | Title or summary of the change. |
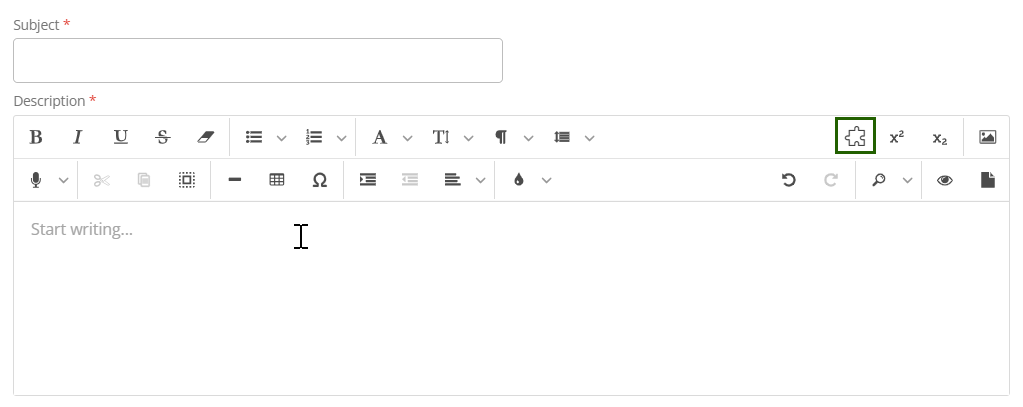
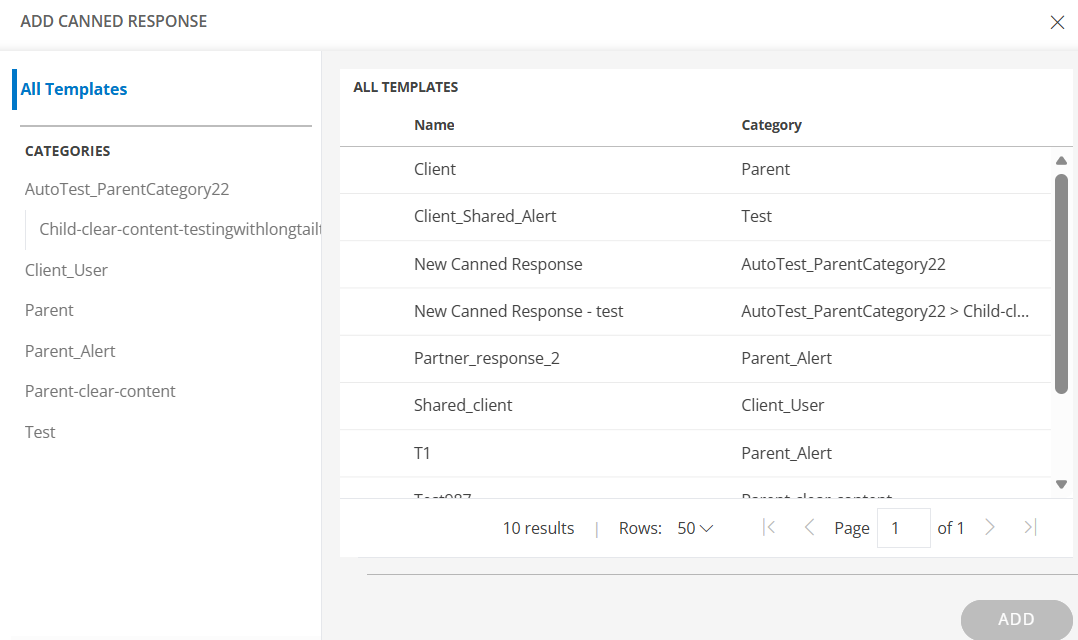
| Description | Provide a detailed explanation of the change. This can include the actual behavior, expected behavior, and steps to reproduce the issue.You can also use the Canned Response option to quickly insert predefined, categorized response templates. Click the Canned Response icon to view the available categories, select a template, and the content will be automatically added to the Description field.
  |
| Requested By | Select the user who is requesting the change. |
| Assignee Group | Choose a group responsible for managing the change. |
| Assign to | Assign the change request to a specific user for execution. |
| Resources | Specify the resources required for implementing the change. |
| Category | Select a category and sub-category to classify the change. |
| Sub Category | Subcategory under the category to which the change is mapped. |
| Priority | Define the urgency of the change. Available options: Very Low, Low, Normal, High, Urgent. |
| Change Type | Select the type of change. |
| Change Plan | Outline the steps involved in executing the change. |
| Rollback Plan | Plan to restore services to the previous version if change implementation fails. |
| Test Plan | Plan to test the implemented change to ensure adherence to quality. |
| Cc | Add users who should be notified about the change request. |
| Knowledge Articles | Link the KB articles to the incident. |
| Attach Incidents / Service Requests / Problems | Link related incidents, service requests, or problems to the change request.[ |
| Schedule | Planned and actual time duration of change implementation. |
| Attach Requests | Attach any Incident, Service Request, or Problem Request to the change request.NoteYou cannot attach the same type of Incident, Service Request, or Problem Request to multiple change requests. |
- Click ADD CHANGE to initiate the request.
Create a change request with Email Requests
- Navigate to Setup > Account > Integrations.
- See Email Requests for more details on configuring Email Requests for change requests.
View Change
Access and review change details and track their progress.
The Change page displays the following attributes:
| Attributes | Description |
|---|---|
| Status | Indicates the current state of the change. |
| Subject | A summary or title that describes the change. |
| Requested On | The date and time when the change was created or reported. |
| Approval | Status typically refers to the decision-making process within the change approval workflow. |
| Change Properties | Contains key details related to the change. |
| Change Configurations | Settings and rules that define how changes are handled. |
The Change page displays the following tabs:
| Tabs | Description |
|---|---|
| Activity | User activities on change. The Activity tab includes the log, conversation, status, and notes related to the change.
|
| Resources | The resources on which the change is identified. |
| Articles | A section where you can view related knowledge base (KB) articles or add a new article. |
| Attached Requests | This section allows you to view any attached service requests, incidents, or problems, as well as the option to add a new one. |
| Integration Log | A log that contains inbound and outbound third-party communication details. |
Edit a Change
You can modify change details or update multiple changes at once.
Edit a Single Change
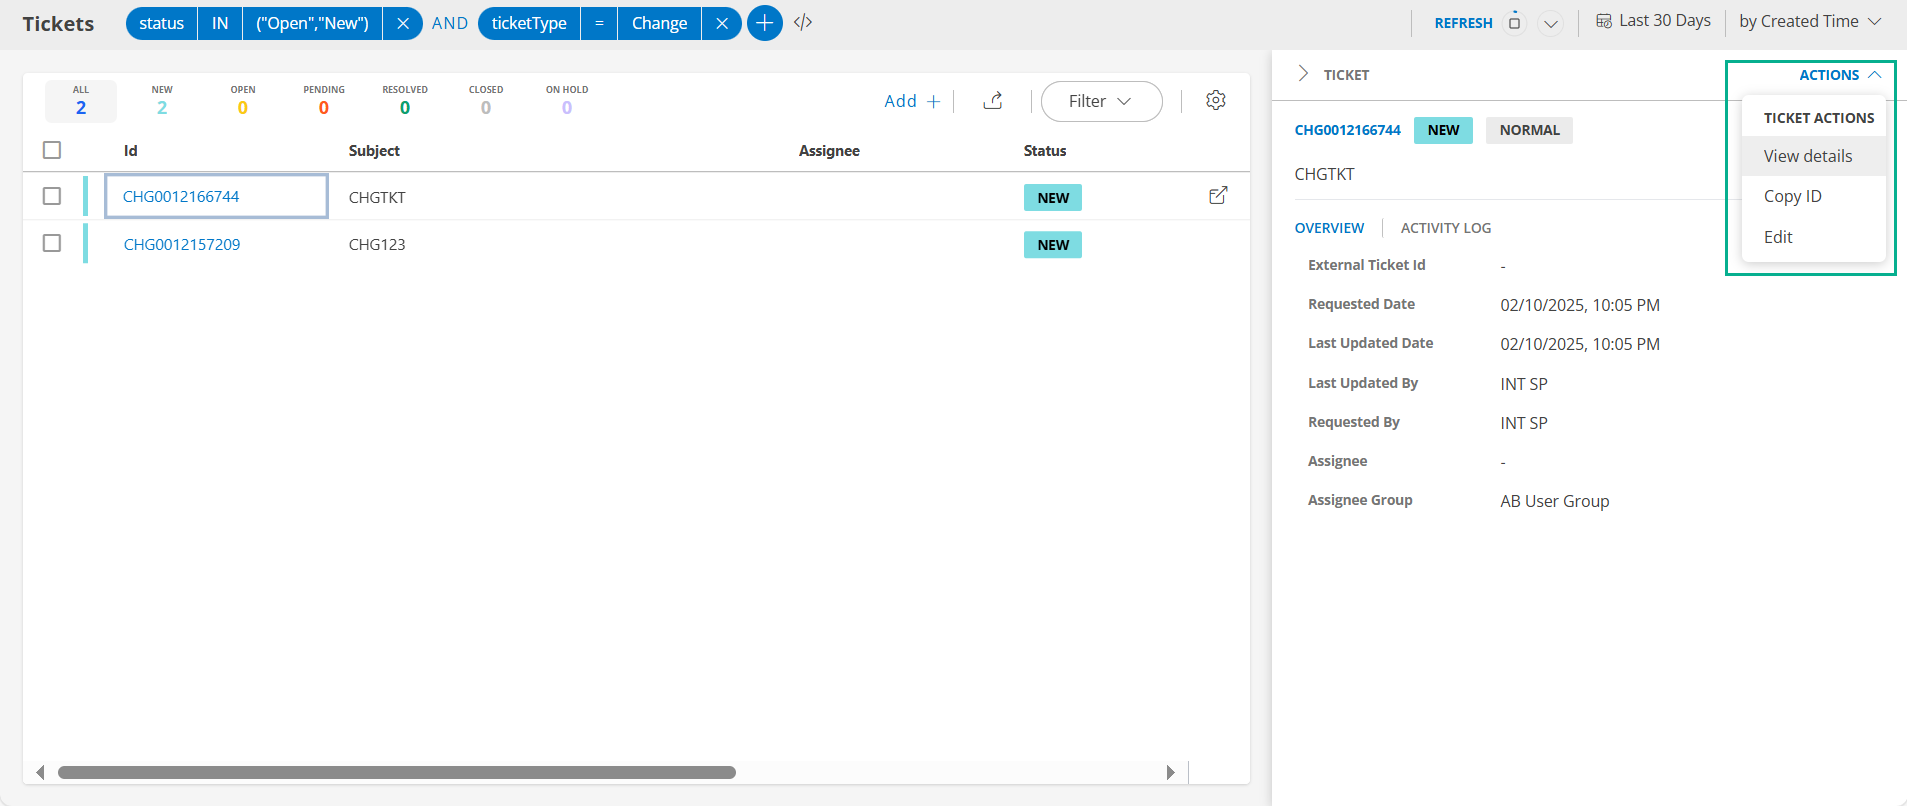
- Navigate to Command Center > Tickets and select a change that you want to modify.
- You can either click on the change ID to modify the details and save them or select Edit from the Actions dropdown menu to make changes to the details.
Bulk Edit Changes
- On the Tickets page, select the multiple changes for which you want to perform a bulk update.
- Click BULK UPDATE.The Update Actions page is displayed.
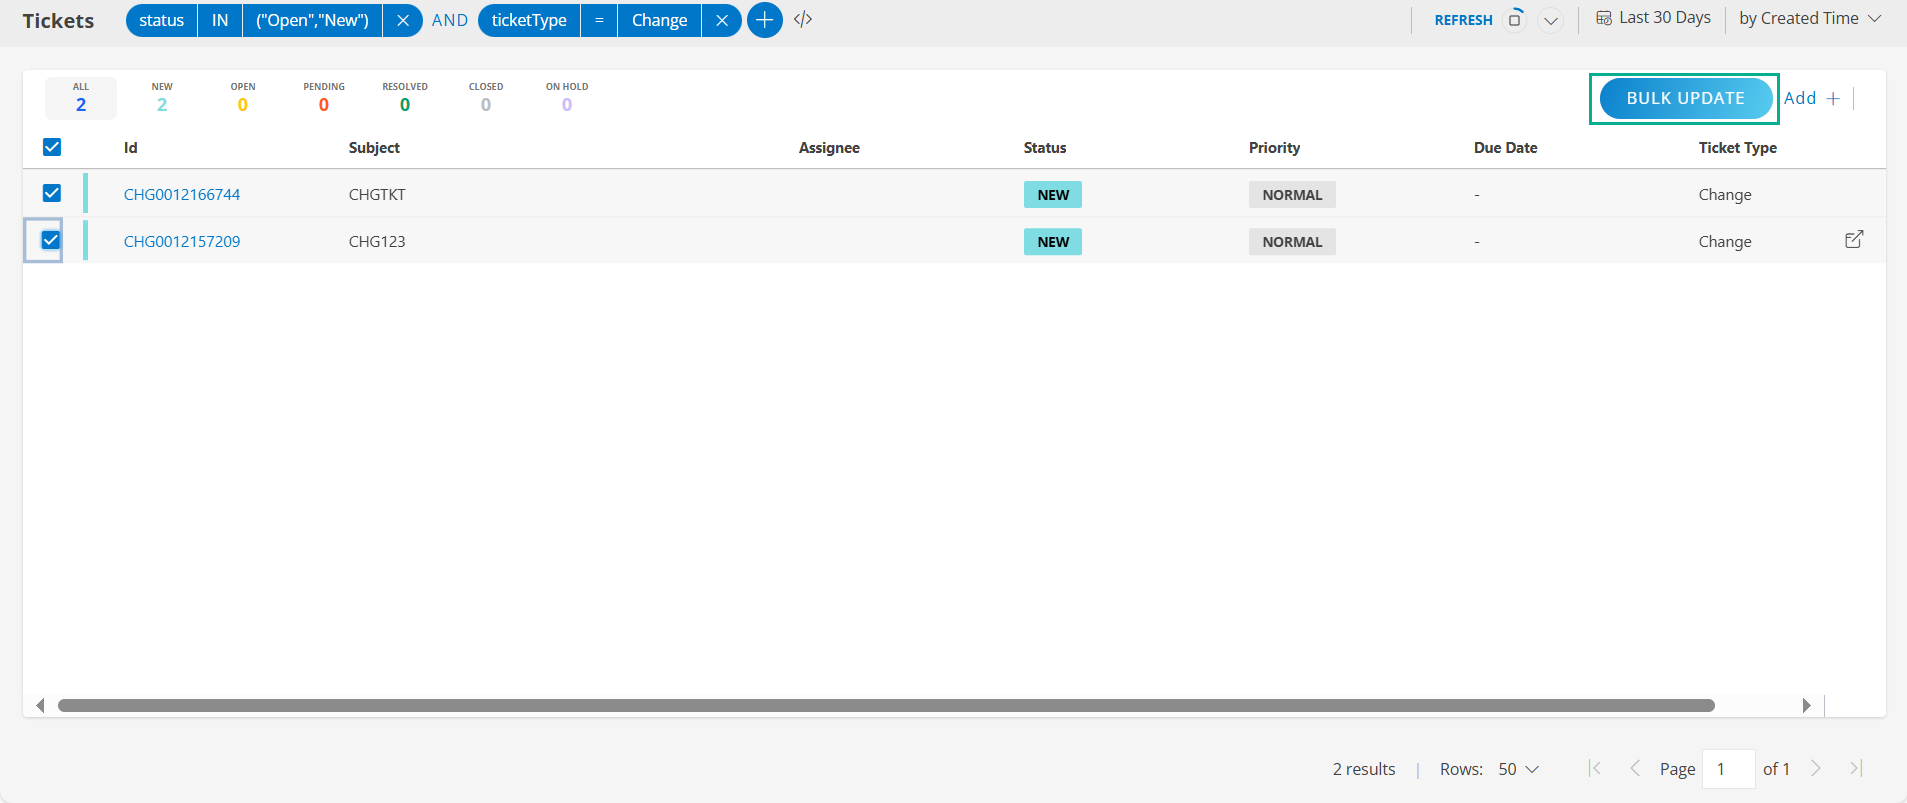
- Make the necessary changes and click SAVE.
Associate Changes with Other Entities
Link a new Incident / Service Request / Problems
- Navigate to Command Center > Tickets.
- Click Change ID.
- On the change details page, select the ATTACHED REQUESTS tab.
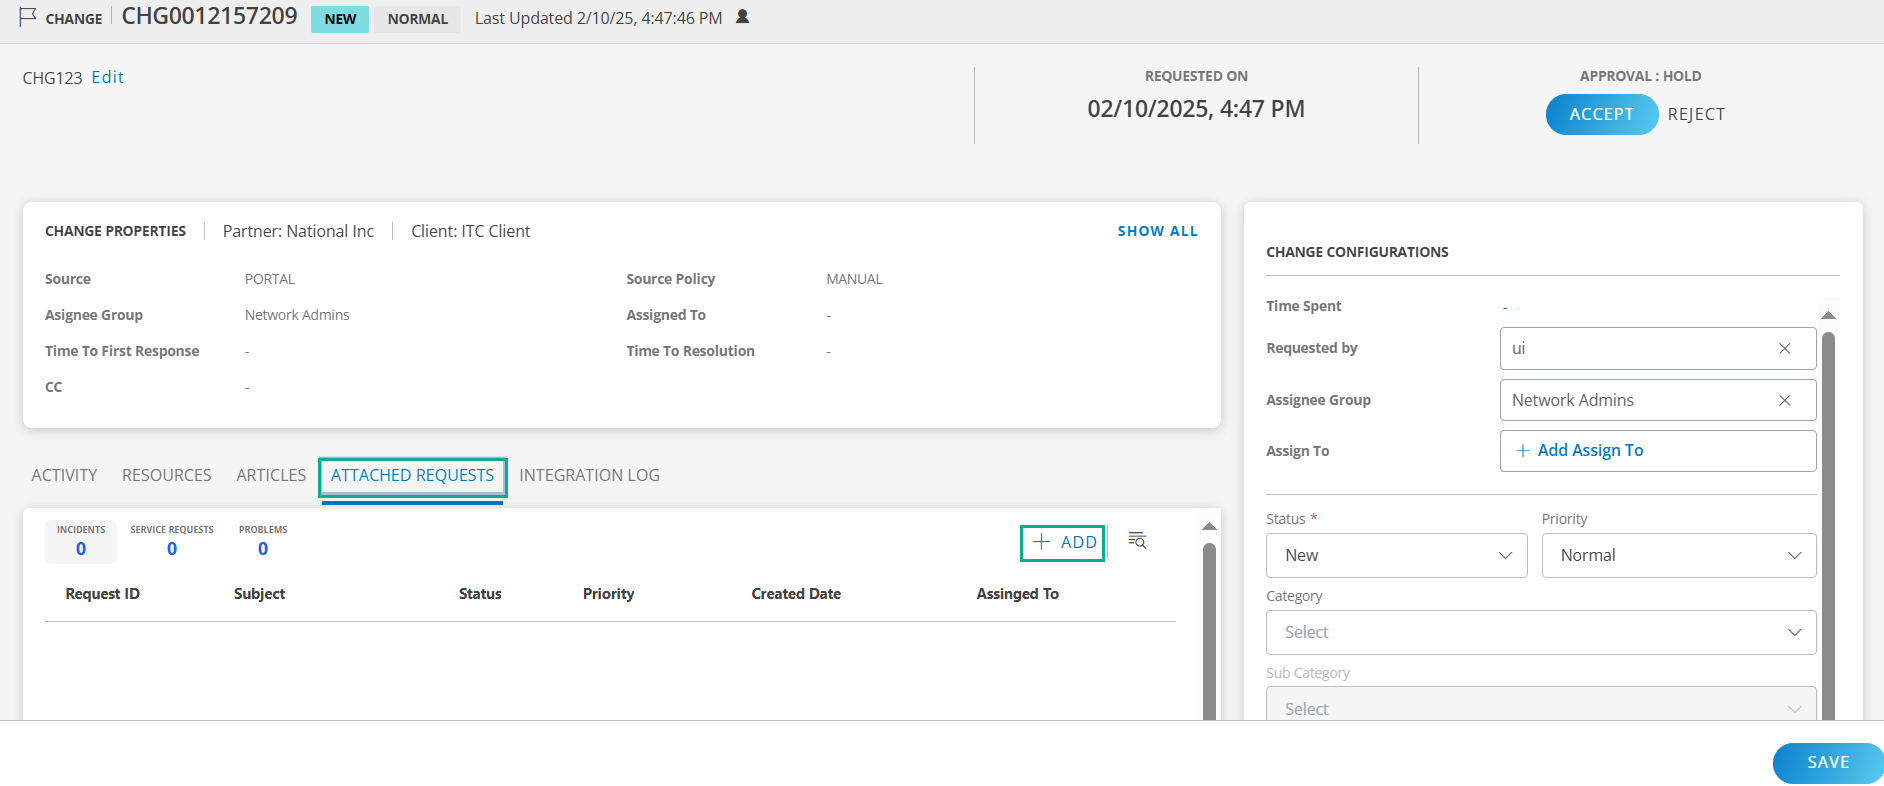
- Click + ADD to add a new incident, service request, or problem.The Attached Requests page is displayed.
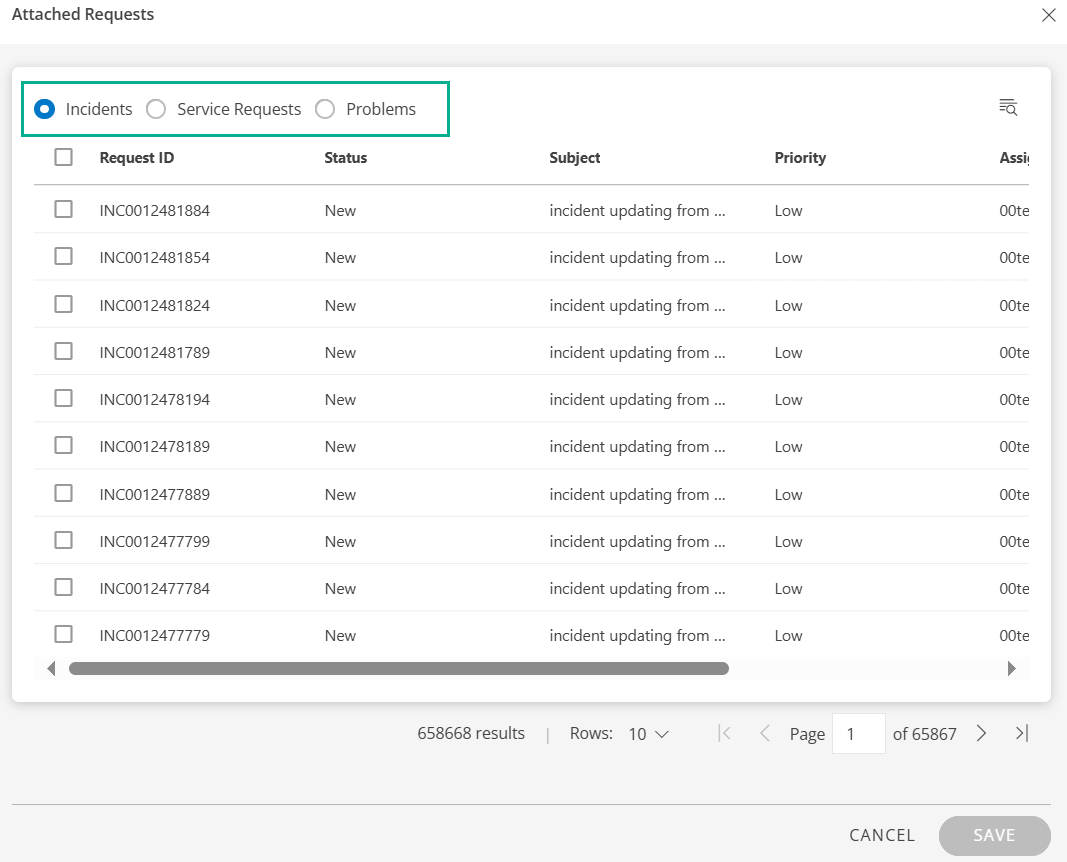
- Select the request ID you want to add and click SAVE.
Close a Change
Configure Auto-Close Policies to close changes that are resolved and that are in an inactive state for a certain elapsed time.
- Navigate to Setup > Account > Service Desk.
- In the left navigation pane, navigate to the Automation section and select Auto Close Policies.The Auto Close Policies page is displayed.
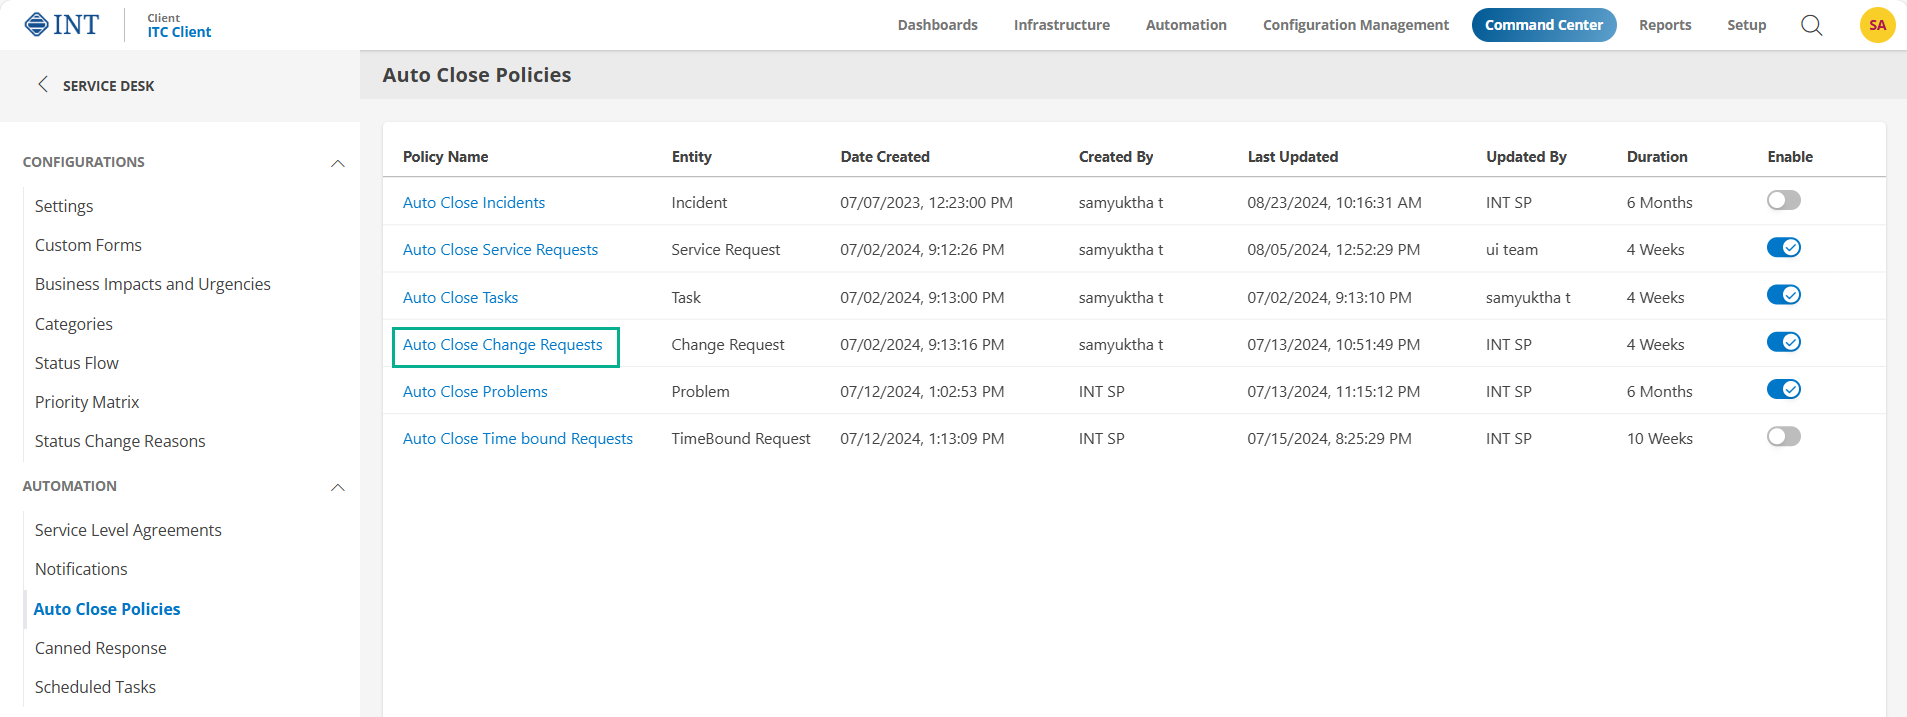
- From Auto Close Policies, select Auto Close Change Requests.The POLICY - AUTO CLOSE SERVICE REQUESTS screen is displayed.
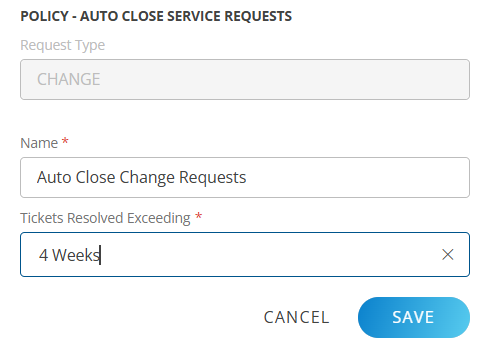
- Enter the following information:
| Field | Description |
|---|---|
| Request Type | Type of the request. |
| Name | Auto-close policy name. |
| Tickets Resolved Exceeding | Inactive interval of a resolved change beyond which the change needs to be closed. |
- Click SAVE to activate auto close.
Change Request Approval Process
The Change Request workflow includes an approval mechanism that ensures only authorized users can approve or reject change requests. Access to approval actions is based on user group membership defined in the Approval Groups configuration.
When a user who belongs to the configured approval groups logs in and opens the ticket, the Approve and Reject options are displayed. The user can take appropriate action to approve or reject the Change Request directly from the ticket view.
Configuration Steps
Navigate to Setup > Account > Service Desk > Settings.
Click CHANGE REQUEST tab.
Under the settings section, add one or more user groups as approval groups under Change approval group(s).Only users within these groups will have permission to approve or reject change requests.