Resources can be logically organized according to where they are physically located using Site Details functionality.
For example, all the resources in your corporate office can be grouped based on the location of your office.
The following can be viewed:
Policy log and schedule maintenance for the group of resources can be viewed.
Availability statuses of the resources belonging to the site or the location.
Before you start, discover all the resources for your location.
Create sites
A Partner user with permission to manage all devices can create a Site.
Site creation includes providing details about a location and adding resources belonging to that location. One device cannot be added in two locations.
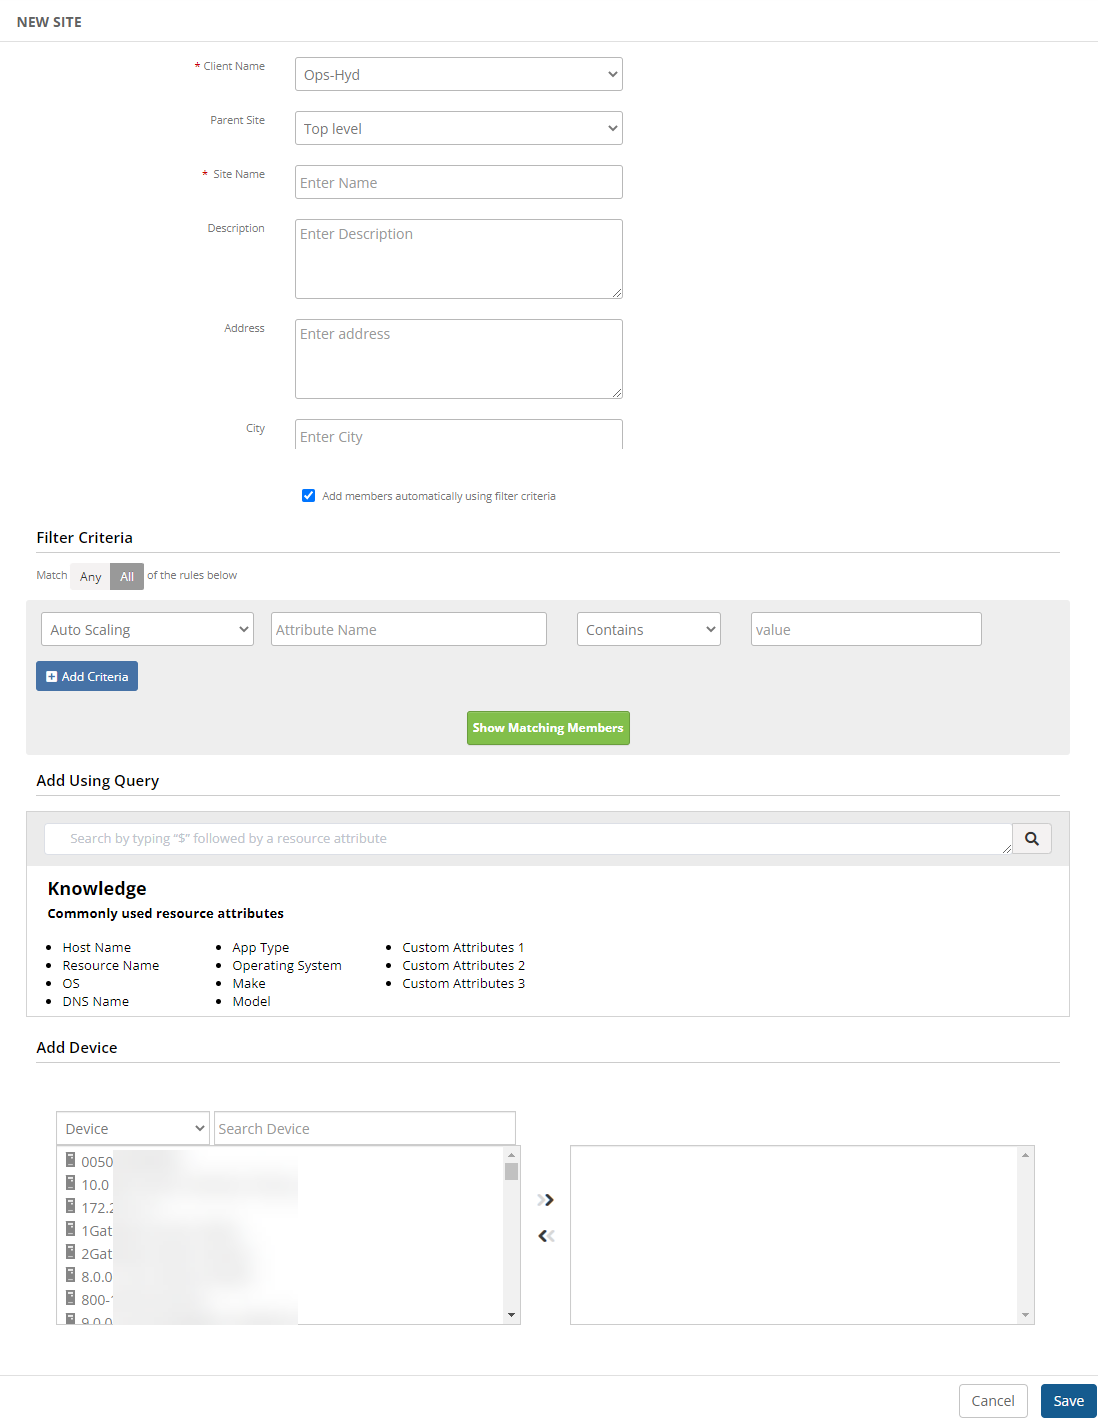
Go to Setup > Resources > Site Details and click Create New. If Sites are already existing, click +Add. The NEW SITE page is displayed.
From the expanded page, enter:
Select a client from the drop-down list of Client Name.
Provide a location where the head office or the topmost level of the organization resides.
Give a site name typically based on the location of the resources.
Provide details about the site in the Description box.
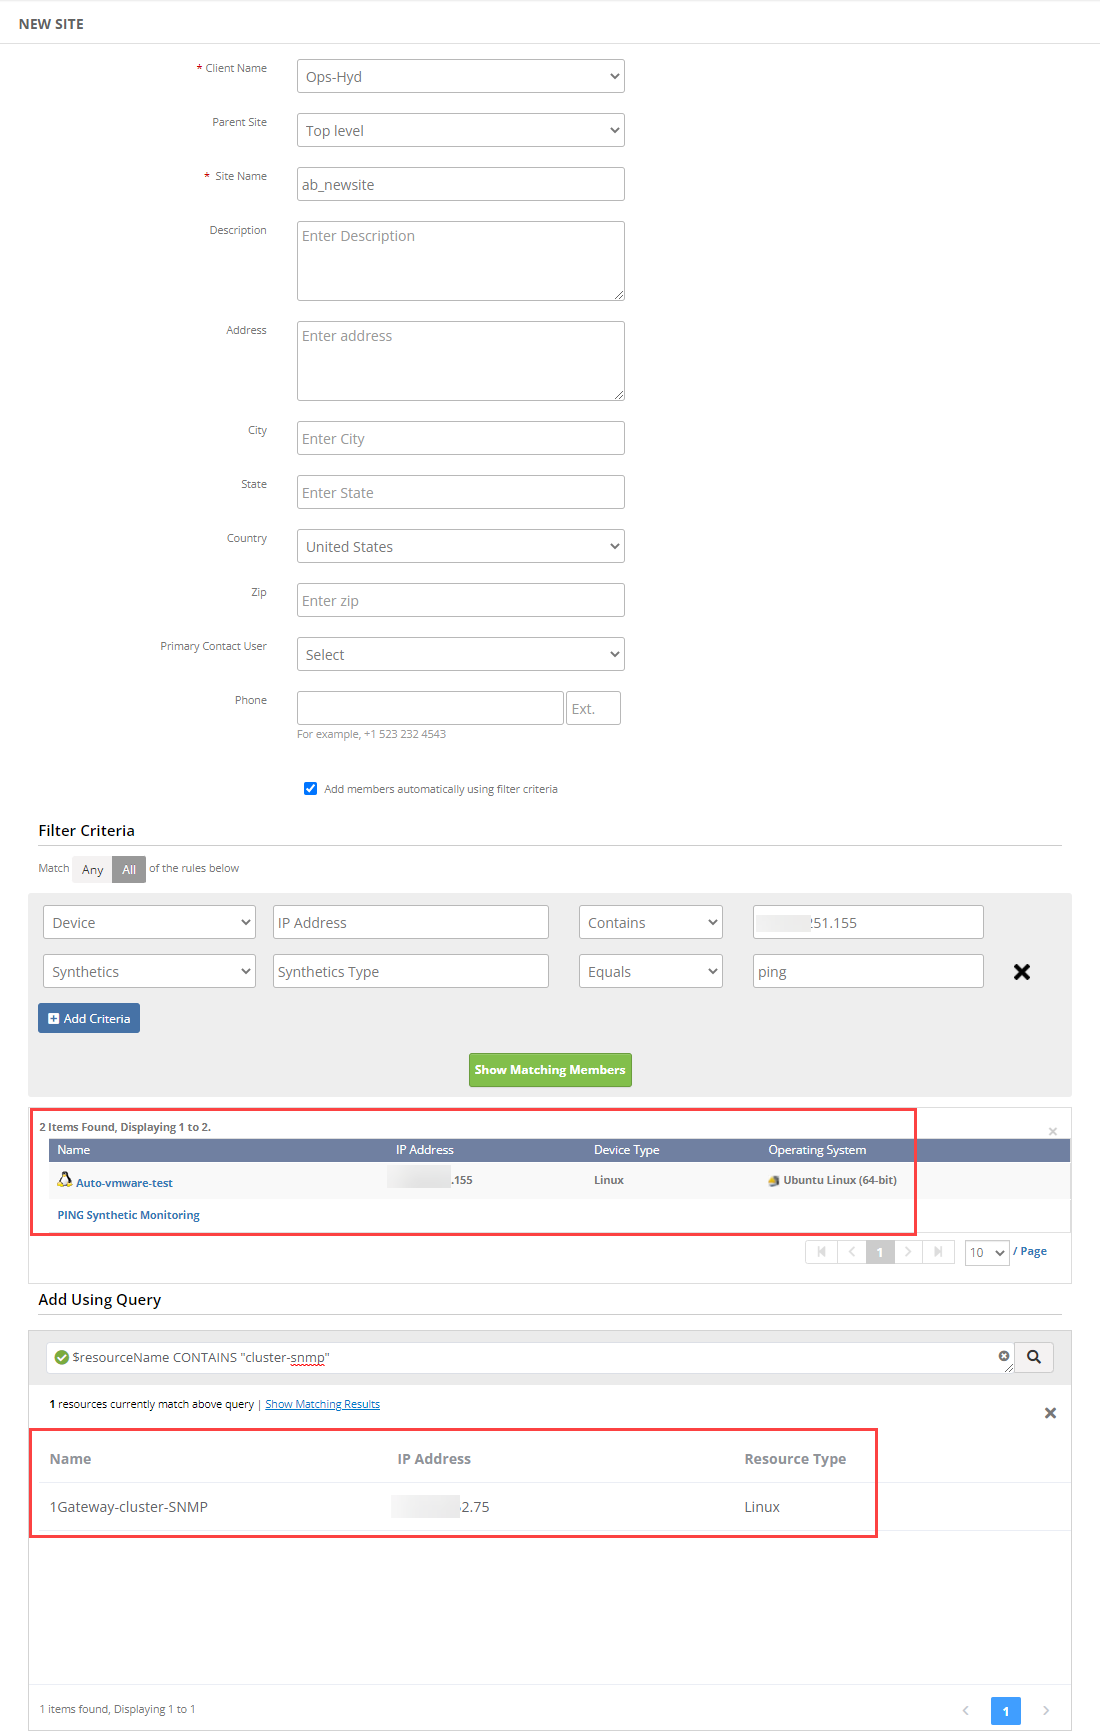
Enter the address, city, state, country, zip of the location.
Select the primary contact person from the drop-down list.
Enter the phone number.
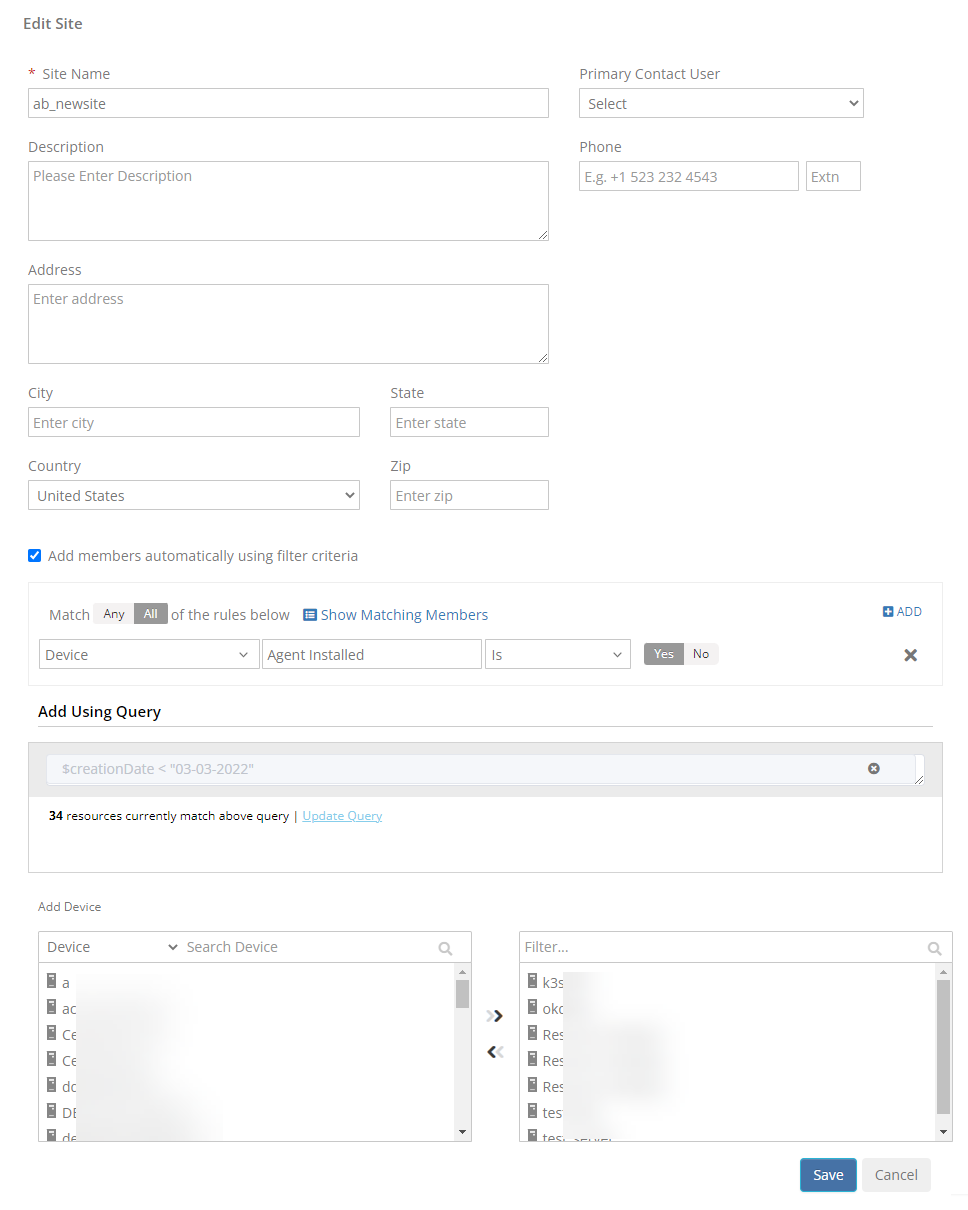
(Optional) Select the checkbox of the option Add members automatically using filter criteria
to add the resources to the site location through the filter criteria.
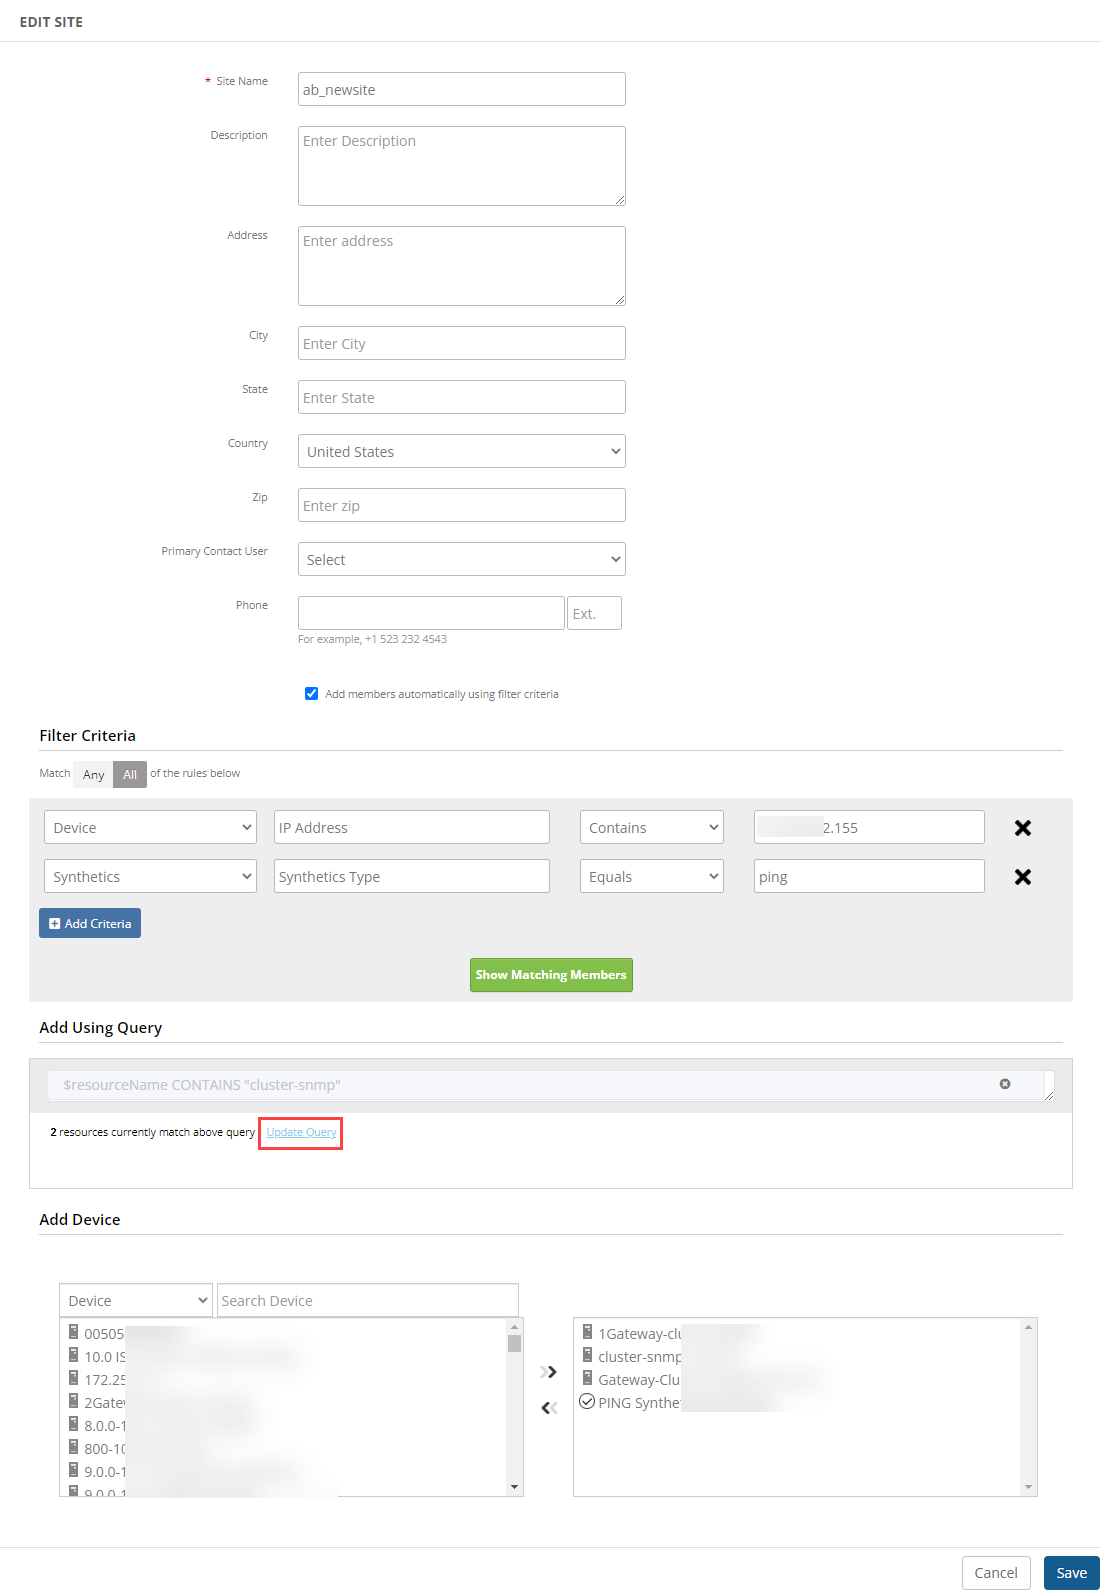
Add resources to the site using the following filter criteria description:
Click Any or All to match any one or all of the defined conditions for filtering.
Select the options for the following filter criteria fields:
Resource Type: Lists all the supported resource types. Select the Resource type from the list.
Attribute Name: Lists attributes. Attributes vary according to the resource type chosen.
Logic condition: Logical match criteria to enhance search results. Options include: Contains, Not Contains, Equals, Not Equals, Starts With, Ends With, and regex.
Value: Value corresponding to the attribute name and logic condition.
Click Add Criteria to include more filter criteria.
Click Show Matching Members to see a list of all the devices matching the criteria is displayed.
Add resources using query language specifying your requirements, in the Add Using Query section.
To enter a query:
Type “$” followed by a resource attribute. Once you type “$” the resource attributes are auto-populated. Examples of resource attributes: Agent Deploy time, Agent Version, DNS Name, etc. Select the attribute followed by a space and key operator value. Examples of key operator value: “<”, “>”, “=”, “IS”, “contains”, “IS NOT NULL”, “IN”, etc. Give a space after you select/enter the key operator value and enter the Value enclosed in double quotes. You can give multiple queries. Use AND or OR condition between the queries, as needed. A green tick after entering a query indicates that the query is valid. A forbidden icon indicates that the query is incomplete or the format is incorrect. Click search icon. The number of resources that match the query is displayed. Click Show Matching Results. Resource list is displayed with Name, IP Address, and Resource Type details. Note: When using REGEX and REGEX NOT:
avoid using square brackets with \d or \s
For example:
$name REGEX "a[\s+].*" This expression can be written as $name REGEX "a\s+.*"
$name REGEX "a[\d+].*" This expression can be written as $name REGEX "a\d+.*"
avoid using ^ and $ in attribute value.
For example:
$name REGEX "^abc.*" This expression can be written as $name REGEX "abc.*"
$name REGEX ".*abc$" This expression can be written as $name REGEX ".*abc"
Select resources from the Add Device section and click right arrow icon to add the list of resources for the site. You can use the dropdown or search box to search for a resource. This is in addition to the resources defined in Filter Criteria section.
Click Save.
The site details appear in the list on the Site Details page.
The following is an example of how Filter Criteria and Add Using Query features work:
The Site is created using two different resource types that are provided as filter criteria, along with a query.
Note: When two different Resource Types are selected using the ALL Rules criteria, the rules are applied individually on each Resource Type. Resources will be filtered against each resource type. Resource types are matched separately and the result is a sum of both.
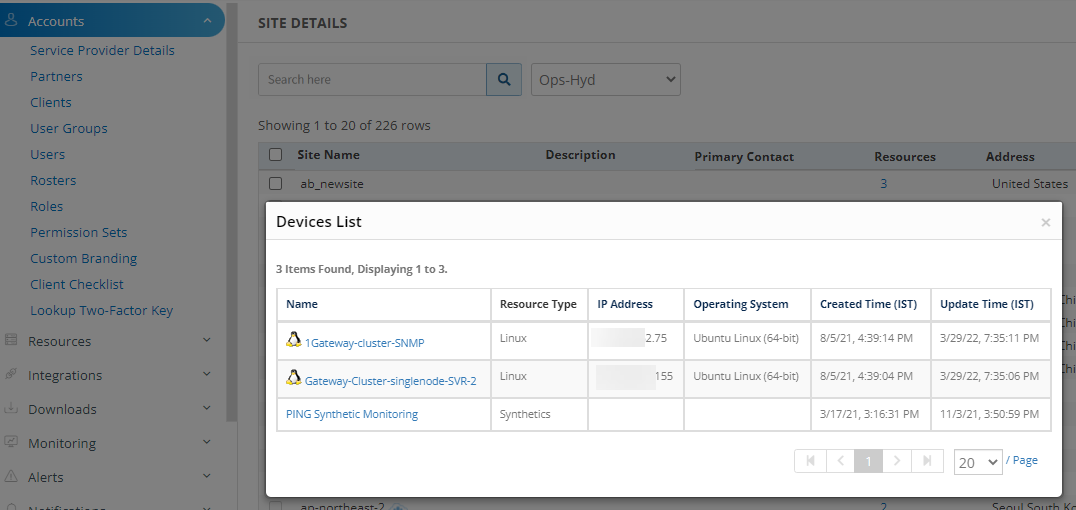
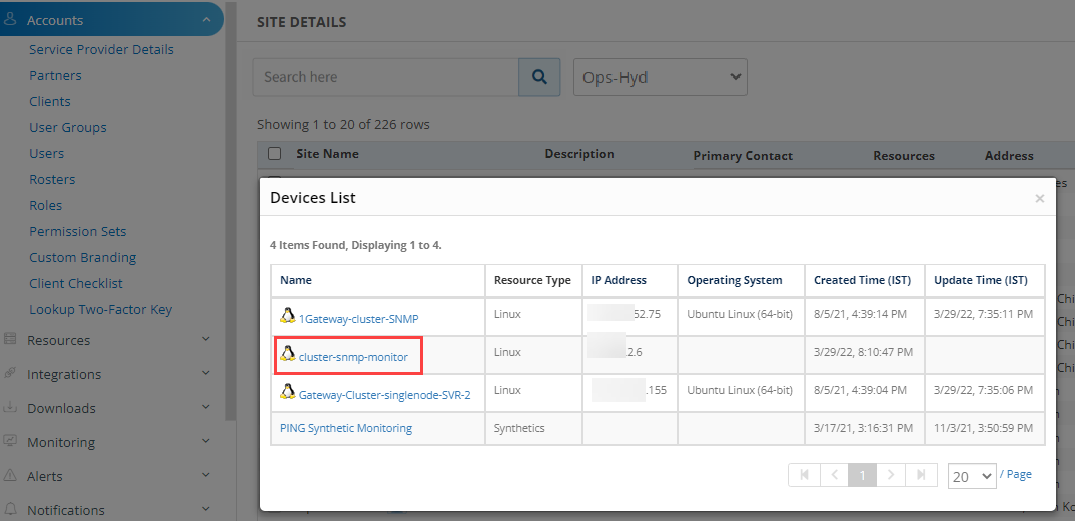
Site details - Devices List:
If a new device is created and it matches the advance search query, it is automatically added to the Site without the need for manually saving it again.
A new device “cluster-snmp-monitor” is added. As it matches the query, it is automatically added to the Site:
View site details
A Partner user with permission to manage all devices can view Site details.
Follow the below mentioned steps to view site details:
All the sites and site details (such as resources) can be viewed. The site list can be sorted by clicking the name and description of the site.
Go to Infrastructure.
Click Sites to view resource details and availability status.
Edit sites
A Partner user with permission to manage all devices can edit a Site.
Follow the below mentioned steps to edit site details:
Go to Setup > Resources and click Site Details.
Search for the site using the Search box, and then select the site to edit.
Click Edit. The page displays all the fields.
Make the required changes. If you want to update the query in the Add Using Query section, click the Update Query link provided below the search box.
Or
Go to Infrastructure > Sites, click the name of the site to edit.
Select Settings and click Edit. The Edit Site page is displayed.
Note: Public cloud sites appear by default in the list of site details when a public cloud is integrated.
You cannot edit or delete a public cloud site.
Delete sites
A Partner user with permission to manage all devices can delete a Site.
Follow the below mentioned steps to delete a Site:
Go to Setup > Resources and click Site Details.
Search for the site and then select the Site to delete.
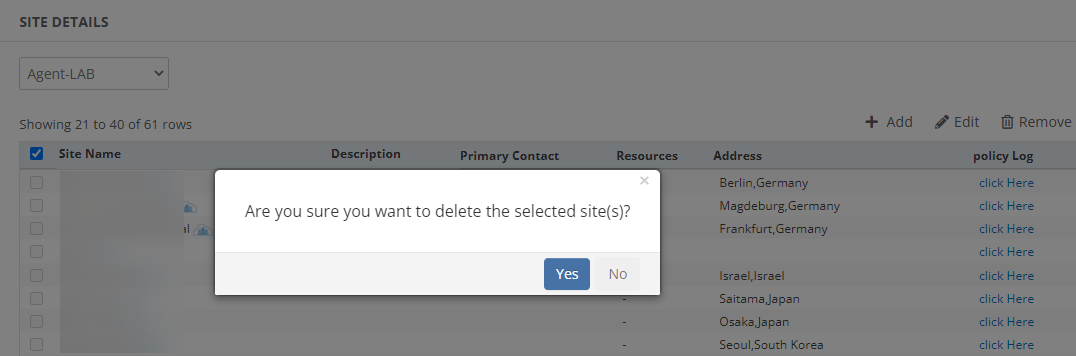
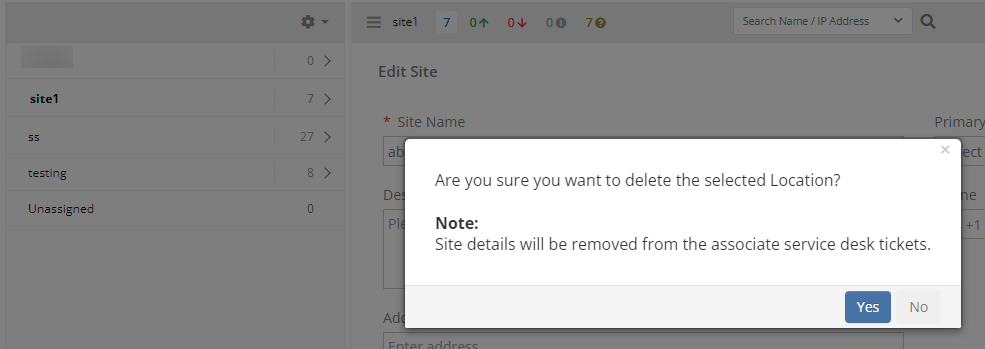
Click Remove. A confirmation popup appears.
Click Yes to confirm deletion. The Site is deleted.
Or
Go to Infrastructure > Sites and click the name of the site to delete.
Select Settings and click Remove. A confirmation popup appears.
Click Yes. The Site is deleted.
Note: Public cloud sites appear by default in the list of site details when a public cloud is integrated.
You cannot edit or delete a public cloud site.
Schedule maintenance periods
A Partner user with permission to manage all devices can schedule maintenance periods for a Site.
Maintenance periods enable you to schedule a time period to carry out maintenance activities on resources. You can set up a time for the maintenance period of your Sites.
Follow the steps given below to add schedule maintenance period for a Site:
Go to Infrastructure > Sites and click the name of the site for scheduling maintenance.
Select Settings and click Maintenance. A confirmation popup appears.
Click Yes. The Create New Maintenance Period window appears.
Provide details to schedule the maintenance period.
Click Save.
As defined by the schedule, site resources go into maintenance mode.