Launch consoles from the Infrastructure page
A browser console permits you to access a remote server using a web browser. To launch a browser console from the Infrastructure page, log in to the portal and perform the following steps:
From All Clients, select a client.
Go to Infrastructure > Search. The Home tab is displayed.
Note
The resources that have been discovered through an app or integration are only displayed.Notes:
- The Home tab is the default view that is displayed when you navigate to the search page at the client-level. It is not available at the partner-level.
- If you have set a default view, it will be displayed on the search page.
Select the resources under the category and click.
Alternatively, click the search icon to look for a specific resource.
The NEW VIEW tab is displayed.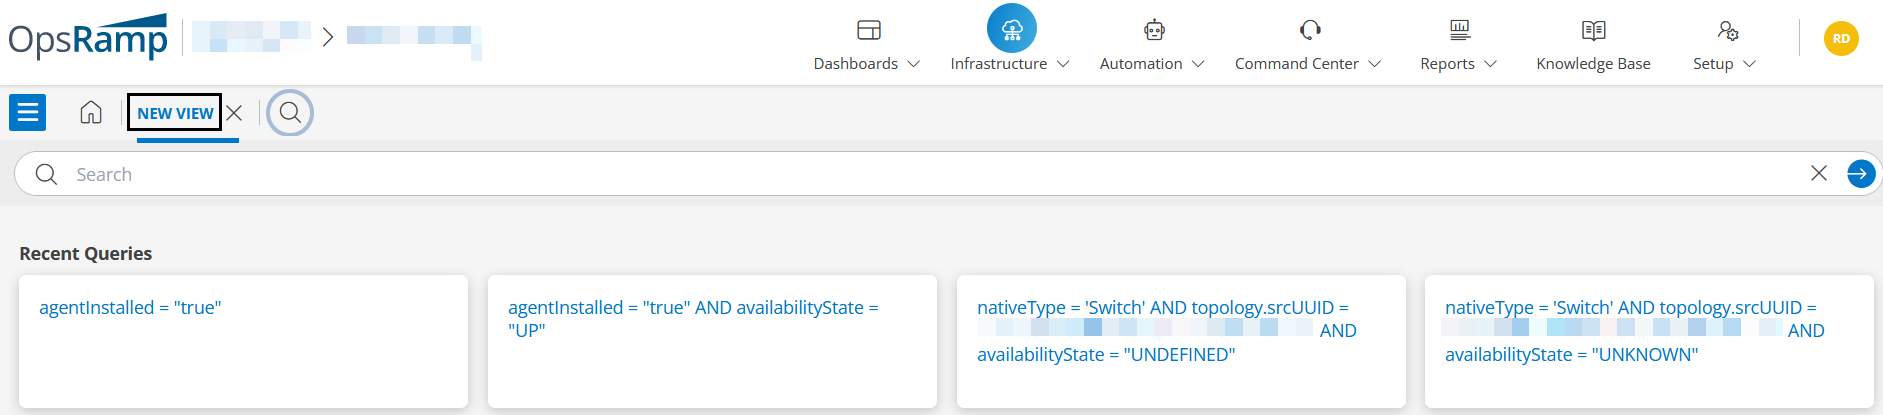
In the Search field, type the OpsQL query.
Example query:$agent.installed IS "true"From the list of resources displayed, select the target resource, and click.
See Infrastructure Search to learn more about search queries.
In the slide-out screen that appears, click the Actions and then, the Launch Remote Session buttons.
In the Launch Remote Session window > Consoles field:- Select a console from the existing list.
(or) - Add a new console.
In both the above mentioned scenarios, the following information about the user that has launched a browser console is displayed:
- Name of the user
- Number (count) of users
RDP Console
If you have launched an RDP console, a user icon and the user name are displayed.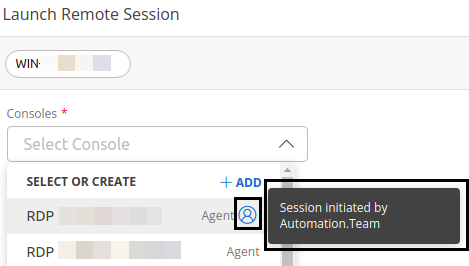
Notes:
- The RDP protocol allows a single user access.
- If more than one user launches the console, the user that has already launched the session gets disconnected and the new user is connected to the session.
SSH Console
If you have launched an SSH console, a user icon and the number of user(s) are displayed.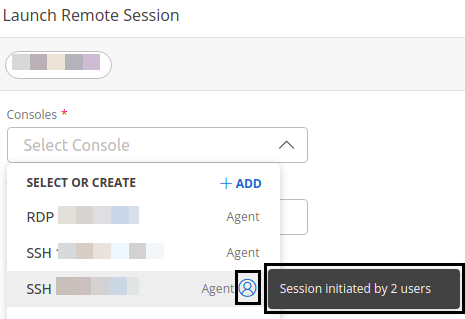
Notes:
- The SSH protocol allows multi-user access, and more than one user can launch the session.
- However, if multiple users connect using the same login credentials, the number of users (count) is displayed only as one.
- The increment in the count is displayed only when the users connect through different login credentials.
- Select a console from the existing list.
Click the Add button (add a new console) and enter the following information:
- Name: Enter the name of the console.
- Connector: Enter the element (Agent or Gateway) managing the target resource.
- Protocol: Protocol that you want to use to communicate with the target resource.
The following protocols are supported:- RDP
- SSH: The Password or Public Key option is available. Select the Public key.
- TELNET
- Username: Login username of the target resource.
- Password: Login password of the target resource. To ensure that you have typed the correct password, click the eye icon to view the password that you entered.
- Confirm Password: Reenter the password. To ensure that you have typed the correct password, click the eye icon to view the password that you entered.
- Port: Port that transmits and receives data. Enter 22 as the port value.
- IP address: IP Address of the target resource.
Click Add after entering the information. A new console is added.
Select the newly added console. Enter the following information on the Launch Remote Session window:
- Activity Log Notes: Enter the activity log notes information. This is a mandatory field.
- Enable upload or download: Select to upload or download a file to the console.
- In the Credentials field:
Select the applicable option for credentials.
- Use Credentials: Select the existing credentials or click Add to create new credentials.
In the Add Credential window that appears, enter the following information:
- Name: Enter the name.
- Description: Provide a description.
- Type: Select the protocol type.
- Authentication Type (mandatory field): The Password or Keypair option is available. Select the keypair and Upload via file option.
For the keypair option, uploading a file through the Upload via file option is mandatory.
For the password option, the username, password, and confirm password fields are mandatory. - Pass Phrase: Enter the Pass Phrase.
- Username: Enter the username. (Mandatory, only if you select the password as the Authentication Type)
- Password: Enter the password. (Visible, only if you select the password as the Authentication Type)
- Confirm Password: Reenter the password. (Visible, only if you select the password as the Authentication Type)
- Port: Enter the port number - 22.
- Connection Timeout (ms): Enter a value. Click Add. A new set of credentials is added.
- I have Credentials: If you have the credentials, select the option, upload the public key, and enter a Pass Phrase. Private keys are required for SSH keypair-based authentication.
- Use Credentials: Select the existing credentials or click Add to create new credentials.
In the Add Credential window that appears, enter the following information:
Click Launch.
The console will be launched.Enter your credentials in the browser console.
The target remote resource is now connected, enabling activities to be performed on the resource.