The Infrastructure Search page is used to search for resources at the partner or the client level.
Every resource has a set of attributes, such as ipAddress, hostName, agentInstalled, which are used to filter the list of resources.
Search for resources using the following syntax:
Resource attribute + operator + value
The Infrastructure Search feature has the Basic query builder and the Advanced query builder options.
The basic query builder supports all the major attributes with the ability to combine and filter expressions together. For nested queries, use the Advanced Query mode.
To navigate to the infrastructure search page:
Log in to OpsRamp.
Navigate to Infrastructure > Search.
The Infrastructure search page is displayed.
To start querying using the basic query builder:
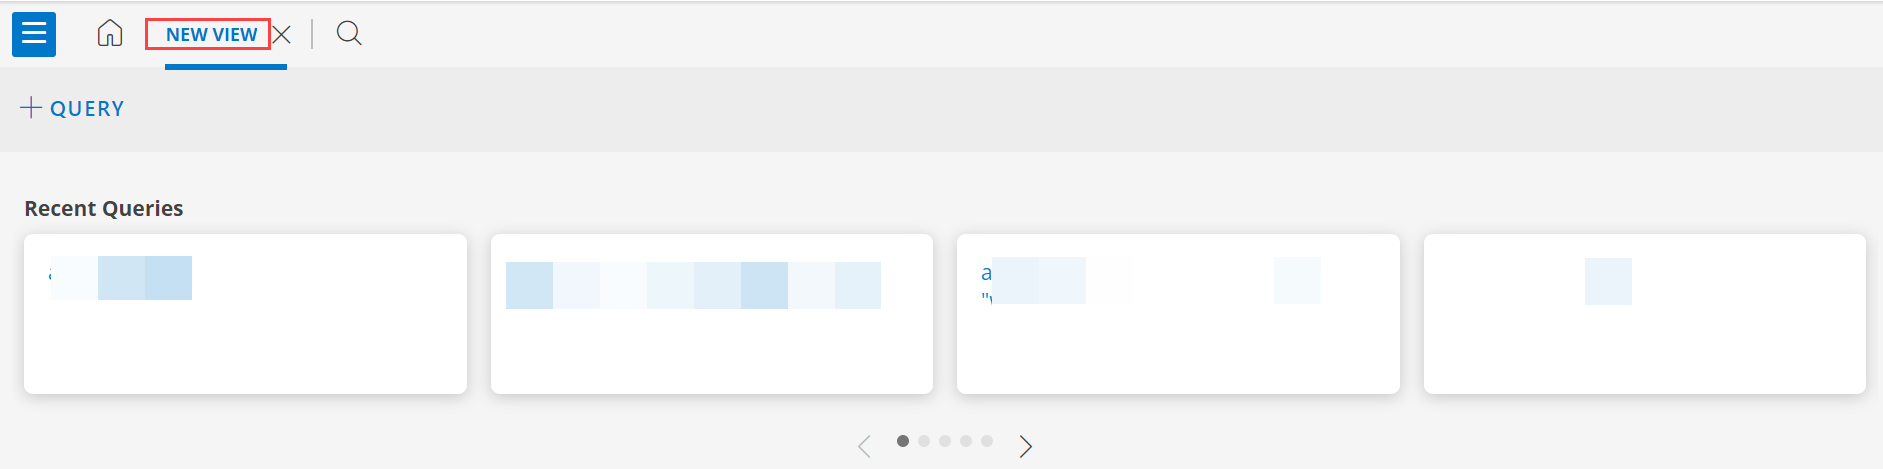
Click + QUERY from the NEW VIEW tab. Select the attribute and the operator from the dynamically populated matching operator list.
Type in (or select) a value from the VALUES drop-down. The values are populated based on the selected attribute and operator. The query result is displayed.
By default, the resources are grouped by Availability State.
Use the filter to group the resources by Native Type.
See Resource Overview for more information on Filters, Settings, columns.
Click + to add another expression.
The AND logical operator is selected by default. Click and select the desired operator.
Follow the steps mentioned above to form another expression – attribute, operator and value.
The query result is displayed.
As a power user, you can go ahead and use the Advanced Query mode.
Click </> to switch to the Advanced query mode.
As soon as you start typing the attribute name in the Search box, the available attributes are displayed automatically.
Select the attribute and the operator from the dynamically populated matching operator list and then type in (or select) a value.
Select the logical operators, AND or OR
Follow the steps mentioned above – select the attribute, operator, and value, to add another expression.
You can add as many valid expressions as possible.
Click the Search icon or press Enter. The query result is displayed.
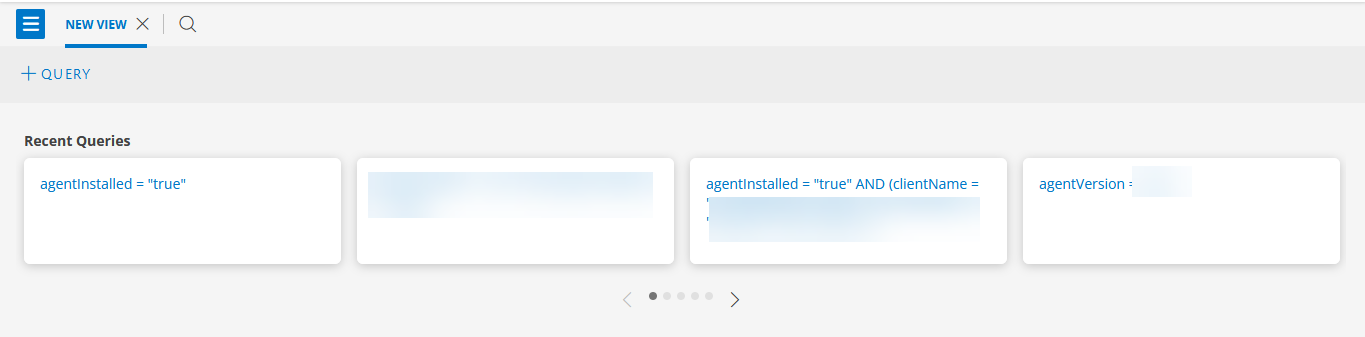
Note:
Your most recent query is added to the Recent Queries list, which shows the query string used for the search.
To repeat a previous query, click the (magnifying glass) search icon to create a new tab, and then click the tile for that search string. The search results are displayed.
Examples
agentInstalled = "true" AND (ipAddress = "1.2.3.4" OR name CONTAINS "fedora")
Returns all agent installed resources with name containing "fedora" and resource with ipaddress as "1.2.3.4"
availabilityState = "DOWN" AND (make = "VMware, Inc." OR os = "Ubuntu 14.04.6 LTS")
All resources whose availability state is DOWN and make is "VMware, Inc." and also OS is Ubuntu 14.04.6 LTS
state = "active" AND os IN ("CentOS Linux release 7.6.1810 (Core)","Microsoft Windows Server 2019","freebsd 12.1-release") OR make = "VMware, Inc." AND agentInstalled = "true"
Returns all the agent installed resources with state as "active" and os is "CentOS Linux release 7.6.1810 (Core)", "Microsoft Windows Server 2019", "freebsd 12.1-release" and make is "VMware, Inc."
For more information on how to use OpsQL, click here
RESOURCE OVERVIEW
The Resource Overview pane allows you to view resources that are discovered through an integration.
The installed apps/integrations are displayed under categories in the pane.
The following basic steps let you view the Resource Overview pane:
Log in to OpsRamp.
From All Clients, select a client.
Navigate to Infrastructure > Search. The Home tab with the RESOURCE OVERVIEW and resources information is displayed.
Notes:
The Resource Overview pane is available only at the client level.
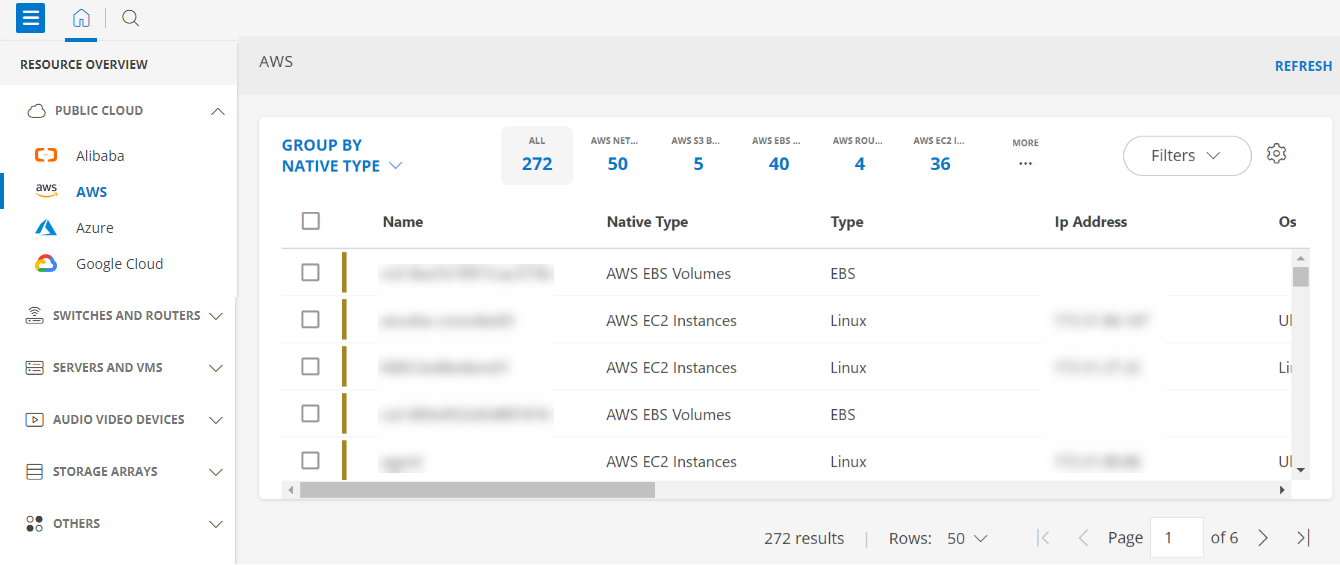
By default, the resources are grouped by Native Type.
Use the filter to group the resources by Availability State.
If native type is not available for the resource, the resource is listed as NULL native type.
All the installed apps/integrations on the Resource Overview page are displayed under the categories.
For example: Public Cloud category will display the Apps: AWS, Azure, Google Cloud, Alibaba. The OpsRamp Gateway is displayed under the Collectors category.
Click the Integration (or App) under the category to view the discovered resources.
You can view the availability state of the resources (UP, DOWN, UNKNOWN, UNDEFINED, ALL) along with the count. If you want to know the list of resources that are in a specific availability state, use the filter to group the resources by Availability State, and then click the number.
Resources details like Name, Ip Address, Os, Make, Model, Native Type, State are also displayed on the page.
Search
Use the search icon available on the Resource Overview pane to search resource categories.
Type the App name. The App name is displayed along with the category.
Click the App. The resources that are shown are grouped by native type, by default.
From the three dots menu, click Collapse to collapse the categories.
Filters
Use the Filters option to filter and search for resources.
To filter:
Click Filters and then select the required option. You can select the Installed App Name, resource type, Native Type, Operating System, and Make.
Click FILTER.
The following example shows the resources filtered using the Installed App Name as a filter criteria.
Based on the Installed App Name selected, the resource types that are discovered through that App are displayed in the Resource Type dropdown. Example: If ‘Aws’ is the Installed App name, then all the resource types that are discovered through Aws are displayed in the Resource Type dropdown.
Use the Settings gear icon to include/exclude columns that you want to show up on the page.
Export
The Export functionality lets you export the search response from Global search and the resource category section as a report.
Prerequisite: The Asset Inventory app should be installed.
To export a search response:
From All Clients, select a client.
Navigate to the Infrastructure > Search page.
Use the search option to search for resources using a query. The Search results are displayed.
Click the Export icon available next to the Filters option.
Note: A message appears asking the user to install the app, if it is not already installed. Click Install App. The Reporting Apps Overview page is displayed to install the app.
If the app is already installed, the page is redirected to the Asset Inventory app screen.
The configuration properties in the Asset Inventory app are auto-filled with the filter criteria that was provided for the global search.
The report generation process is initiated. The progress depends on the data and the configuration parameters.
Similarly, you can export search response from the Resource Overview section.
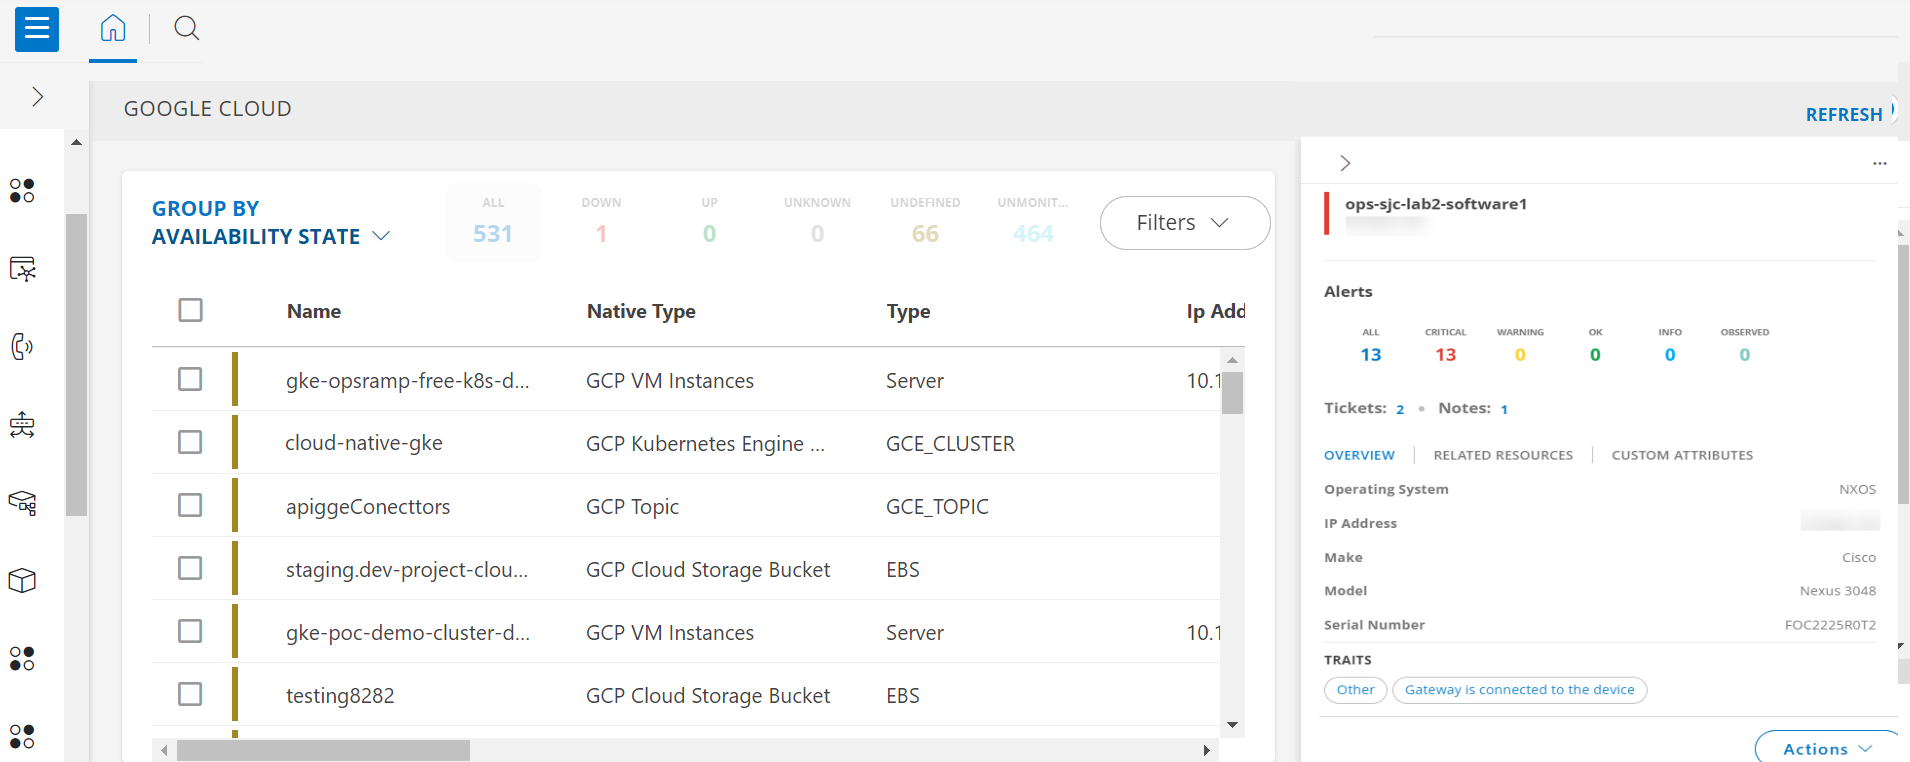
Click the resource name or anywhere in the row to view the resource details slide-out.
The slide-out has the following details:
Alerts: The number of alerts the resource has based on their current state: Critical, Warning, OK, INFO, OBSERVED, AND ALL (total number of alerts).
Tickets and Notes: The number of tickets on the resource and Notes (if any) are displayed.
OVERVIEW: The OVERVIEW tab is displayed by default. It has details like Make, Model, IP Address, OS, Resource Groups. Traits: Information related to the resource properties like agent/gateway connectivity information, resource type.
You can view the Integration/App that discovered the resource in the resource slide-out. To view the Integration/App:
Click the resource. The resource slide-out appears. The Integration/App is displayed under Overview > Apps.
Click on the App/Integration to view the Installed Integrations page with the details.
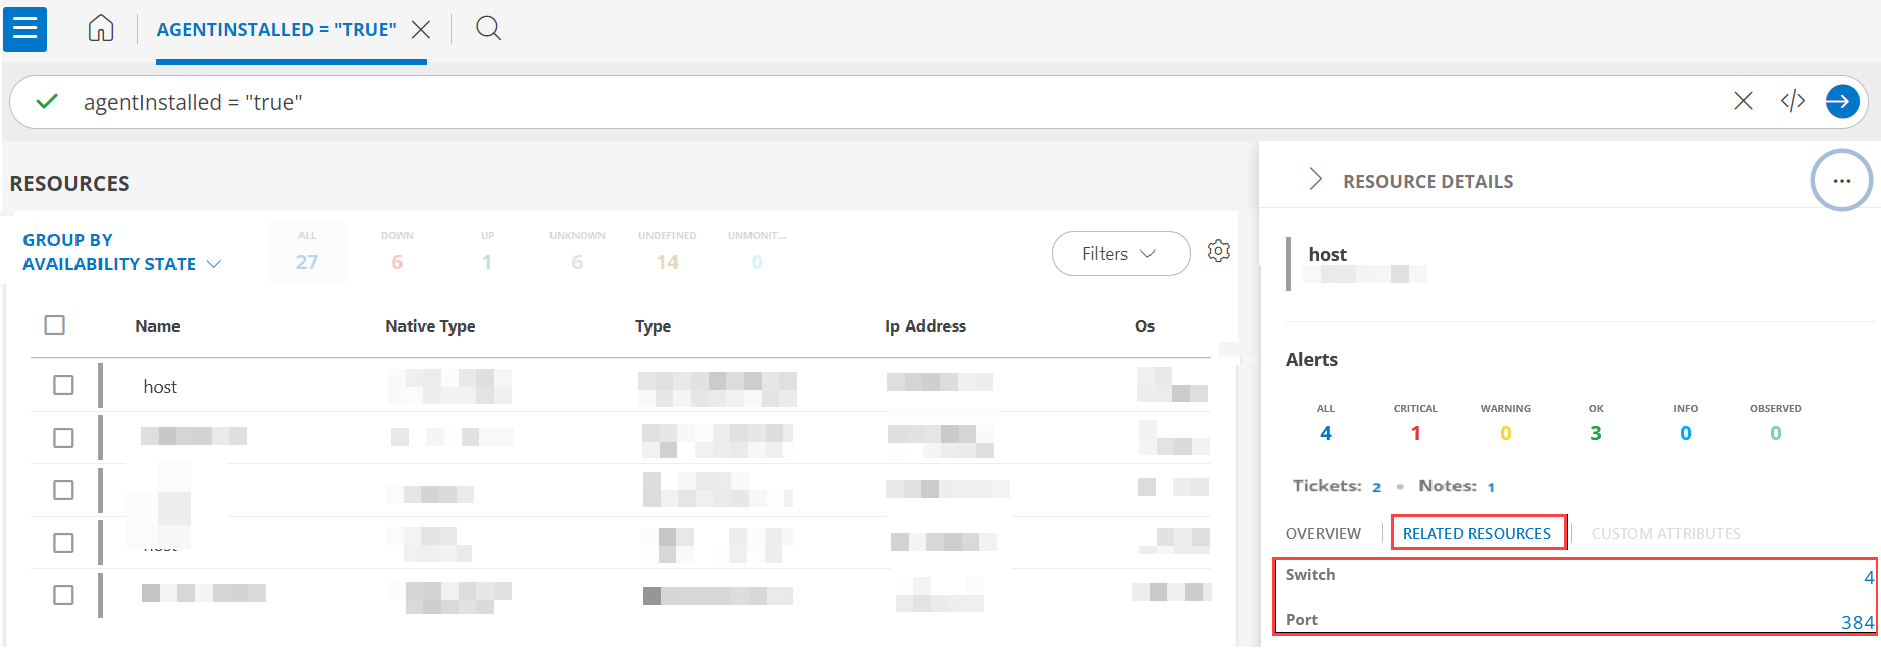
RELATED RESOURCES: If the resource has a relationship with other resources, then the count of those resources, along with their native types, is displayed in the RELATED RESOURCES tab. Click the count to get the list of resources that are related to the resource. The tab is grayed out if there are no related resources.
CUSTOM ATTRIBUTES: The custom attributes tab displays the attribute name, value and the Source.
ACTIONS: Use the ACTIONS button to:
Schedule maintenance period on the resource.
Launch Remote Session (this option appears only if Agent/Gateway is installed on the resources. It is applicable for Classic Gateway, Windows and Linux devices)
Execute Commands (this option appears only if Agent is installed on the resource.) Note: The Launch Remote Session and Execute Commands support is not provided for SDK related apps.
You can also select bulk resources and perform the above actions.
three dots menu: Click the three dots menu available at the upper-right corner of the slide-out. The View details option is displayed.
Click View details to navigate to the resource details page.
Resource Categories
Following table shows the actions that can be performed from the Resource Categories dropdown that is available on the left pane of the Resource Overview screen: Note: You can perform these actions based on the permissions available to you.
Action
Steps/Description
View resource groups
To view a resource group:
Click the Resource Categories dropdown available on the left pane.
Click Groups. All the resource groups under the client are displayed.
Search resource groups
To search a resource group:
Click the Resource Categories dropdown available on the left pane.
Click Groups. All the resource groups under the client are displayed.
Click the search icon and type the resource group name. The search result is displayed.
From the three dots menu, click Collapse to collapse the resource groups.
Add resource groups
To add a resource group:
Click the Resource Categories dropdown available on the left pane.
Click Groups. All the resource groups under the client are displayed.
Click the three dots menu and click Add Group. Provide the information in the Create Resource Group page and click Save. The resource group is created and added to the list of resource groups. You can view the resource group on the left pane.
Add resource subgroups
To add a resource subgroup:
Click the Resource Categories dropdown available on the left pane.
Click Groups. All the resource groups under the client are displayed.
Mouse hover over a resource group and click the three dots menu.
Click Add Subgroup. Provide the information in the Create Resource Group page and click Save. The resource subgroup is created and appears under the parent resource group. Click the down arrow to view the subgroup that is created. Note: You can create a subgroup for a child resource group too.
Edit resource groups
To edit a resource group or a subgroup:
Click the Resource Categories dropdown available on the left pane.
Click Groups. All the resource groups under the client are displayed.
Mouse hover over a resource group or a subgroup and click the three dots menu.
Click Edit. Do the necessary changes in the Update Resource Group page and click Save. The resource group is updated.
Remove resource groups
To remove a resource group or a subgroup:
Click the Resource Categories dropdown available on the left pane.
Click Groups. All the resource groups under the client are displayed.
Mouse hover over a resource group or a subgroup and click the three dots menu.
Click Remove. A confirmation dialog box appears.
Click Remove to remove the resource group permanently. Note: If you remove a resource group and if there are any child groups under it, all the child groups will also be removed. Any resources assigned to this group (and its subgroup(s), if any) will remain intact and will not be deleted.
View sites
To view a site:
Click the Resource Categories dropdown available on the left pane.
Click Sites. All the sites under the client are displayed.
Search sites
To search a site:
Click the Resource Categories dropdown available on the left pane.
Click Sites. All the sites under the client are displayed.
Click the search icon and type the site name. The search result is displayed.
From the three dots menu, click Collapse to collapse the sites.
Add sites
To add a site:
Click the Resource Categories dropdown available on the left pane.
Click Sites. All the sites under the client are displayed.
Click the three dots menu and click Add Site. Provide the information on the New Site page and click Save. The site is created and added to the list of sites. You can view the site on the left pane.
Add Subsites
To add a subsite:
Click the Resource Categories dropdown available on the left pane.
Click Sites. All the sites under the client are displayed.
Mouse hover over a site and click the three dots menu.
Click Add Subsite. Provide the information on the New Site page and click Save. The subsite is created and appears under the parent site. Click the down arrow to view the subsite that is created. Note: You can create a subsite for a child site too.
Edit sites
To edit a site or a subsite:
Click the Resource Categories dropdown available on the left pane.
Click Sites. All the sites under the client are displayed.
Mouse hover over a site or a subsite and click the three dots menu.
Click Edit. Do the necessary changes in the Edit Site page and click Save. The site is updated.
Remove sites
To remove a site or a subsite:
Click the Resource Categories dropdown available on the left pane.
Click Sites. All the sites under the client are displayed.
Mouse hover over a site or a subsite and click the three dots menu.
Click Remove. A confirmation dialog box appears.
Click Remove to remove the site permanently. Note: If you remove a site and if there are any child sites under it, all the child sites will also be removed. Any resources assigned to this site (and its subsite(s), if any) will remain intact and will not be deleted.
Resource Column Settings
You can add columns as required. To do this, click the Settings icon on the Resources listing page. The selected columns will be displayed on the Resources listing page.
Delete, Manage and Unmanage resources
Monitorable resources that have only agent installed and gateway discovered devices can be managed, deleted, or unmanaged. Remaining resources can only be deleted.
Note: A maximum of 40 resources/devices can be selected to perform the above actions.
Delete
To delete a resource:
From All Clients, select a client.
Navigate to Infrastructure > Search.
Select the resource(s) you want to delete. The number of selected resources is shown.
From the Actions dropdown click Delete.
The Delete Resources dialog box shows the resource(s) that are selected for deletion.
Click Delete to delete the resource(s). The resource(s) are deleted and a confirmation message appears.
Manage
You can manage a resource that is in an inactive or unmanaged state.
To manage a resource:
From All Clients, select a client.
Navigate to Infrastructure > Search.
Select the resource(s) that are in the inactive state. The State column in the table shows the inactive resources.
From the Actions dropdown click Manage.
The Manage Resources dialog box shows the resources that are applicable for managing. It also shows the resources that are not applicable for managing. For example, if you select an active resource, it will be shown under the Non-Applicable section.
Click Manage to manage the resource(s). The resource(s) are managed and a confirmation message appears.
The state of the resource(s) changes to “Active”.
Unmanage
You can unmanage a resource that is in an active or managed state.
To unmanage a resource:
From All Clients, select a client.
Navigate to Infrastructure > Search.
Select the resource(s) that are in the active state. The State column in the table shows the active resources.
From the Actions dropdown click Unmanage.
The Unmanage Resources dialog box shows the resources that are applicable for unmanaging. It also shows the resources that are not applicable for unmanaging. For example, if you select an inactive resource, it will be shown under the Non-Applicable section.
Click Unmanage to unmanage the resource(s). The resource(s) are unmanaged and a confirmation message appears.
The state of the resource(s) changes to “Inactive”.
List of Resource Overview categories and sub-categories
Category
Integration Name (sub-category)
Audio Video Devices
Polycom-Trio-8800
Crestron AV
NEC Displays
Poly AV - Group Series
Poly AV - Studio Series
Poly VVX/CCX Phone
Cloud-Based Applications
Microsoft 365
Container Platforms
Kubernetes
Mesosphere DC/OS
Red Hat OpenShift (OKD)
K3S
Prometheus Metrics
Data Protection
Dell Avamar
Dell PowerProtect Data Manager
Dell Cyber Recovery Manager
Databases
Informix Database
Hyperconverged Infrastructure
NUTANIX
Cisco HyperFlex
Middleware
Java Virtual Machine
IBM Websphere
Redhat Jboss
WildFly
Servers and VMs
VMware
XenServer
Cisco UCS
Microsoft Hyper-V
Windows Fail-over Cluster
Linux Fail-over Cluster
Veritas Cluster
IBM AIX Server
HP UX Server
IBM AS400
Solaris OS Server
Public Cloud
Azure Stack
Azure
AWS
Google Cloud
Alibaba
Oracle Cloud
Software Defined Networks
Contrail Controller
Viptela
VMware NSX-T
VMware NSX-V
Megaport
Storage Arrays
Pure Storage
NetApp Filer
Dell EMC VNX
Dell EMC VNXe
Dell EMC VMAX
Dell EMC CLARiiON
IBM STORWIZE
HP EVA
NetApp Cluster
Dell EMC XTREMIO
Dell EMC VPLEX
Dell EMC RPA
Hitachi VSP
Hitachi HCI
Hitachi HNAS
Hitachi VSP
Hitachi VSP Opscenter
Dell Power Store
Dell Power Max
DELL Data Domain
Dell PowerScale
NetApp ONTAP
NetApp Active IQ Unified Manager
NetApp SolidFire
HPE 3PAR
Switches and Routers
Meraki
Cradlepoint
Brocade Network Advisor
Dell Networker
Software-Defined WAN (SD-WAN)
VMware SD-WAN - VeloCloud
Silverpeak SD-WAN
Versa Networks
Viptela
Collaboration
Zoom
Office365
Telephony
NEC IP-PBX
Web Services
HTTP Endpoint Probe
DNS Response Probe
Synthetic
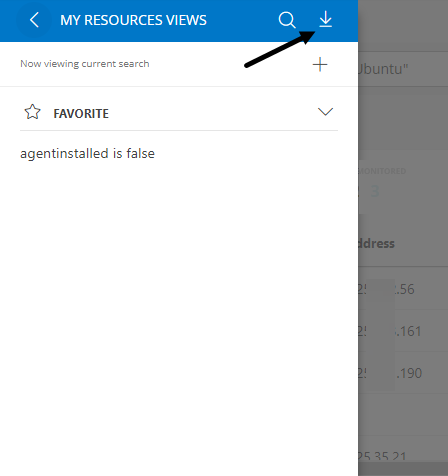
MY RESOURCES VIEWS
You can perform the following actions from the MY RESOURCE VIEWS slide-out:
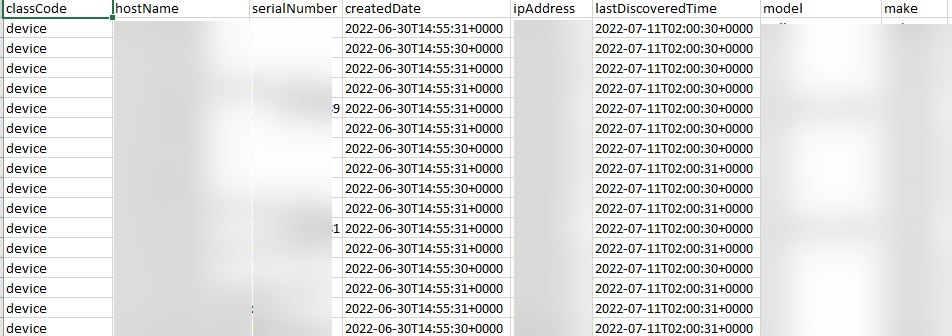
The Download Resources functionality lets you download the resources from the Infrastructure > Search page. All the resources in the client will be downloaded in CSV format.
To export resources:
Click Infrastructure > Search.
Click the hamburger menu icon at the upper-left corner of the Infrastructure search page.
From the slide-out, click the Download Resources icon. All the resources will be downloaded in CSV format.
Save a View
Once you execute a query, you can save the query results as a view.
To save a view:
Click the hamburger menu icon at the upper-left corner of the Infrastructure search page.
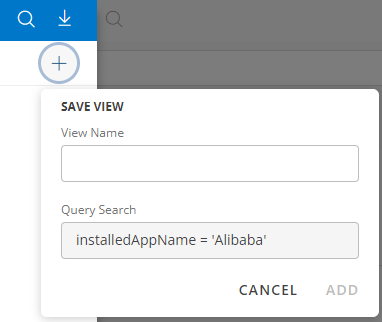
From the slide-out, click the + icon. The SAVE VIEW popup is displayed.
Enter a name for the view and click ADD.
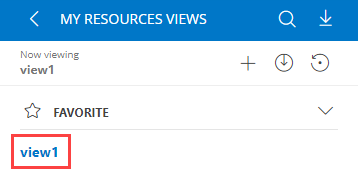
The view is saved and displayed in the slide-out.
Use the up/down arrow icons to hide/show the views in the slide-out.
The Save and Restore icons appear after you create a view. Click them to perform the Save and Restore views respectively.
Set Favorite
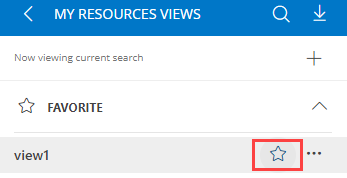
If you want to mark a view as favorite, hover over the view name on the slide-out.
Click the star icon. The view is added as favorite and appears under the FAVORITE category. The blue colored star icon indicates that the view is added as favorite.
If you want to unfavorite the view, click the blue colored star against the view. The view is removed from the Favorite category.
You can perform other actions on the saved view:
Restore
The Restore option reverts to the previous query.
Once you have made changes to a specific query, which is already saved as a view:
Hover over the view name on the slide-out.
Click the actions menu. The VIEW OPTIONS popup is displayed.
Click the Restore option. The previous query automatically appears in the Search box. Note: You must not save the changes you made to the query for the view. Otherwise, the query will not be reverted.
Rename
The Rename option allows you to rename the name of the view.
To rename a view:
Hover over the view name on the slide-out.
Click the actions menu. The VIEW OPTIONS popup is displayed.
Click the Rename option. The RENAME VIEW popup is displayed.
Enter a new name for the view in the Name box and click SAVE. The view is renamed.
Copy
The Copy option allows you to create a copy of a view.
To create a copy of a view:
Hover over the view name on the slide-out.
Click the actions menu. The VIEW OPTIONS popup is displayed.
Click the Copy option. The COPY VIEW popup is displayed.
Enter a name for the view in the Name box and click SAVE. The view is copied and is displayed in the slide-out.
Set Default View
The Set Default View option allows you to set a view as a default view for the current user.
To set a view as a default:
Hover over the view name on the slide-out.
Click the actions menu. The VIEW OPTIONS popup is displayed.
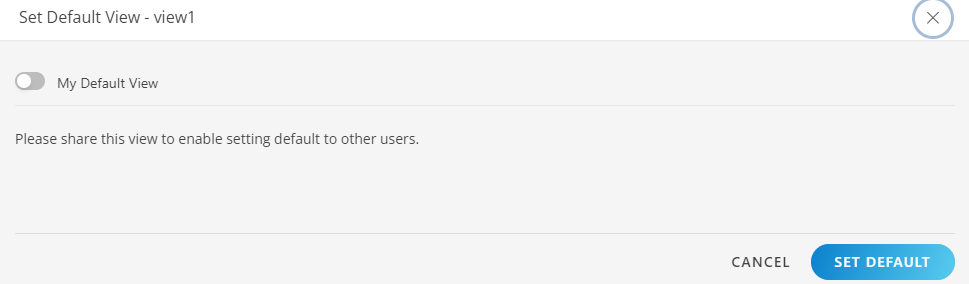
Click the Set Default View option. The Set Default View dialog box is displayed.
Turn on the My Default View option.
Click the SET DEFAULT button.
Refresh the browser. You can see that the view is set as default for the current user.
To set the default view for other users, share the view and make it default for the user you want to set as default.
Share
The Share option allows you to share a view with other users.
To share a view:
Hover over the view name on the slide-out.
Click the actions menu. The VIEW OPTIONS popup is displayed.
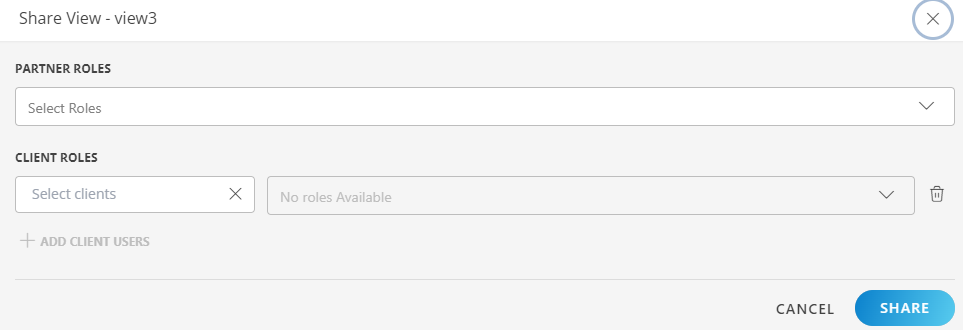
Click the Share option. The Share View dialog box is displayed.
Based on the scope of the user, the options appear.
For SP and Partner users:
Select the role from the PARTNER ROLES drop-down list. (The view is shared with all the partners with the role selected.)
Under CLIENT ROLES, select the client and the role from the drop-down lists. If you select All Clients, it will show the client-level roles that are available across all clients. If you select a specific client, it will show the roles that are available for that client.
Click + ADD CLIENT USERS if you want to share the view with multiple users.
For Client users:
Select the role from the drop-down list.
Click SHARE. The view is shared.
Remove
The Remove option allows you to remove a view.
To remove a view:
Hover over the view name on the slide-out.
Click the actions menu. The VIEW OPTIONS popup is displayed.
Click the Remove option. A confirmation dialog box is displayed.
Click REMOVE. The view is removed.
RELATED RESOURCES
The related resources are a group of resources that are related to a particular resource. For the resources to be related to each other, they should meet one of the following conditions:
runsOn: Indicates that a resource is running on another resource. For example, an application that is running on a server that is in the process of getting discovered.
connectedTo: Indicates that a resource is connected to another resource. For example, a port that is connected to a switch.
dependsOn: Indicates that one resource needs another resource to exist. For example, an ESXi host cannot exist without a vCenter.
componentOf: Indicates that one resource is a component of a group of resources. For example, a number of VMs that belong to a cluster. Each VM is a component of the cluster.
Concept of relationship
The following example demonstrates the concept of relationship among the resources:
There are three resources, namely Resource 1, Resource 2, and Resource 3.
If Resource 2 is connected (meets one of the four conditions of related resources) to Resource 1, it indicates that Resource 2 is related to Resource 1.
If Resource 3 is connected (meets one of the four conditions of related resources) to Resource 1, it indicates that Resource 3 is related to Resource 1.
The above example can be summarized in the following way:
Resource 2 and 3 are in a relationship with Resource 1.
Resource 2 and 3 are the related resources of Resource 1.
Related Resources tab
The Related Resources tab displays the number of related resources for a selected resource. It also displays the native type of the resources connected to the main resource.
For example: Main = Resource 1, native type = host Related resources = Resources 2 and 3, native type = vm The main resource displays the native type as vm and the associated count as 2.
Pre-requisites The following conditions are a must for a resource to display the related resources count:
The Native Type attribute for the resource (1, according to the example) that shows the count must be defined.
One or more resources (2 and 3, according to the example) must be in a relationship with the resource (1).
Exceptions The related resources will not be displayed under the following conditions:
Native Type Attribute
Relationship
Result
Defined
Resources not related
Related Resources tab is grayed out
Count is not displayed
Not defined
Related
Unknown is displayed as the native type
Count is displayed
View Related Resources tab
To view the Related Resources tab, log in to OpsRamp.
From All Clients, select a client.
Navigate to Infrastructure > Search. The Home Tab with the RESOURCE OVERVIEW and resources information is displayed.
You can select a resource under a sub-category and click.
Alternatively, click the search icon to look for a specific resource. The NEW VIEW tab is displayed.
Click +Query and search for the resource(s) using a query. From the list of resources displayed, click the target resource.
A slide-out screen that contains the RELATED RESOURCES tab and the following information is displayed:
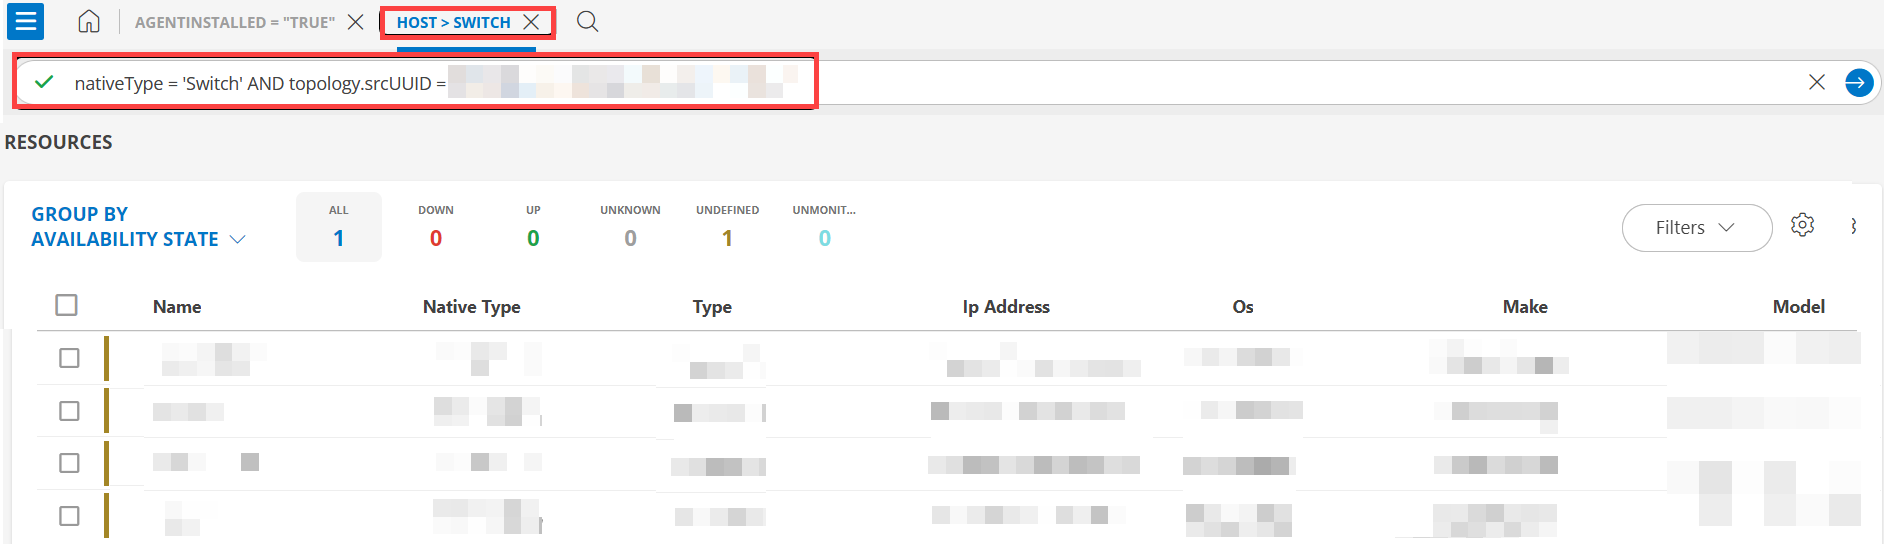
Native types (Switch and Port as seen in the illustration) of the resources that are related to the main resource.
Associated count (4 switches and 384 ports as seen in the illustration) of native types.
Click the count of any category resources. A new tab that contains a query with the native type of the resource and topology UUID is displayed. The list of resources of the selected category are also displayed.