As the account owner, use My Profile to customize your profile and choose feature preferences that match how you work with the platform. Mouse over your avatar in the top-right corner and click My Profile:
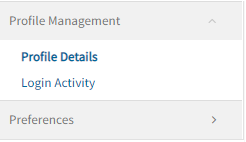
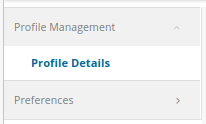
The Profile Management menu permits you to view or change Profile Details. The Login Activity feature allows you to view active sessions and log out of active sessions.
Use the Preferences menu to view or change feature properties:
Password change
A tenant can contact OpsRamp support for password change for all of its users. When this capability is disabled, users will not be able to change their password.
Only Administrators can change the password for other users from Setup > Users.
My Profile
By default, any user can update their profile details in the My Profile section.
Note: The Administrator can grant users with view-only access to the My Profile section, which means users can only view, but cannot update their profile details.
Profile details
Click Profile Details to display your current profile. Your profile includes general account, localization, and notification preferences:
| Category | Property | Required | Description |
|---|---|---|---|
| General Preferences | Name | Yes | Your first and last names |
| Username | Yes | User name associated with your account | |
| Two-Factor Authentication | Two-factor authentication selection: ON = Enable two-factor authentication OFF = Disable two-factor authentication Update this property directly on the view page. If two-factor authentication is enabled and activated, your two-factor key is reauthenticated after your profile is updated. After three unsuccessful, two-factor authentication attempts you are redirected to the login page. | ||
| Address | Your address | ||
| City | Your city | ||
| State | Your state | ||
| Zip | Your zip code | ||
| Country | Yes | Your country | |
| Phone Number | Your phone number | ||
| Mobile number | Your mobile phone number | ||
| Primary Email | Yes | Your primary email address for receiving notifications. You can, instead, associate an alternate email address with notifications. | |
| Alternate Email | An alternate email address, which you can associate with notifications. | ||
| Localization Preferences | Time Zone | Yes | Your local time zone |
| Date Pattern | Your preferred date display format, such as mm/dd/yy or yy/mm/dd. | ||
| Time Format | Your preferred time display format. Select from a 12-hour or 24-hour clock. | ||
| Theme | Your preferred theme, you may either select Light mode or Dark Mode. Note: Dark Mode may not apply across the entire OpsRamp portal. | ||
| Default Client | Select the default client information. | ||
| Home Page | You can set a preferred landing page based on your users profile settings. You may either select Classic Dashboard or Dashboard 2.0 from the drop down listbox. | ||
| Notification Preferences If you choose email notification, you can specify Primary Email or Alternate Email as the email address to use for notifications. | Account Information | Notification preference for account information: Email = Notify using email No Notify = Do not send a notification | |
| Alert Notification | Notification preference for alerts: Email = Notify using email No Notify = Do not send a notification | ||
| Report Notification | Notification preference for reports: Email = Notify using email No Notify = Do not send a notification | ||
| Export Notification | Notification preference for exports: Email = Notify using email No Notify = Do not send a notification |
To change your profile:
- Click Edit.
- Minimally, enter your information in the required fields and make any other changes you want.
- Click the Update button to commit your changes. You need to log out and log in, again, for the changes to take full effect.
Login Activity
The Login Activity is a security feature that allows you to view active logged-in sessions and log out of these sessions. This feature helps identify and prevent suspicious login activity.
To navigate to the Login Activity page:
- Log in to OpsRamp.
- Hover over the avatar on the upper-right corner of the page.
- Click My Profile.
- Click Login Activity under Profile Management. The Where You’re Logged in page is displayed.
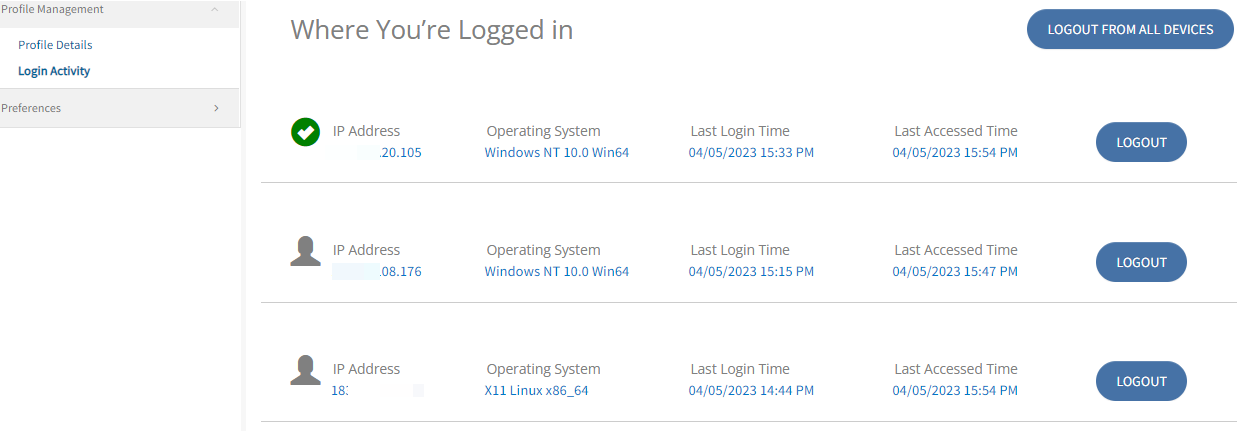
Information related to all the devices you are logged in is displayed on the Where You’re Logged in page. You may have logged in with different browsers on multiple devices, with the same credentials.
- The device that you are currently logged in is displayed on top with a green tick mark.
- The rest of the devices are sorted by the Last Login Time.
- The Last Accessed Time refreshes every three minutes.
Logout
You can choose to log out from any of the devices.
To log out from a device:
- Click the Logout button.
- From the confirmation dialog box, click Yes. The device is logged out.
Logout from all Devices
You can choose to log out from all the devices.
To log out from all the devices:
- Click the Logout from all Devices button.
- From the confirmation dialog box, click Yes. The devices are logged out.
The following table has Login Activity column information:
| Column | Description |
|---|---|
| IP Address | Public IP Address of the device. |
| Operating System | Operating system of the device. |
| Last Login Time | Last login date and time. |
| Last Accessed Time | Last accessed date and time. |
Preferences
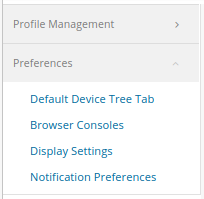
This section describes additional viewing and notification preferences.
To change any of these preferences, click Edit and follow the edit dialog, selecting from the available options or entering the value you want in the text box.
Default Device Tree Tab
Use the Default Device Tree Tab property to specify the first option to display on the infrastructure tree. Available options are:
- Device Type
- Resource Group
- Service Group
- Sites
Browser Consoles
Use the Browser Consoles preference to specify the properties for the following console types.
RDP Console
| Parameter Name | Description |
|---|---|
| Width | (optional) Width of the display to request, in pixels. If not specified, the width of the connecting client display is used. The browser console automatically chooses the appropriate display size for RDP connections based on the browser window size and the device DPI. You can force the display size by specifying explicit width or height values. |
| Height | (optional) Height of the display to request, in pixels. If not specified, the height of the connecting client display is used. |
| Resolution (DPI) | (optional) Effective resolution you want for the client display, in DPI. If not specified, the resolution and size of the client display are used to determine, heuristically, an appropriate resolution for the RDP session. |
| Color depth | (optional) Color depth to request, in bits-per-pixel. If specified, this must be 8, 16, or 24. Regardless of the value you specify, if an update uses less than 256 colors, the browser console always sends the update as a 256-color PNG image. To reduce bandwidth usage, consider reducing color depth. The browser console automatically detects 256-color images, which can be guaranteed for all graphics sent over the connection by forcing the color depth to 8-bit. Otherwise, color depth is dictated by the RDP server. |
| Resize method | (optional) Method to use to update the RDP server when the width or height of the client display changes. If not specified, no action is taken when the client display size changes. Options:
|
SSH Console
SSH support provides a display, but not an RDP-like protocol. The display is a terminal emulator, and that has options for configuring text properties. The specified font must be installed on the server because the server, not the client, renders the characters to the display terminal.
| Parameter Name | Description |
|---|---|
| Color scheme | (optional) The color scheme of the terminal emulator used for SSH connections. The color scheme is specified as semicolon-separated name-value pairs. Each name-value pair assigns a value to a color in the terminal emulator palette. Example of default blue text on a white background and the red color represented as a purple shade: foreground: rgb:00/00/ff; background: rgb:ff/ff/ff; color9: rgb:80/00/80This format is similar to the color configuration format used by Xterm. Xterm color configurations can be adapted to the browser console. If not specified, the browser console renders text as gray on a black background. Possible color names are:
|
| Font name | (optional) The font name. If not specified, the default font is monospace. |
| Font size | (optional) The font size, in points. If not specified, the default font size is 12. |
| Maximum scrollback size | (optional) Maximum number of rows to permit within the terminal scrollback buffer. If not specified, the scrollback buffer is limited to a maximum of 1000 rows. |
Telnet Console
Telnet support provides a display, but not an RDP-like protocol. The display is a terminal emulator, and that has options for configuring text properties. The specified font must be installed on the server because the server, not the client, renders the characters to the display terminal.
| Parameter Name | Description |
|---|---|
| Color scheme | (optional) The color scheme of the terminal emulator used for Telnet connections. The color scheme is specified as semicolon-separated name-value pairs. Each name-value pair assigns a value to a color in the terminal emulator palette. Example of default blue text on a white background and the red color represented as a purple shade: foreground: rgb:00/00/ff; background: rgb:ff/ff/ff; color9: rgb:80/00/80This format is similar to the color configuration format used by Xterm. Xterm color configurations can be adapted to the browser console. If not specified, the browser console renders text as gray on a black background. Possible color names are:
|
| Font name | (optional) The font name. If not specified, the default font is monospace. |
| Font size | (optional) The font size, in points. If not specified, the default font size is 12. |
| Maximum scrollback size | (optional) Maximum number of rows to permit within the terminal scrollback buffer. If not specified, the scrollback buffer is limited to a maximum of 1000 rows. |
Display Settings
The Display Settings property toggles Room Mode for your dashboard. The Room Mode option permits you to view selected dashboards, which are displayed in a carousel sequence for a specified time interval. This feature is intended for NOCs to project the dashboard on a mounted display, such as in a hallway or a NOC room.
In Room Mode, the UI never disconnects. You can select one or more partner- or client-level dashboards to display.
Two security features are built into Room Mode:
- You cannot go to a page other than the dashboard page.
- If you exit the dashboard, the UI forces a logout. This ensures that another user cannot gain access to the account of the user who put the UI in room mode.
In the Display Settings preference dialog, click Yes to enable Room Mode and click No to disable room mode.
Notification Preferences
The Notification Preferences dialog permits you to specify at a very granular level how you want to receive Generic Notifications and Alert Notifications. For each notification type, you can differentiate notifications by priority and notification method for each priority.
Priorities:
- Very Low Priority
- Low Priority
- Normal Priority
- High Priority
- Urgent Priority
Notification methods:
- SMS
- Voice
For email notification, you can choose to be notified using your Primary Email or Alternate Email.