Introduction
The New Roster page is a list of scheduled duties for organization users. This would help users perform multiple tasks seamlessly, including:
- Yearly recurring schedules (consider using monthly recurring schedules instead).
- Recurring schedules that end after a specified number of occurrences (specify exact end dates instead).
- Scheduling times that include seconds.
- Bulk removal of schedules.
- This feature is particularly beneficial for business users.
Create a Roster
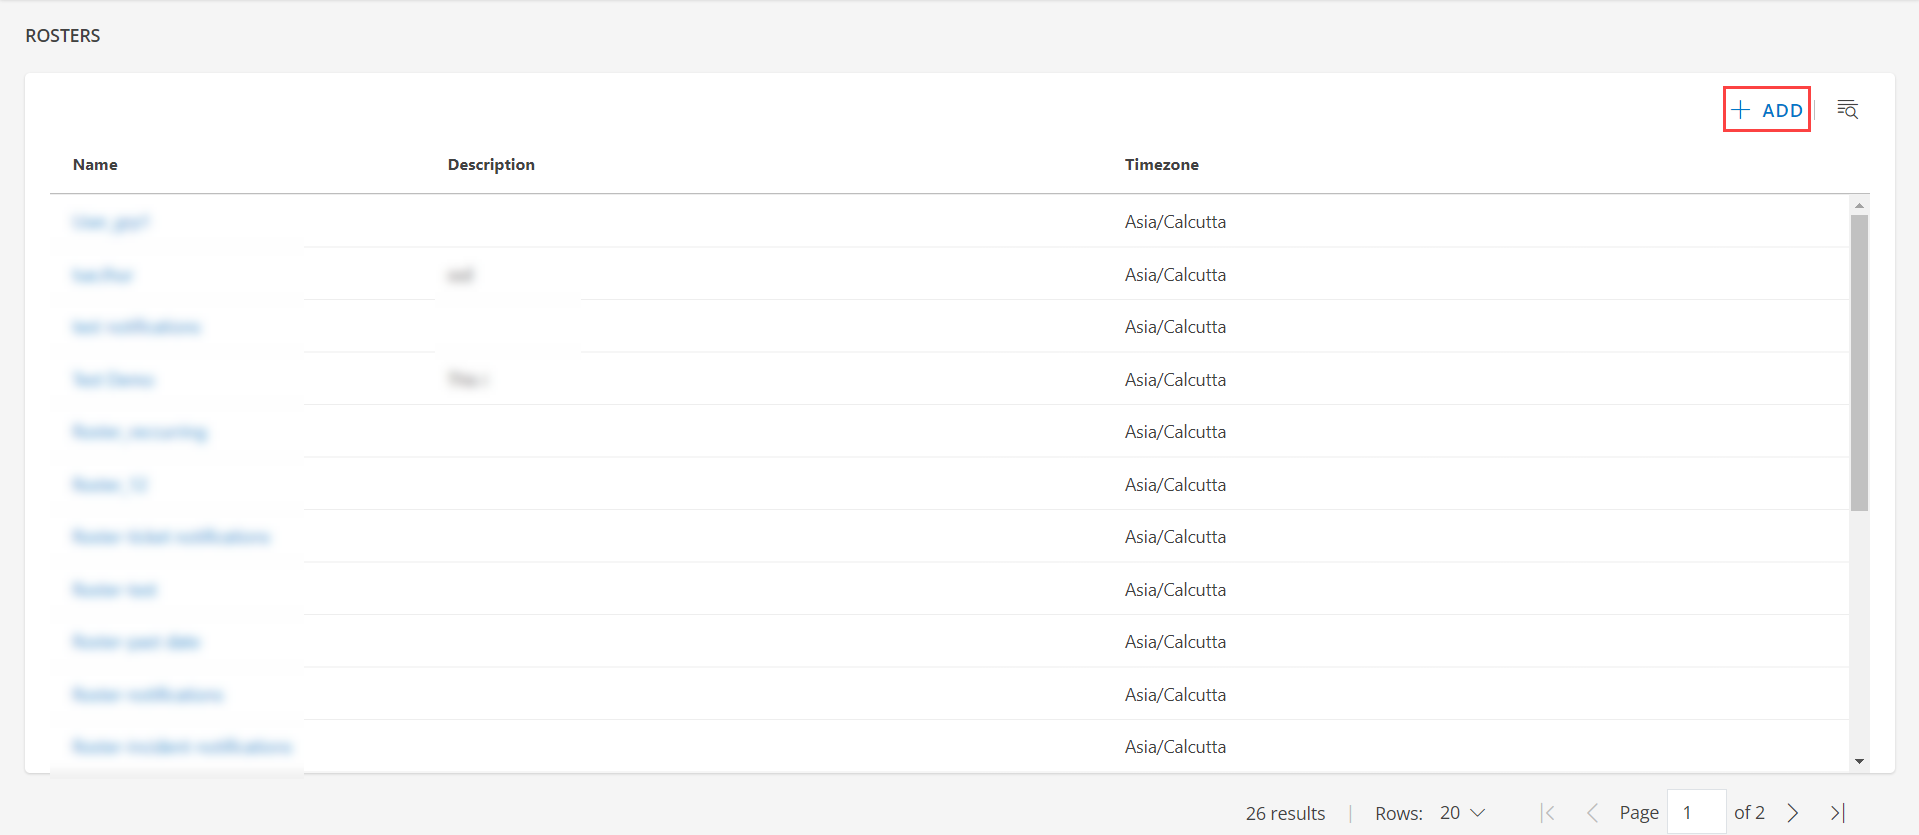
- Go to Setup > Rosters.
- Click TRY THE NEW ROSTERS on the top right of the page.

- The ROSTER page is displayed. Click + ADD.
In the ROSTER DETAILS page is displayed, enter the below details:
Property Description Roster Name Name of the roster. Time Zone Roster time zone. Description A description of the roster. In the SHIFTS section click + ADD.
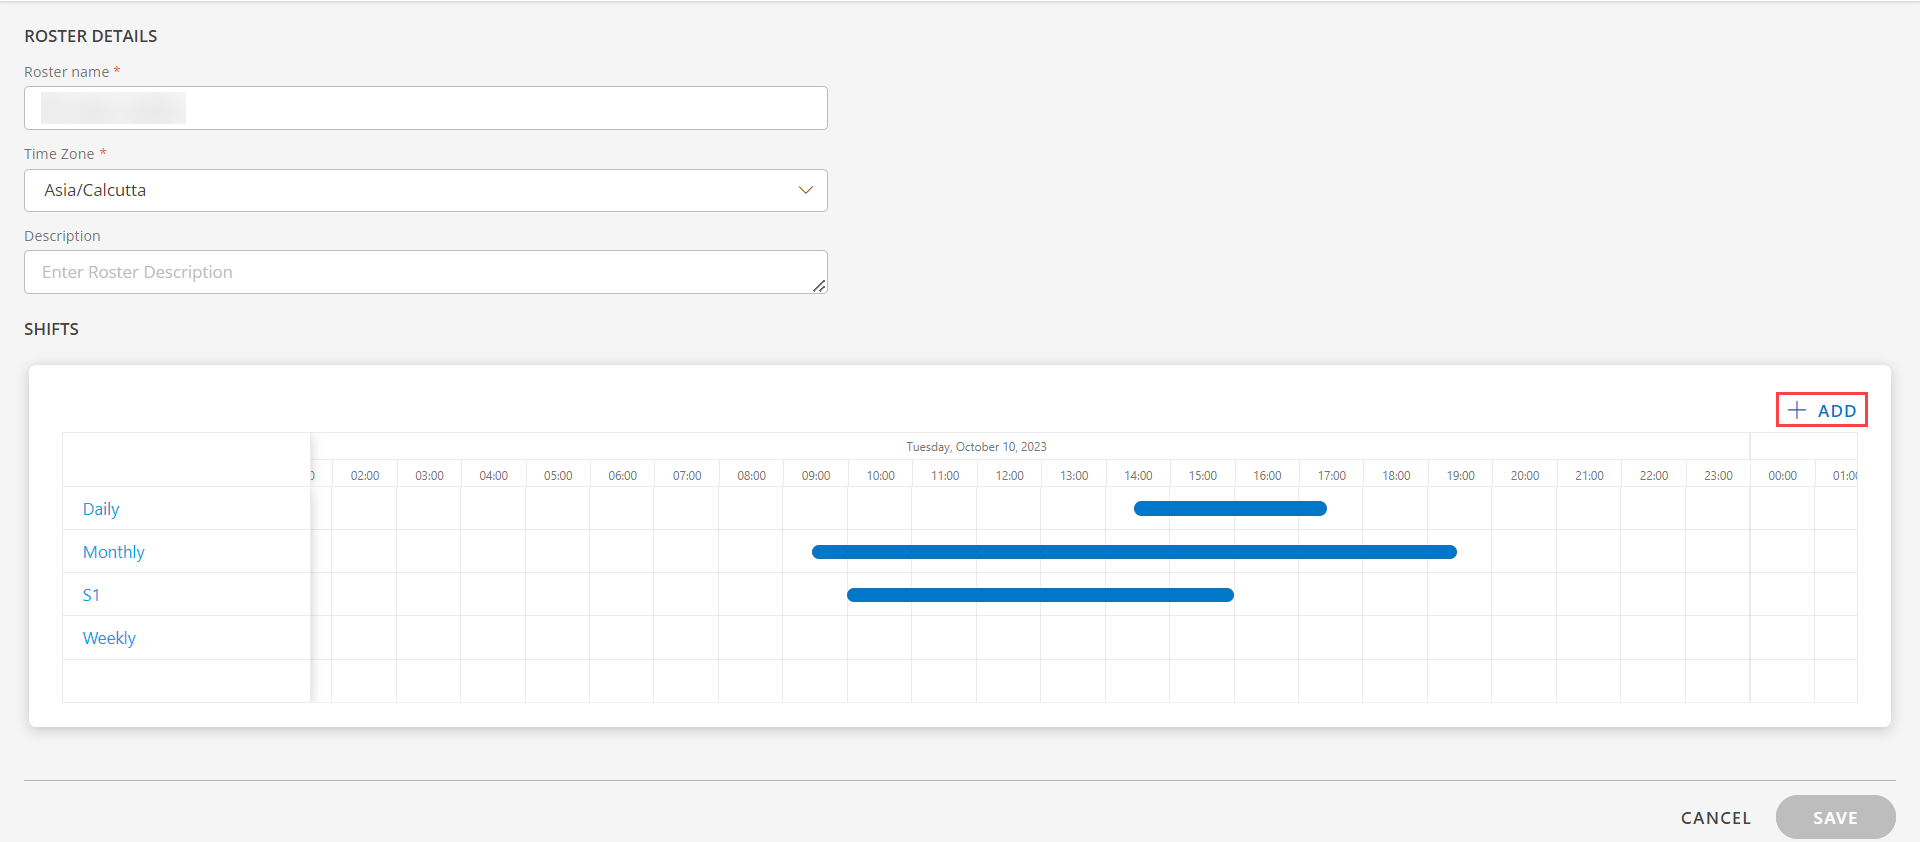
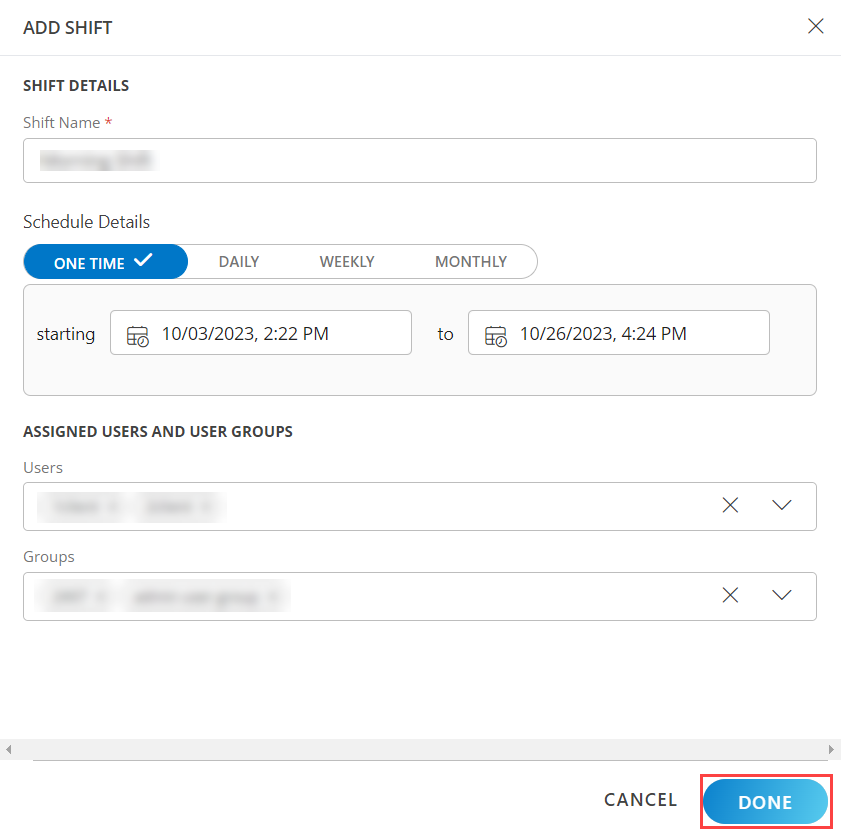
The ADD SHIFT details page appears. Enter the below details:
Property Description Shift Name Roster shift name Schedule Details Schedule class: - One Time
- Daily
- Weekly
- Monthly
Start Time Schedule start time. Select the below mentioned details and click Apply. - Time
- Date
End Time Schedule end time. Select the below mentioned details and click Apply. - Time
- Date
Groups If you want user groups to be roster members and if user groups are defined, drag the user group(s) in the Available User Groups column to the Assigned User Group column. You can also search for user groups to include. Users Users assigned to the shift. Select a user from the drop-down menu. The user list is populated with the available user information: - User name
- Designation
- Phone
- Mobile
- User Time Zone
Click + to add more users.Click DONE.
- Click SAVE.
- The roster is created and a confirmation message is displayed.
Search for a Roster
You can use the search to find a roster by the roster name.

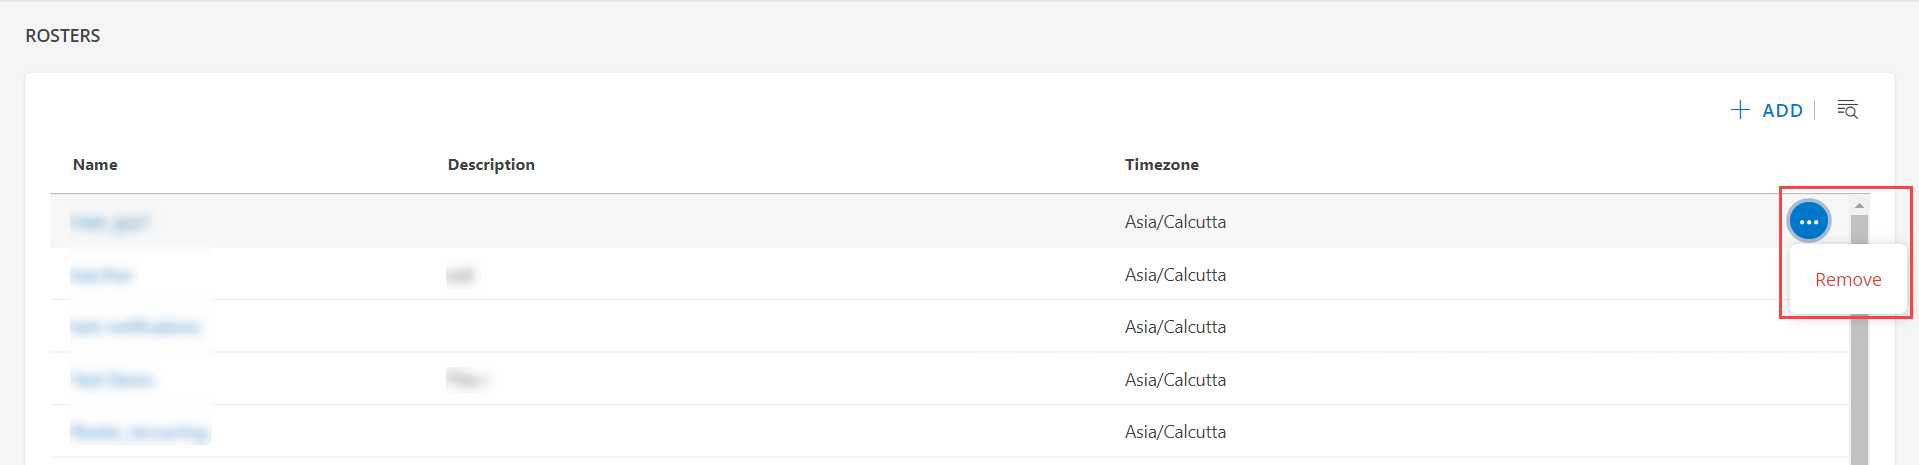
Remove a Roster
- Select a client from the All Clients list.
- Go to Setup > Rosters.
- Click TRY THE NEW ROSTERS on the top right of the page.
- Select the roster name and click Remove, which displays a confirmation message.
- Click Yes to confirm roster removal.