Overview
This page explains how to copy a global Synthetic Monitoring Template, customize it, and assign it to a synthetic monitor. It also describes the configuration rules that affect alerting behavior.
Prerequisite
Before assigning a template, remember the following points:
- You can assign only one template per synthetic monitor. Monitoring does not work as expected if you assign more than one template.
- Templates should match the type of synthetic monitor. For example, assign DNS templates to DNS synthetic monitors.
- To get alerts for configured metrics from all the configured locations assigned to a template, you must enable the Alert option and configure the Component Threshold for each metric while creating the template.
- If you make any changes to a synthetics template, remember that the template won’t update automatically. You need to reassign the template to the synthetic resources to apply those changes.
- Monitoring starts only after assigning templates to your synthetic monitor.
Note
The availability.down.locations.count metric is calculated based on specific monitoring metrics, depending on the monitor type.
- For HTTP/HTTPS, DNS, PING, TCP, UDP, IMAP, POP3, SMTP, RTT, FTP, and SCRIPT monitoring, the
synthetic.response.timemetric is required. - For SSL monitoring, the
ssl.cert.expiry.checkmetric is required.
If the required metric is not available as part of the template, the availability.down.locations.count metric may be computed incorrectly, which can cause inaccurate alerting.
Identify the latest global synthetic template
All global Synthetic templates are available as out-of-the-box templates on the Setup > Account > Monitoring > Templates page. You can copy these templates to either Partner or Client scope.
Before you copy a template, identify the latest global Synthetic template:
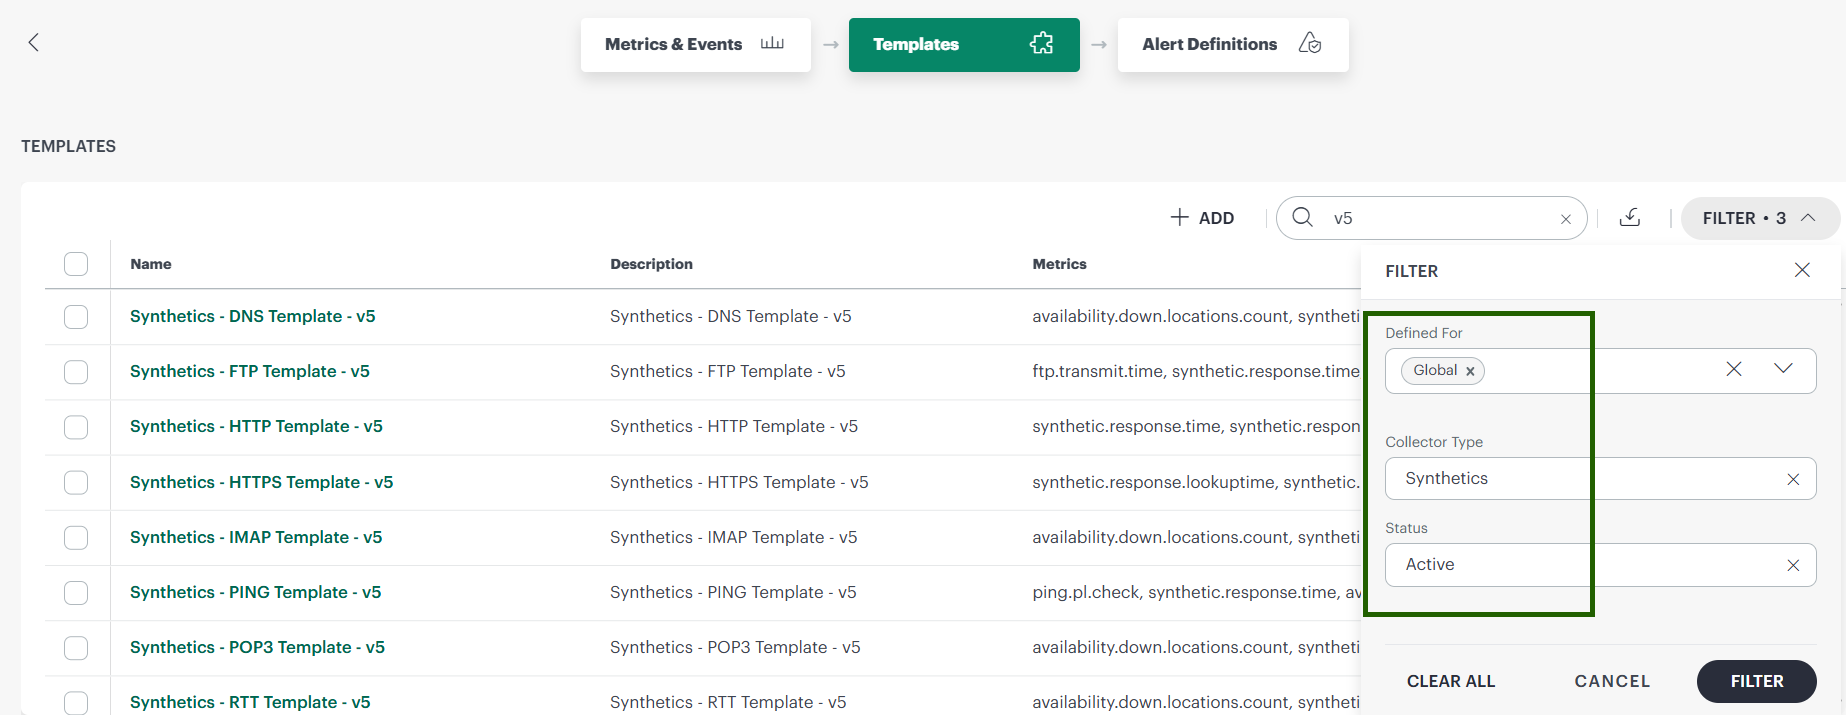
- Navigate to Setup > Account > Monitoring > Templates.
- Filter templates by Collector Type = Synthetics.
- Find the template where Scope = Global.
- Select the latest version.
- Copy the template to the required Partner or Client scope.
After selecting the appropriate template, follow the steps in the next section to copy it.
Copy a global synthetic template
To copy a global synthetic template and customize it for your Account, follow these steps:
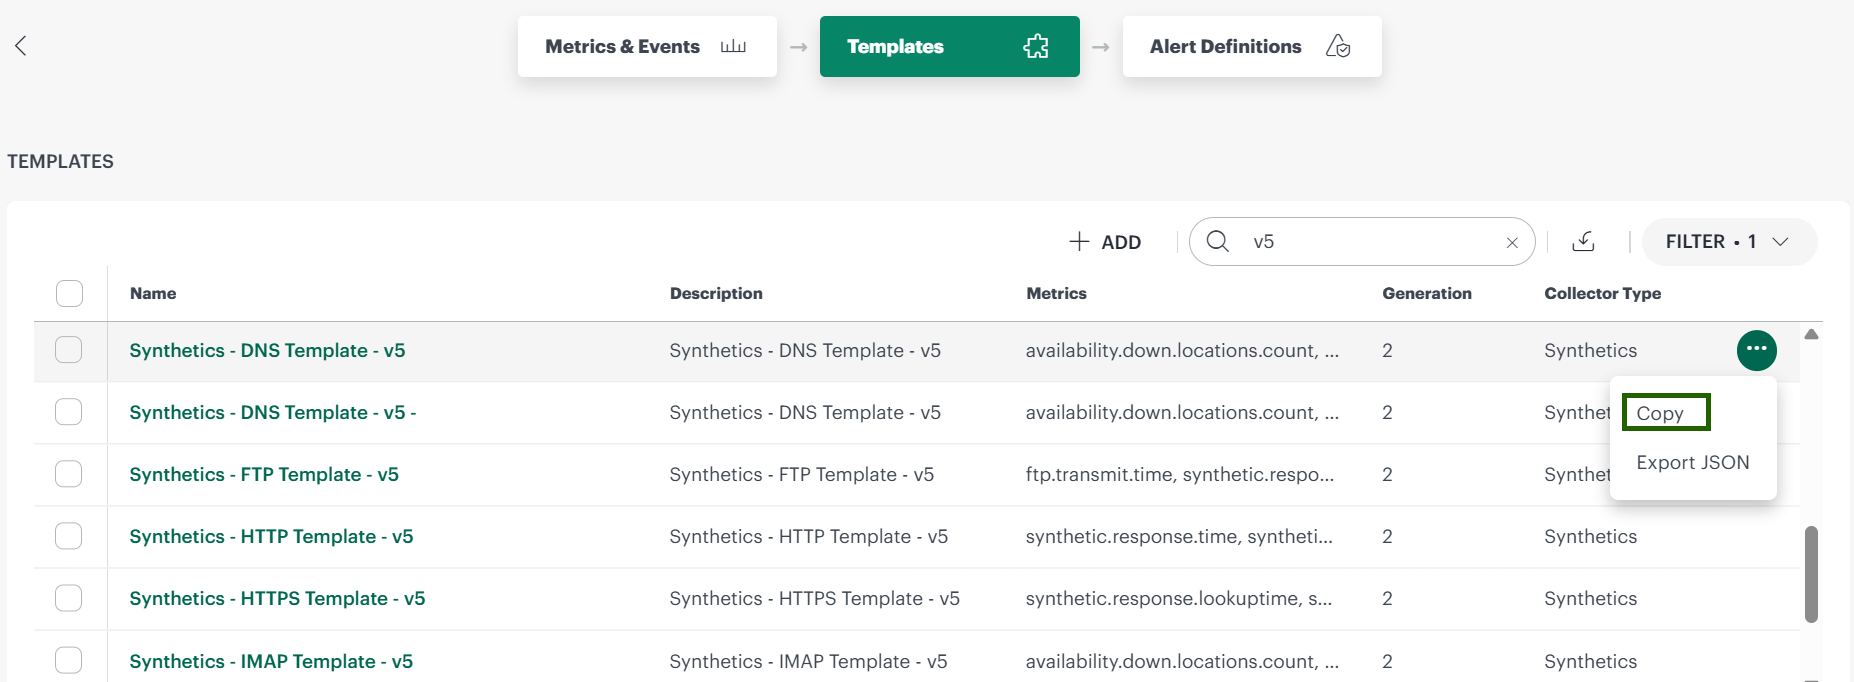
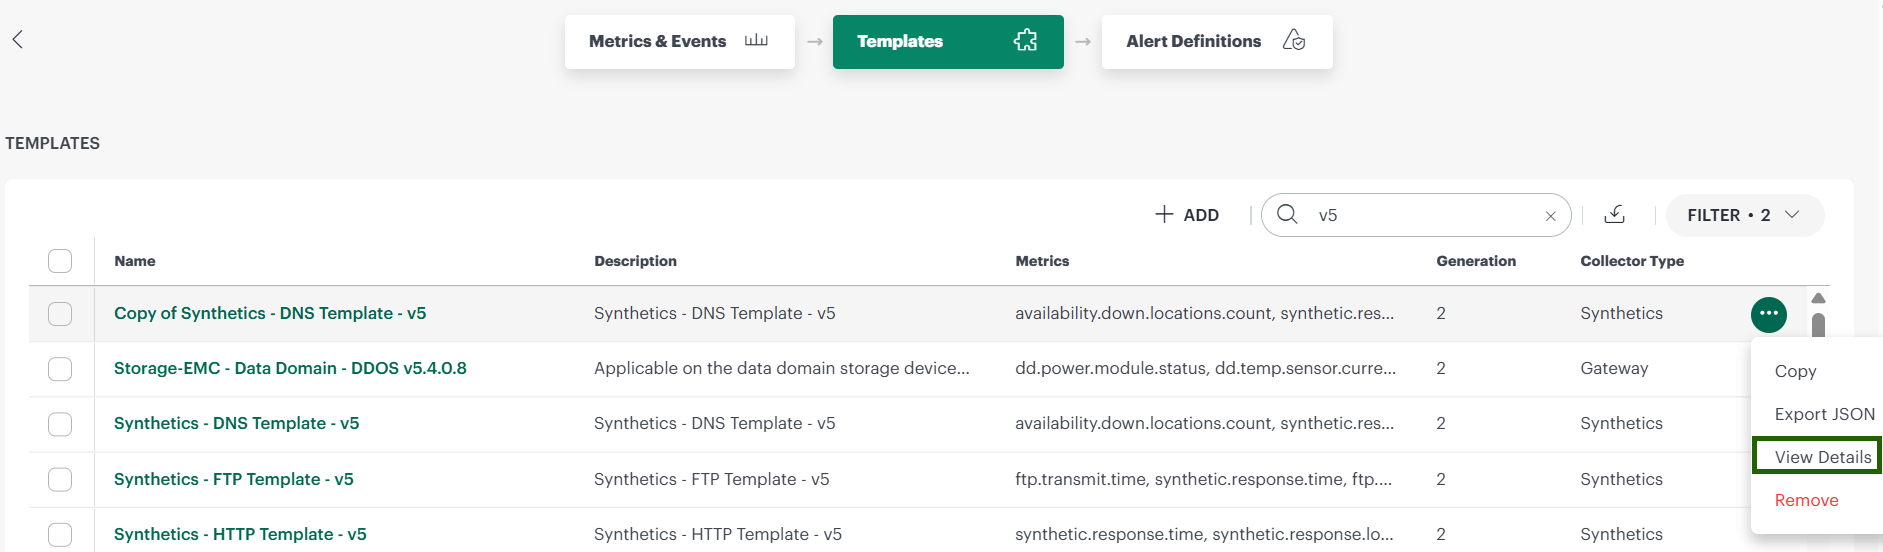
- Navigate to Setup > Account > Monitoring > Templates.
- Search for the required global synthetic template.
- Click the three-dot action menu and select Copy option to clone a template.
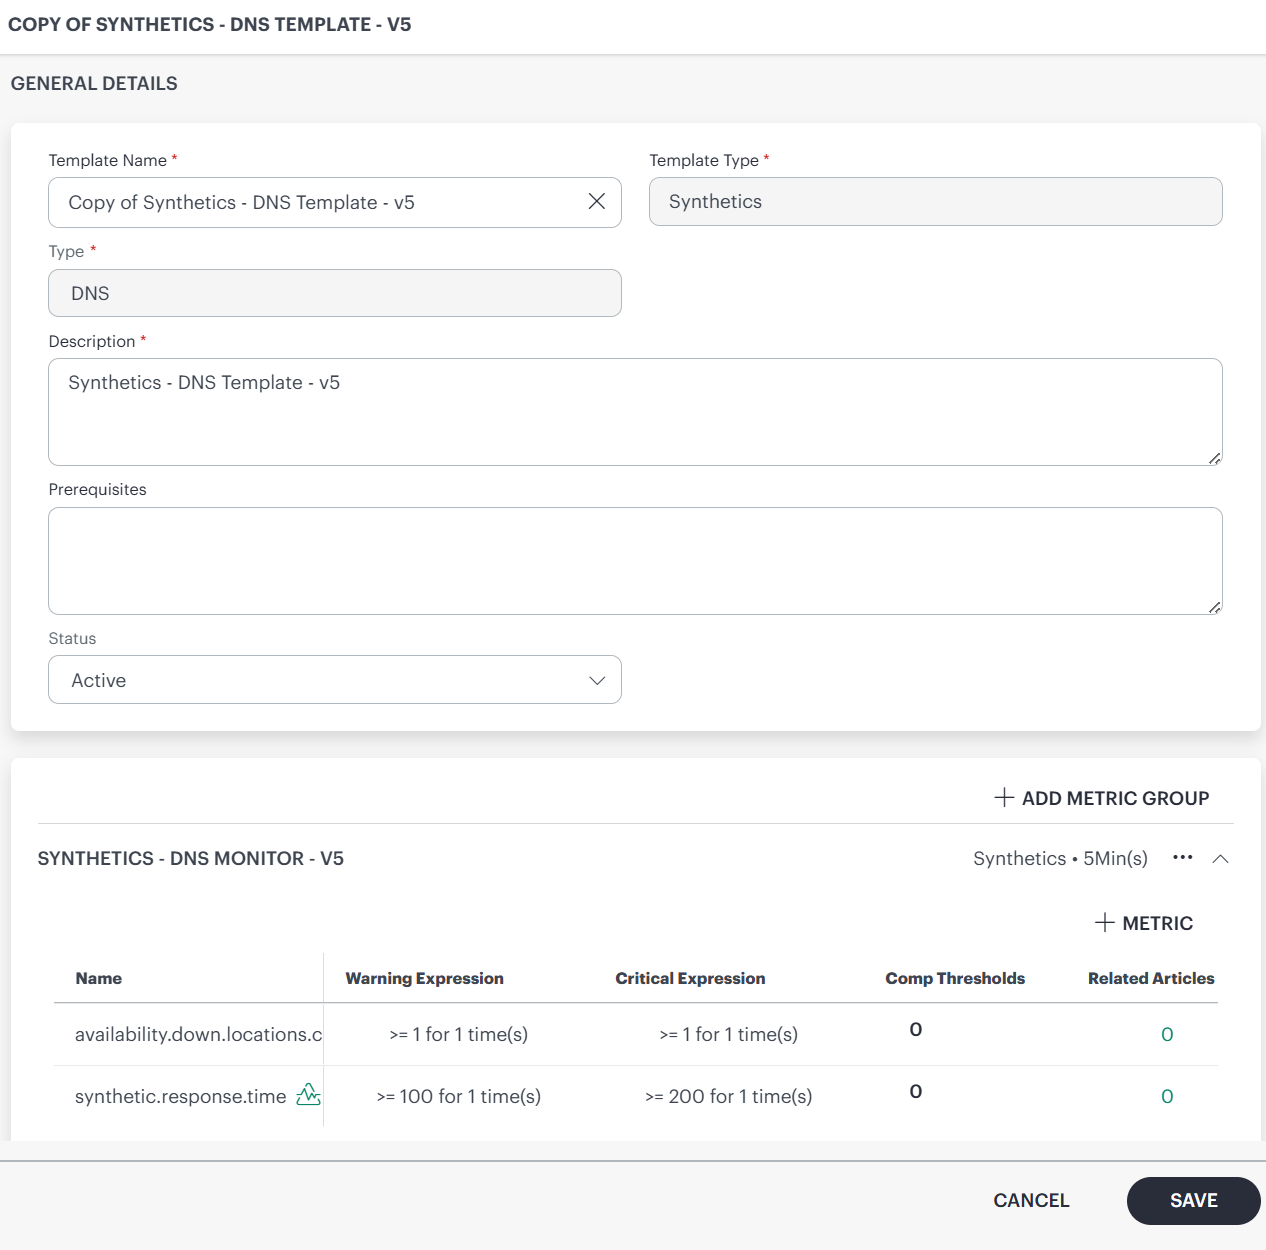
- Update the template values if needed, and then click Save.
| Field | Description |
|---|---|
| Template Name | Enter a clear and unique template name. |
| Description | Add a short summary of the template purpose. |
| Prerequisites | Enter dependency or setup notes for users. |
| Status | Set the template state based on readiness. |
| Notes | Add operational notes for future maintenance. |
| Metric Group | Add the required synthetic metric group, for example, Synthetics - DNS Monitor - v5. |
The copied template is now ready to assign. If you want to customize the alert subject and alert content, continue to the next section.
Customize alert subject and alert content (optional)
If you want to customize the alert subject and alert content for a copied synthetic monitor template, follow these steps:
- Search for the copied synthetic template.
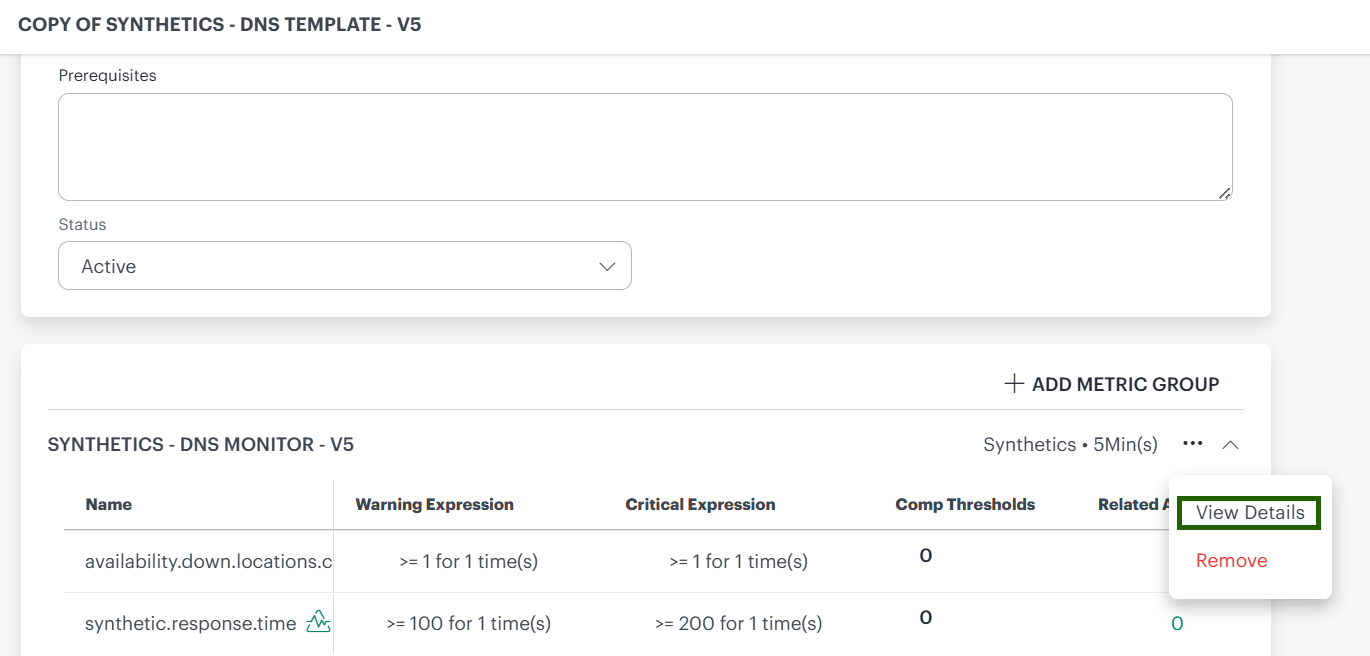
- Click the three-dot action menu, and then click View Details.
- On the General details page, go to the Metrics section, and then click View Details.
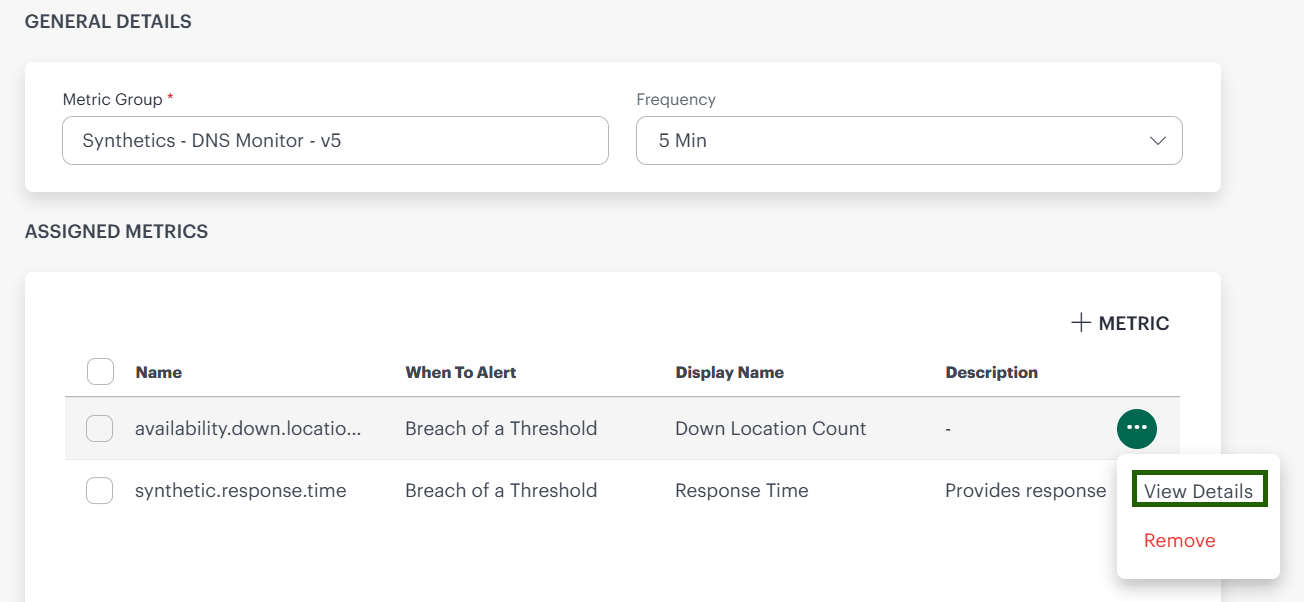
- To open the metric details, click View Details.
- In metric details page, update Alert Subject and Alert Content by using the following tokens:
| Token | Description |
|---|---|
| ${additional.info} | Additional context returned by the monitor check, such as a failure message, status details, or response data. |
| ${check.type} | The synthetic check type, such as HTTP, DNS, SSL, or PING. |
| ${resource.host} | The host name or IP address of the monitored Resource. |
| ${metric.name} | The internal name of the metric that triggered the alert. |
| ${metric.display.name} | The display name shown in the UI for the selected metric. |
| ${metric.display.unit} | The unit used for the metric value, such as ms, seconds, or percent. |
| ${severity} | The alert severity level, such as Critical, Warning, or Informational. |
| ${resource.name} | The name of the monitored Resource. |
| ${component.name} | The name of the component associated with the metric or alert. |
| ${metric.value} | The current value collected for the metric at the time of the alert. |
| ${threshold} | The threshold value that triggered the alert. |
| ${warning.threshold} | The warning threshold used to identify early warning conditions. |
| ${critical.threshold} | The critical threshold used to identify severe conditions. |
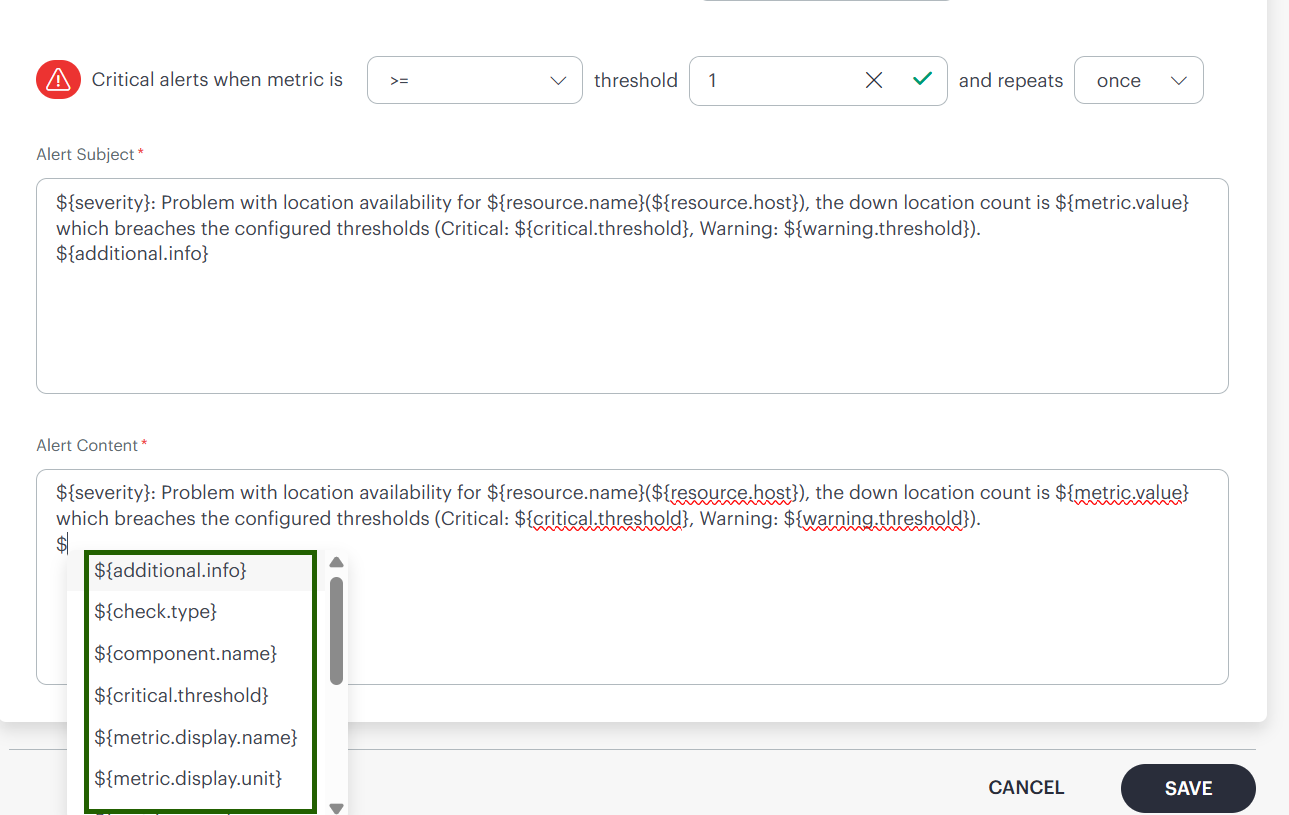
- Once updated click Save.
Assign a synthetic template to synthetic monitor
To assign a synthetic monitoring template to a synthetic monitor, follow these steps:
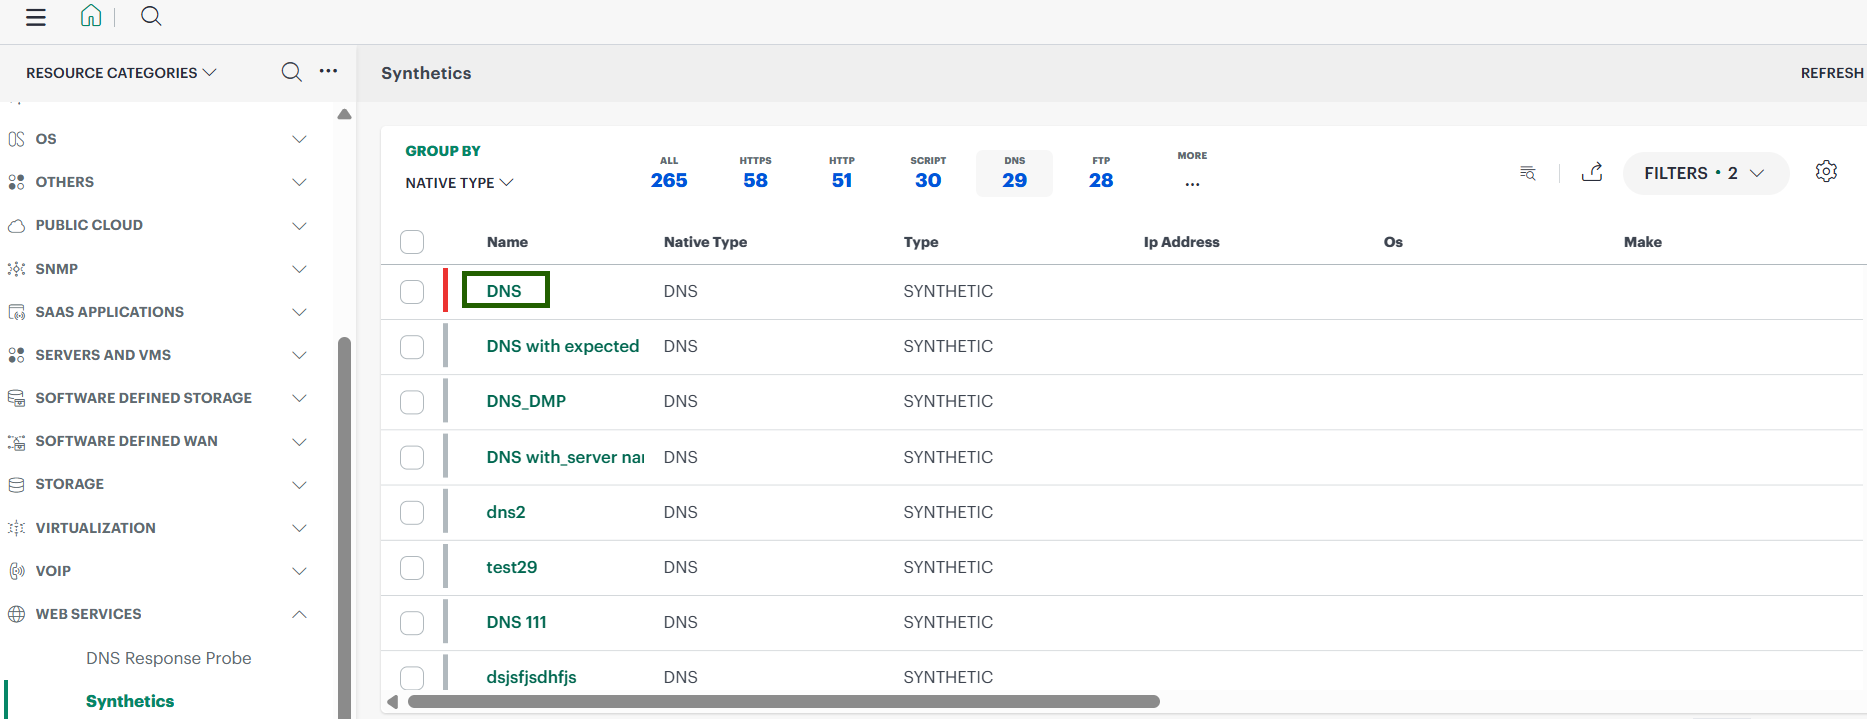
- From All Clients, select the required Client.
- Go to Infrastructure > Resources > Web Services > Synthetics.
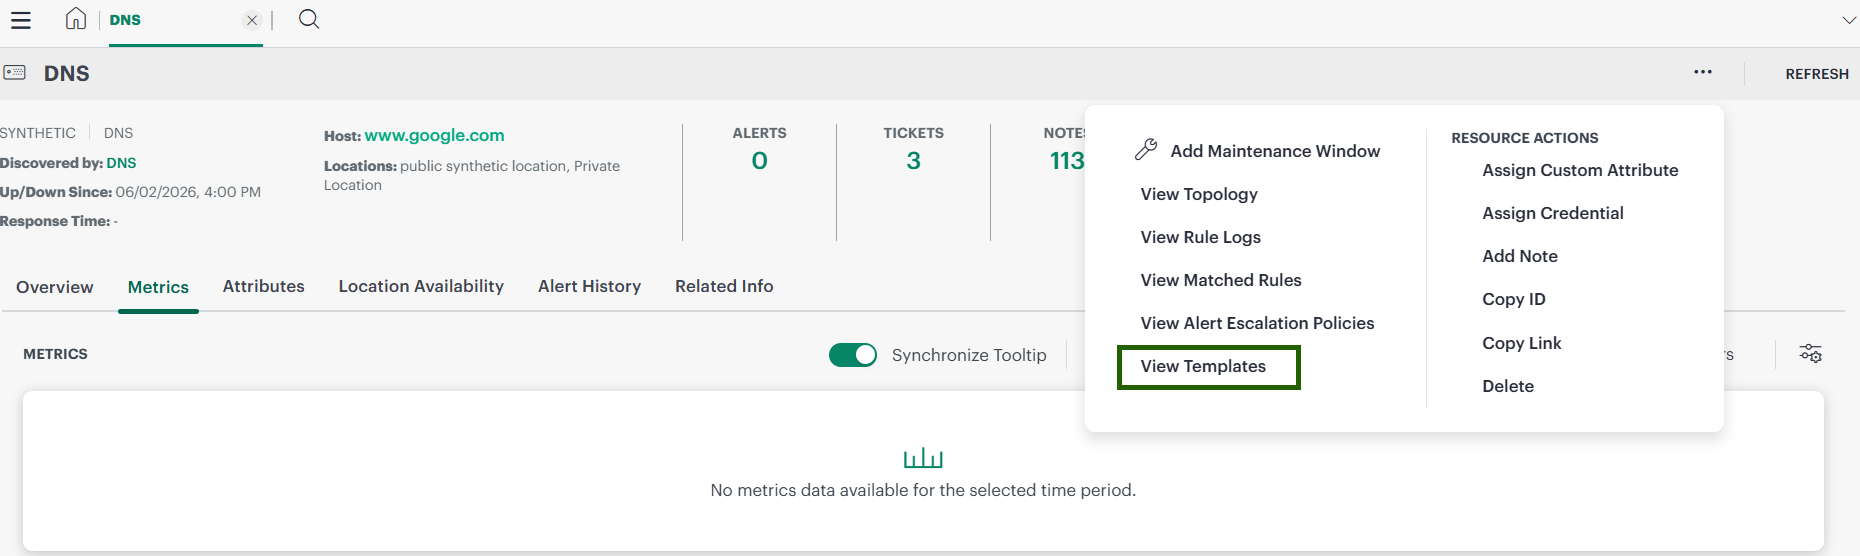
- Select the synthetic monitor to which you want to assign the template.
- Click the Actions menu (three dots) in the upper-right corner, and then select View Templates.
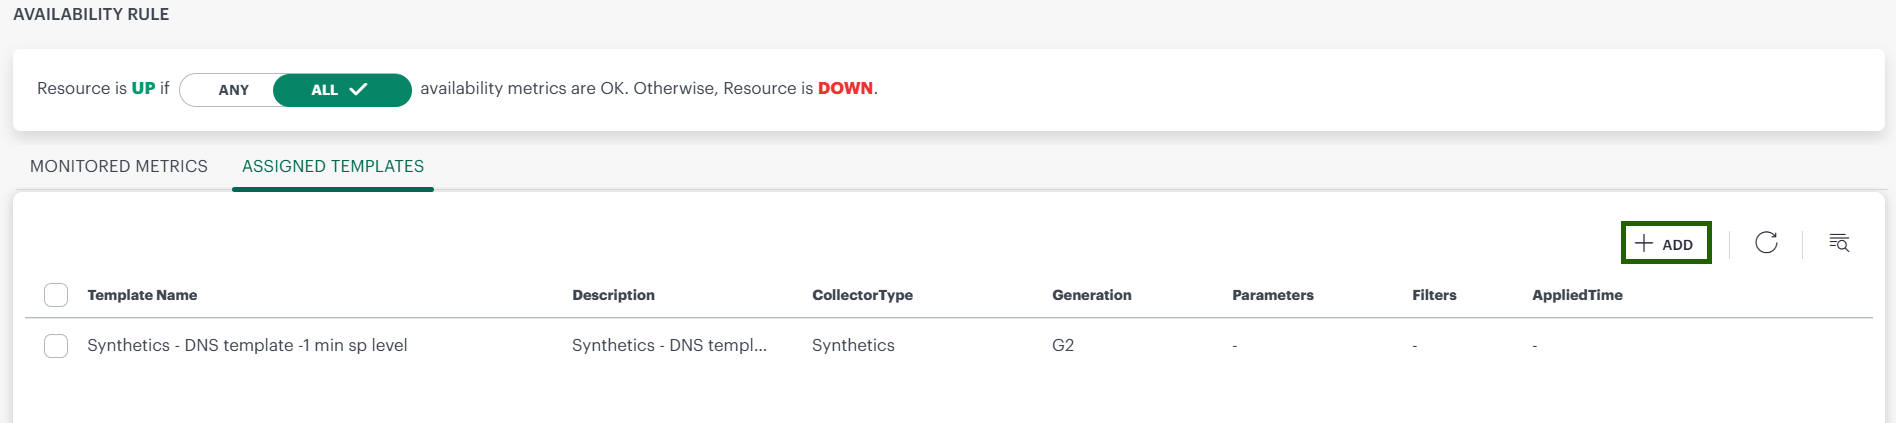
- On the Assign Templates page, click + Add.
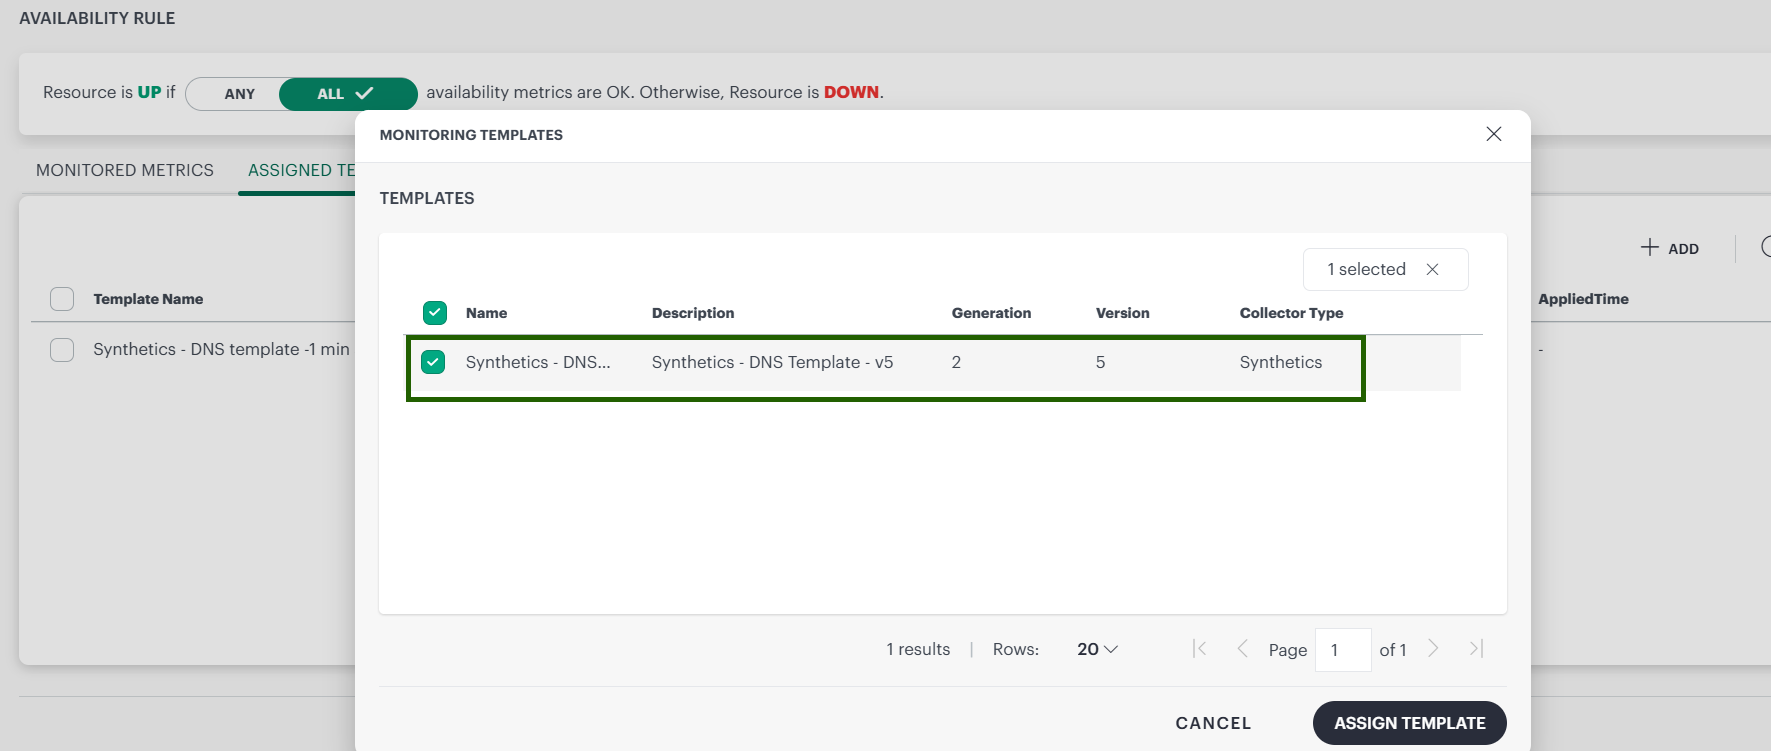
- On the Monitoring Templates screen, search for the latest template, select it and then click Assign Templates.
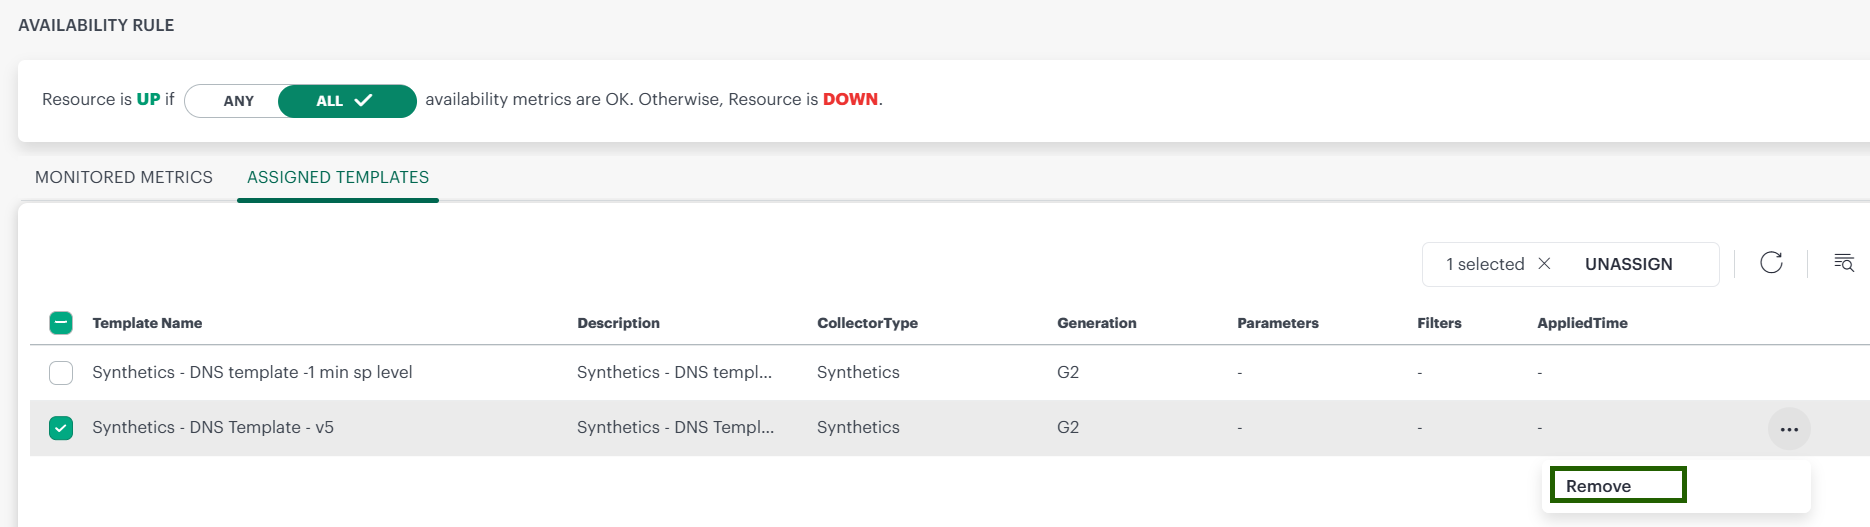
- Verify that the template appears in the list of assigned templates.
- To unassign it later, click Remove.