Introduction
Azure Blob is a cloud-based alternative to traditional on-premise container storage that can store any volume of business or application data from any source. Users may seamlessly migrate and integrate key business and application data for highly scalable cloud storage and next-gen file-based integration patterns using the OpsRamp Integration Cloud connector for Azure Blob storage. Exporting data involves installing an export integration and creating a data export.
Prerequisites
Below are the Prerequisites on Azure, to leverage batch exports from OpsRamp:
- Storage: Use an existing storage account or create a new storage account.
- Container: Use an existing container or create a new storage container.
- Network:
- Enable from all network
- Enabled from selected virtual networks and IP addresses (OpsRamp Specific IPs)
Setting up Azure Blob storage
Follow these steps to set up Azure Blob Storage before adding it as a destination in OpsRamp:
- Login to Azure portal.
- Create a storage account.
- Choose your storage account and under Blob service, click on Containers.
- Create a new container. This is where all your event files will be stored.
- You also need to provide an access key to authorize OpsRamp to write to your container. Under settings click on Access keys. You can find your access keys here.
For more information about how to create an Azure Blob storage account, refer Create a Storage Account.
Note: Please note the account name, container name, and access key since you’ll need these to set up Azure Blob Storage as a destination in OpsRamp.
Networking Configuration
To allow access, we should make the changes shown below in the networking area. Described the each option in detail:
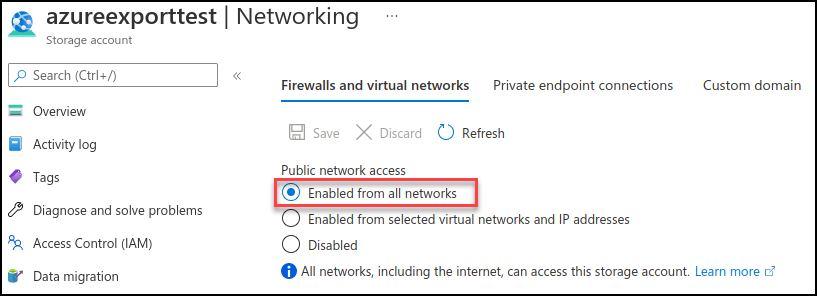
Enabled from all networks: If access is not restricted to a specific network, please select the “Enabled from all networks” checkbox.
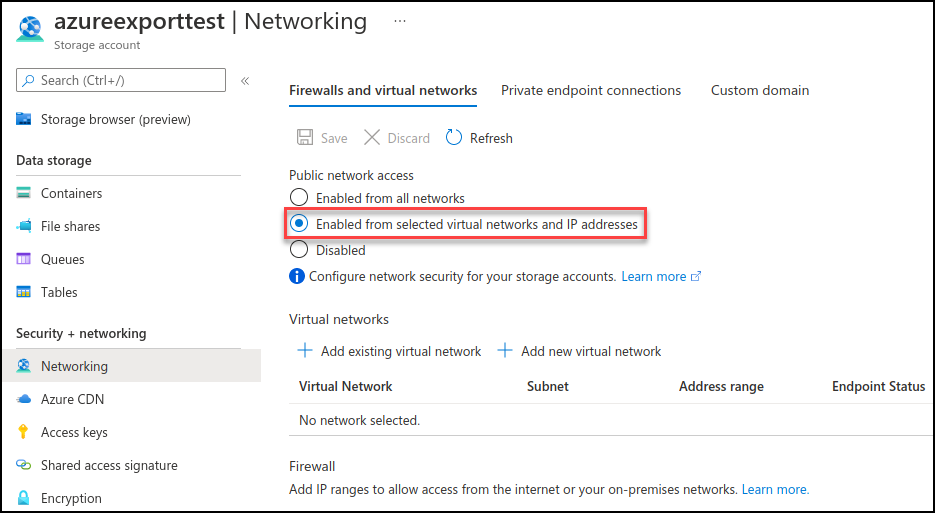
Enabled from Selected virtual networks and IP addresses: If you want to restrict access to a specific IP address, check the “Enabled from Selected virtual networks and IP addresses” checkbox. In this case, enter the OpsRamp outbound IP address to export the work. Please contact support or your customer success contact to obtain the OpsRamp IP.
Navigate to your Storage account > Networking and select the network options under Public network access.
- Scenarios-1: Enable from all networks.
Scenarios-2: Enabled from selected virtual networks and IP addresses
Click on the “Add your client IP address” checkbox.
Please whitelist OpsRamp IP addresses specific to respective POD. For Opsramp IP’s, please contact Support or your customer success contact.Azure Blob Storage Integration
Note: If the OpsRamp POD and the Azure Blob Storage account are both running in the same Azure region, only scenario 1 will work.
Services deployed in the same region as the storage account use private Azure IP addresses for communication. Thus, you can’t restrict access to specific Azure services based on their public outbound IP address range. Please contact your customer success contact or support to find out on which POD you are deployed.
Configuring Azure Blob Storage in OpsRamp
To enable data export to Microsoft Azure Blob Storage, first add it as a destination to the source from which event data is being sent. When the destination is enabled, OpsRamp events will begin to flow to Microsoft Azure Blob Storage. The files will be visible in your blob container.
Follow the below steps to configure Azure Blob Storage as a destination in OpsRamp:
Install the integration
- From All Clients, select a client.
- Navigate to Setup > Account.
- Select the Integrations and Apps tab.
- The Installed Integrations page, where all the installed applications are displayed. Note: If there are no installed applications, it will navigate to the Available Integrations and Apps page.
- Click + ADD on the Installed Integrations page. The Available Integrations and Apps page displays all the available applications along with the newly created application with the version.
- Search for Blob Storage using the search option available.
Note: Alternatively, you can use the All Categories option to search. - Click +ADD on the Blob Storage tile and click Install.
- In the Install Blob Storage Integration window, enter:
- Name: Name of the Integration.
- Logo: Logo you upload depending on the integration type (optional).
- Click on Install.
Configure the integration
In Authentication, enter the following information, and Save:
- Storage account name: Azure Blob account name.
- Secret access key: Access key generated from the portal.
- Container Name: Name of the Azure container for the export data.
- Base URI: Data location in the container. For example,
https://portal.azure.com.
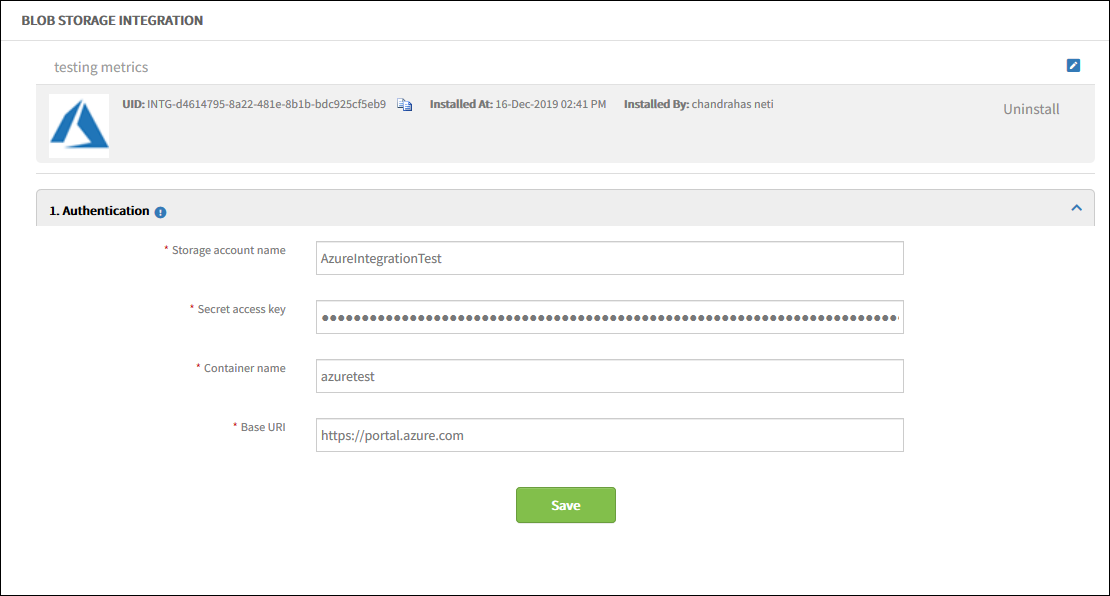
If the provided Information is correct, then the integration will be saved without any errors.
Please refer to the Create Batch export for next steps.