This section guides you through setting up, configuring, and managing the Cisco ACI integration in OpsRamp.
Prerequisites
- Before configuring the integration, ensure that your environment meets the following requirements related to gateway versions, credentials, and connectivity.
- OpsRamp Classic Gateway (Linux) version 14.0.0 or later.
- OpsRamp NextGen Gateway version 14.0.0 or later.
- OpsRamp recommends using the latest Gateway version for full coverage of recent bug fixes and enhancements.
- The minimum required privilege for the Cisco ACI App is a user account with the
“read-all”role and Read access privilege to all security domains. - customers are expected to provide the client ID and secret of an
ExtOAuthClientwith the system-observer role. - To check the reachability of the end device from the gateway using the following commands:
- Try pinging with the IP address provided in the configuration:ping
<IP Address> - Try telnet using:
telnet <IP Address> <Port>
- Try pinging with the IP address provided in the configuration:ping
Configure and Install the Cisco ACI Integration
Click here to Configure and Install the Cisco ACI Integration
- To select your client, navigate to All Clients, and click the Client/Partner dropdown menu.
Note: You may either type your client’s name in the search bar or select your client from the list. - Navigate to Setup > Account. The Account Details screen is displayed.
- Click Integrations. The Installed Integrations screen is displayed with all the installed applications.
Note
If you do not have any installed applications, you will be navigated to the Available Integrations and Apps page with all the available applications along with the newly created application with the version. - Click + ADD on the Installed Integrations page.
Note: Search for the integration either by entering the name of the integration in the search bar or by selecting the category of the integration from the All Categories dropdown list. - Click ADD in the Cisco ACI application.
- In the Configuration screen, click + ADD. The Add Configuration screen appears.
- Enter the following BASIC INFORMATION:

| Field Name | Description | Field Type |
|---|---|---|
| Name | Enter the name for the configuration. | String |
| Host Name / IP Address | Enter the Host Name / IP Address of the Cisco ACI. It should be accessible from Gateway. | String |
| Is Secure | Select this checkbox to secure communication between your system and the specified endpoint using protocols such as HTTPS (HTTP over SSL/TLS).Default Selection: By default, the system enables this setting. When selected, it encrypts the connection and adds an extra layer of security to the transmitted data. | Checkbox |
| Port | Specify the port number that OpsRamp uses to connect to the Cisco ACI Target DeviceNote: By default, the port number is 443. | String |
| Credentials | Select the credentials required to authenticate OpsRamp with the Cisco ACI Target Device. You can either select the credentials from the dropdown menu or add a new credential.To add a credential, click +ADD. The ADD CREDENTIAL dialog box appears. Enter the following information. - Name: Enter the credential name. - Description: Enter the brief description of the credential. - User Name: Enter the Username. - Password: Enter the password. - Confirm Password: Confirm your password. | String |
| App Failure Notifications | When selected, you will be notified in case of an application failure such as Connectivity Exception, Authentication Exception. | Checkbox |
- CUSTOM ATTRIBUTES: Custom attributes are the user-defined data fields or properties that can be added to the preexisting attributes to configure the integration.
| Field Name | Description | Field Type |
|---|---|---|
| Custom Attribute | Select the custom attribute from the dropdown. You can add attributes by clicking the Add icon (+). | Dropdown |
| Value | Select the value from the dropdown. | Dropdown |
Note
The custom attribute that you add here will be assigned to all the resources that are created by the integration. You can add a maximum of five custom attributes (key and value pair).- In the RESOURCE TYPE section, select:
- ALL: All the existing and future resources will be discovered.
- SELECT: You can select one or multiple resources to be discovered.
- In the DISCOVERY SCHEDULE section, select recurrence pattern to add one of the following patterns:
- Minutes
- Hourly
- Daily
- Weekly
- Monthly
- Click ADD.
Now the configuration is saved and displayed on the configurations page after you save it.
Note
From the same page, you may Edit and Remove the created configuration.12. Under the ADVANCED SETTINGS, Select the Bypass Resource Reconciliation option, if you wish to bypass resource reconciliation when encountering the same resources discovered by multiple applications.
Note
If two different applications provide identical discovery attributes, two separate resources will be generated with those respective attributes from the individual discoveries.14. (Optional) Click +ADD to create a new collector. You can either use the pre-populated name or give the name to your collector.
15. Select an existing registered profile.16. Click FINISH.
The integration is installed and displayed on the INSTALLED INTEGRATION page. Use the search field to find the installed integration.
Modify Cisco ACI Integration
Click here to Modify the Configuration
- See Modify an Installed Integration or Application article.
Note
Select Cisco ACI.Discover Resources in Cisco ACI Integration
Click here to View the Cisco ACI
- Navigate to Infrastructure > Search > NETWORK FABRIC > Cisco ACI. The Cisco ACI page is displayed.
- Select the application on the Cisco ACI page
- The RESOURCE page appears from the right.
- Click the ellipsis (…) on the top right and select View Details.

- Navigate to the Attributes tab to view the discovery details.
View resource metrics
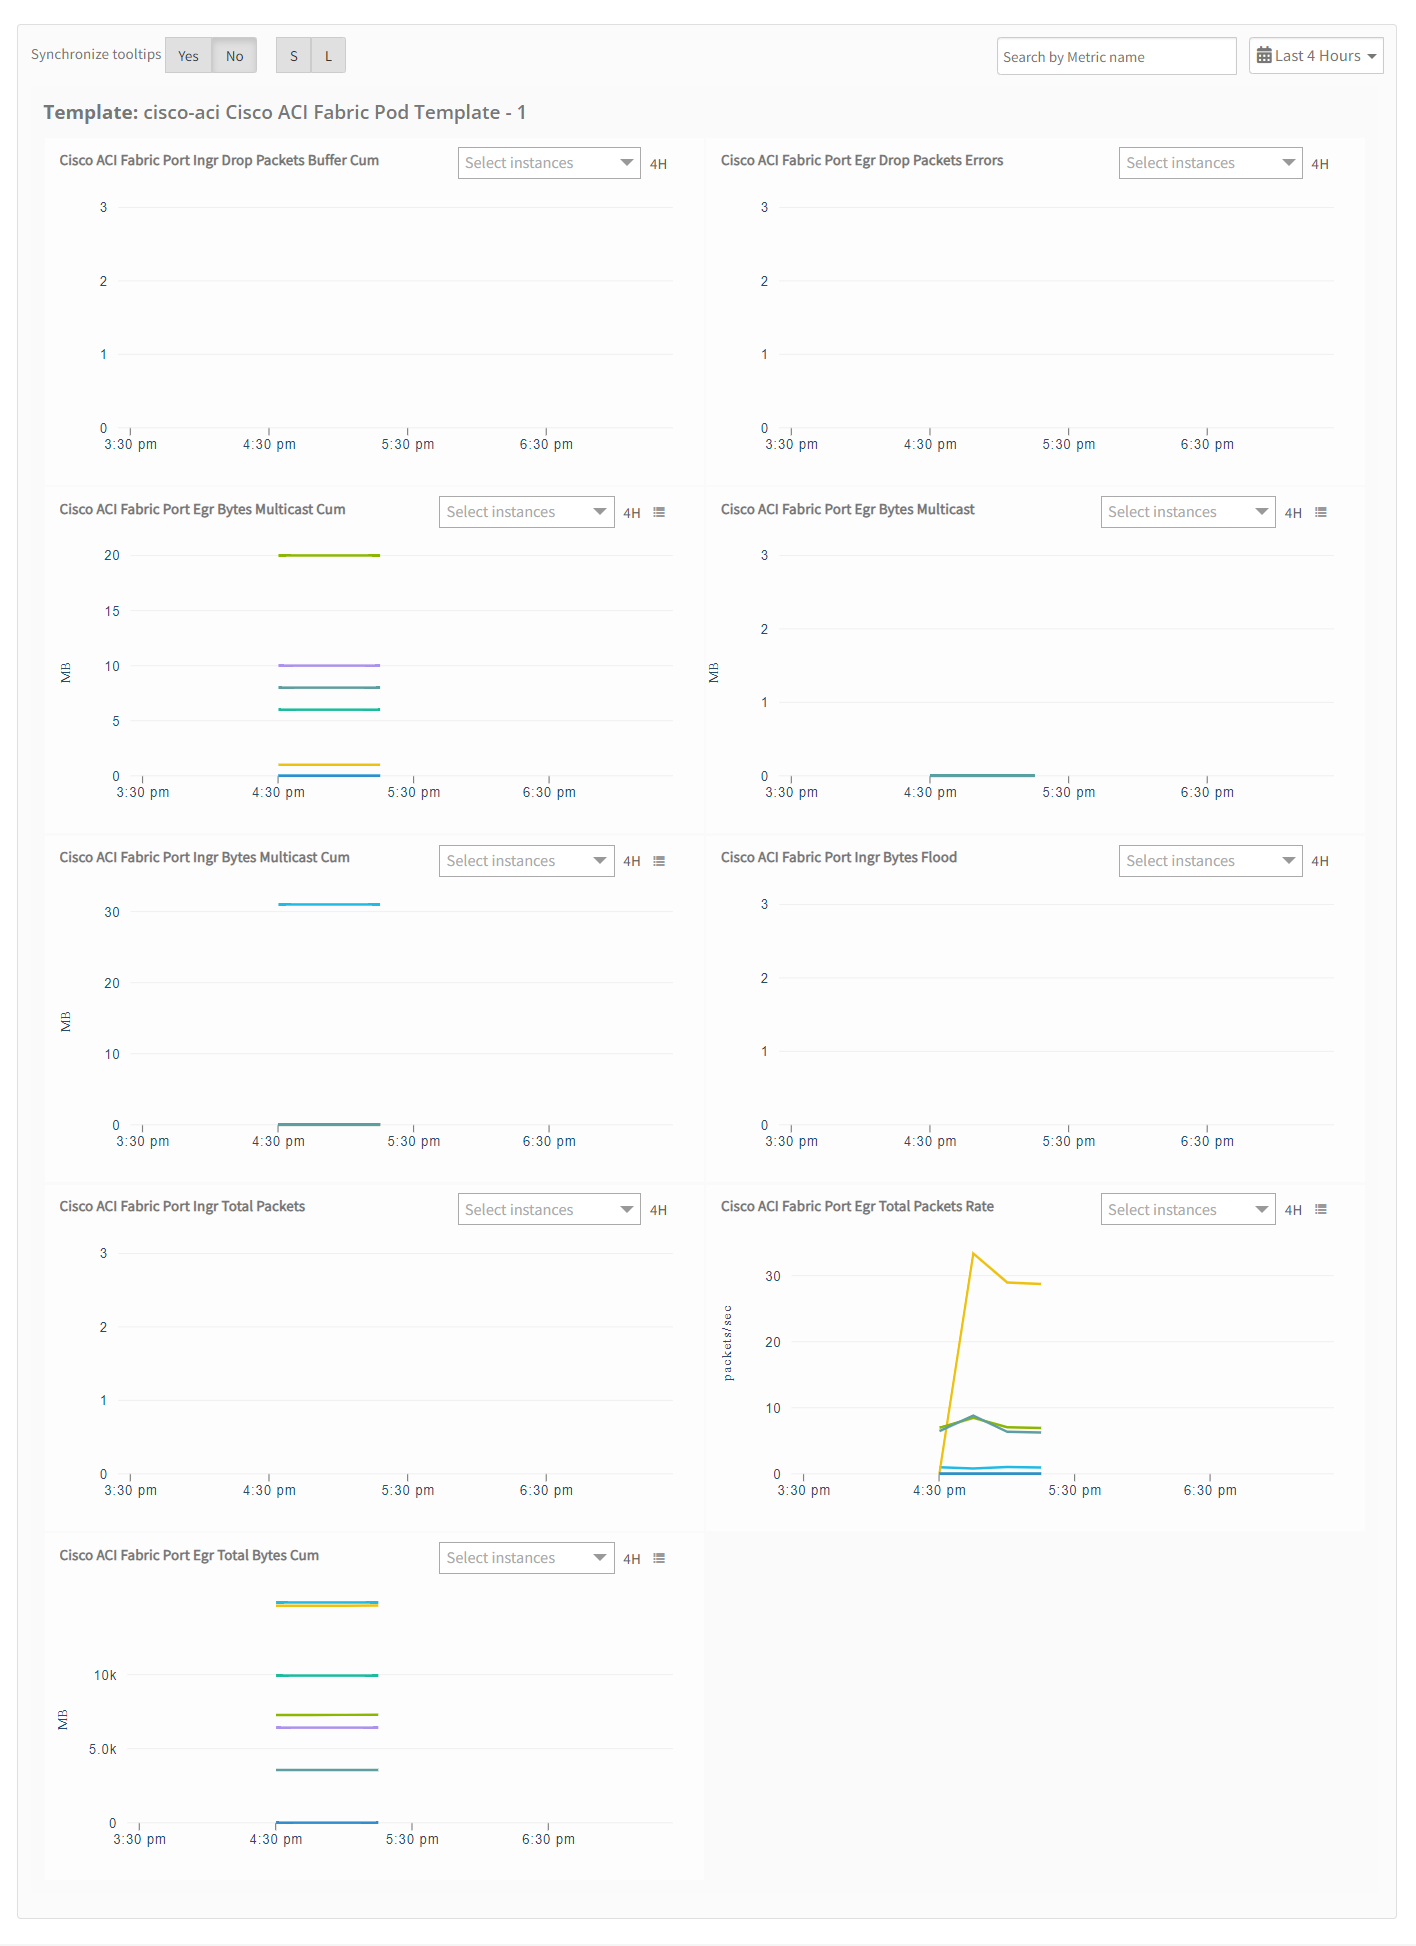
To confirm Cisco ACI monitoring, review the following:
- Metric graphs: A graph is plotted for each metric that is enabled in the configuration.
- Alerts: Alerts are generated for metrics that are configured as defined for integration.
- Click the Metrics tab to view the metric details for Cisco ACI.