Introduction
IBM® Informix® is a fast and scalable database server that manages traditional relational, object-relational, and dimensional databases. Its small footprint and self-managing capabilities are suited to embedded data-management solutions.
The IBM Informix database server runs on UNIX, Linux, Mac OS X, and Windows operating systems. It supports a comprehensive set of high availability options, high levels of performance, data replication capabilities, scalability and minimal administrative overhead for both simple and complex IT infrastructures.
Prerequisites
Classic gateway (Linux) version should be 14.0.0 and above.
Nextgen gateway version should be 14.0.0 and above.
Note: OpsRamp recommends using the latest Gateway version for full coverage of recent bug fixes, enhancements, etc.Remote machine user credentials should have the administrator/root level access.
Server path in configuration is JSON field, need to provide the payload in the following format:
Server Path
      {
        "informixServers": [
          {
            "serverName": "ol_informix1410",
            "serverPath": "C:\\Program Files\\IBM Informix Software Bundle\\ol_informix1410.cmd"
          },
          {
            "serverName": "test",
            "serverPath": "C:\\Program Files\\IBM Informix Software Bundle\\test.cmd"
          },
          {
            "serverName": "sample",
            "serverPath": "C:\\Program Files\\IBM Informix Software Bundle\\sample.cmd"
          },
          {
            "serverName": "testDemo",
            "serverPath": "C:\\Program Files\\IBM Informix Software Bundle\\testDemo.cmd"
          }
        ]
      }
- The User must have CONNECT access privileges to both the
sysmasterandsysadmindatabases. - To rule out SSH accessability or specific failures like end device connectivity or authentication, try to establish connection with end device from gateway using the following commands.
- Try ping with IP Address provided in configuration
ping <IP Address>. - Try telnet using
telnet <IP Address> <port>. - Try ssh to the end device from gateway
ssh <username>@<IP Address>.
- Try ping with IP Address provided in configuration
Supported Metrics
Click here to view the supported metrics
| Native Type | Metric Name | Metric Display Name | Units | Application Version | Description |
|---|---|---|---|---|---|
| Informix DB Server | Informix_server_startup | Informix server startup | ms | 1.0.0 | Monitors the Database Server Uptime |
| Informix_check_dbalive | Informix check dbalive | 1.0.0 | Monitors the Informix Availability. Possible states are - On-Line : 1, Off-Line : 0 | ||
| Informix_virtual_cpu_system | Informix virtual CPU system | microsec | 1.0.0 | Monitors the Informix virtual CPU system Time | |
| Informix_virtual_cpu_user | Informix virtual CPU user | microsec | 1.0.0 | Monitors the Informix virtual CPU user Time | |
| Informix_dbsize_size_mb | Informix dbsize size mb | MB | 1.0.0 | Monitors the Informix Free Dbspace Space | |
| Informix_dbsize_size_pct | Informix dbsize size pct | % | 1.0.0 | Monitors the Informix Free Dbspace Space | |
| Informix_database_count | Informix database count | count | 1.0.0 | Monitors the Informix database count | |
| Informix_dbspace_offline | Informix dbspace offline | 1.0.0 | Monitors the Database offline status. Possible states are - Up : 1, Down : 0 | ||
| Informix_dbspace_inconsistent | Informix dbspace inconsistent | 1.0.0 | Monitors the Database inconsistency status. Possible states are - Validating : 1, Other : 0 | ||
| Informix_lru_writes | Informix lru writes | count | 1.0.0 | Monitors the Informix LRU Writes | |
| Informix_foreground_writes | Informix foreground writes | count | 1.0.0 | Monitors the Informix Foreground Writes | |
| Informix_chunk_io_write | Informix chunk io write | count | 1.0.0 | Monitors the Informix Chunk I/O Writes | |
| Informix_chunk_io_read | Informix chunk io read | count | 1.0.0 | Monitors the Informix Chunk I/O Reads | |
| Informix_deadlock_timeout | Informix deadlock timeout | count | 1.0.0 | Monitors the Informix deadlock timeout | |
| Informix_checkpoint_wait | Informix checkpoint wait | count | 1.0.0 | Monitors the Informix checkpoint wait | |
| Informix_lock_wait | Informix lock wait | count | 1.0.0 | Monitors the Informix lock waits | |
| Informix_buffer_wait | Informix buffer wait | count | 1.0.0 | Monitors the Informix Buffer Waits | |
| Informix_latch_wait | Informix latch wait | count | 1.0.0 | Monitors the Informix Latch Waits | |
| Informix_lock_user | Informix lock user | count | 1.0.0 | Monitors the Informix Thread Overflow | |
| Informix_lock_session | Informix lock session | count | 1.0.0 | Monitors the Informix Lock Overflow | |
| Informix_buf_cachehit_ratio_write | Informix buffer cachehit ratio write | % | 1.0.0 | Monitors the Informix buffer cachehit ratio write | |
| Informix_buf_cachehit_ratio_readx | Informix buffer cachehit ratio read | % | 1.0.0 | Monitors the Informix buffer cachehit ratio write |
Default Monitoring Configurations
Informix Database has default Global Device Management Policies, Global Templates, Global Monitors and Global metrics in OpsRamp. Users can customize these default monitoring configurations as per their business use cases by cloning respective global templates and global Device Management Policies. OpsRamp recommends doing this activity before installing the app to avoid noise alerts and data.
- Default Global Device Management Policies
OpsRamp has a Global Device Management Policy for each Native Type of Informix Database. You can find those Device Management Policies at Setup > Resources > Device Management Policies, search with suggested names in global scope. Each Device Management Policy follows below naming convention:
{appName nativeType - version}
Ex: ibm-informix Informix DB Server - 2 (i.e, appName = ibm-informix, nativeType = Informix DB Server, version = 2)
- Default Global Templates
OpsRamp has a Global template for each Native Type of Informix Database. You can find those templates at Setup > Monitoring > Templates, search with suggested names in global scope. Each template follows below naming convention :
{appName nativeType 'Template' - version}
Ex: ibm-informix Informix DB Server Template - 2 (i.e, appName = ibm-informix, nativeType = Informix DB Server, version = 2)
- Default Global Monitors
OpsRamp has a Global Monitors for each Native Type which has monitoring support. You can find those monitors at Setup > Monitoring > Monitors, search with suggested names in global scope. Each Monitors follows below naming convention:
{monitorKey appName nativeType - version}
Ex: ibm-informix Informix DB Server Monitor ibm-informix Informix DB Server 2(i.e, monitorKey = Informix DB Server, appName = ibm-informix, nativeType = Informix DB Server, version = 2)
Configure and Install the Informix Database Integration
- From All Clients, select a client.
- Navigate to Setup > Account.
- Select the Integrations and Apps tab.
- The Installed Integrations page, where all the installed applications are displayed. If there are no installed applications, it will navigate to the Available Integrations and Apps page.
- Click + ADD on the Installed Integrations page. The Available Integrations and Apps page displays all the available applications along with the newly created application with the version.
- Search for the application using the search option available. Alternatively, use the All Categories option to search.
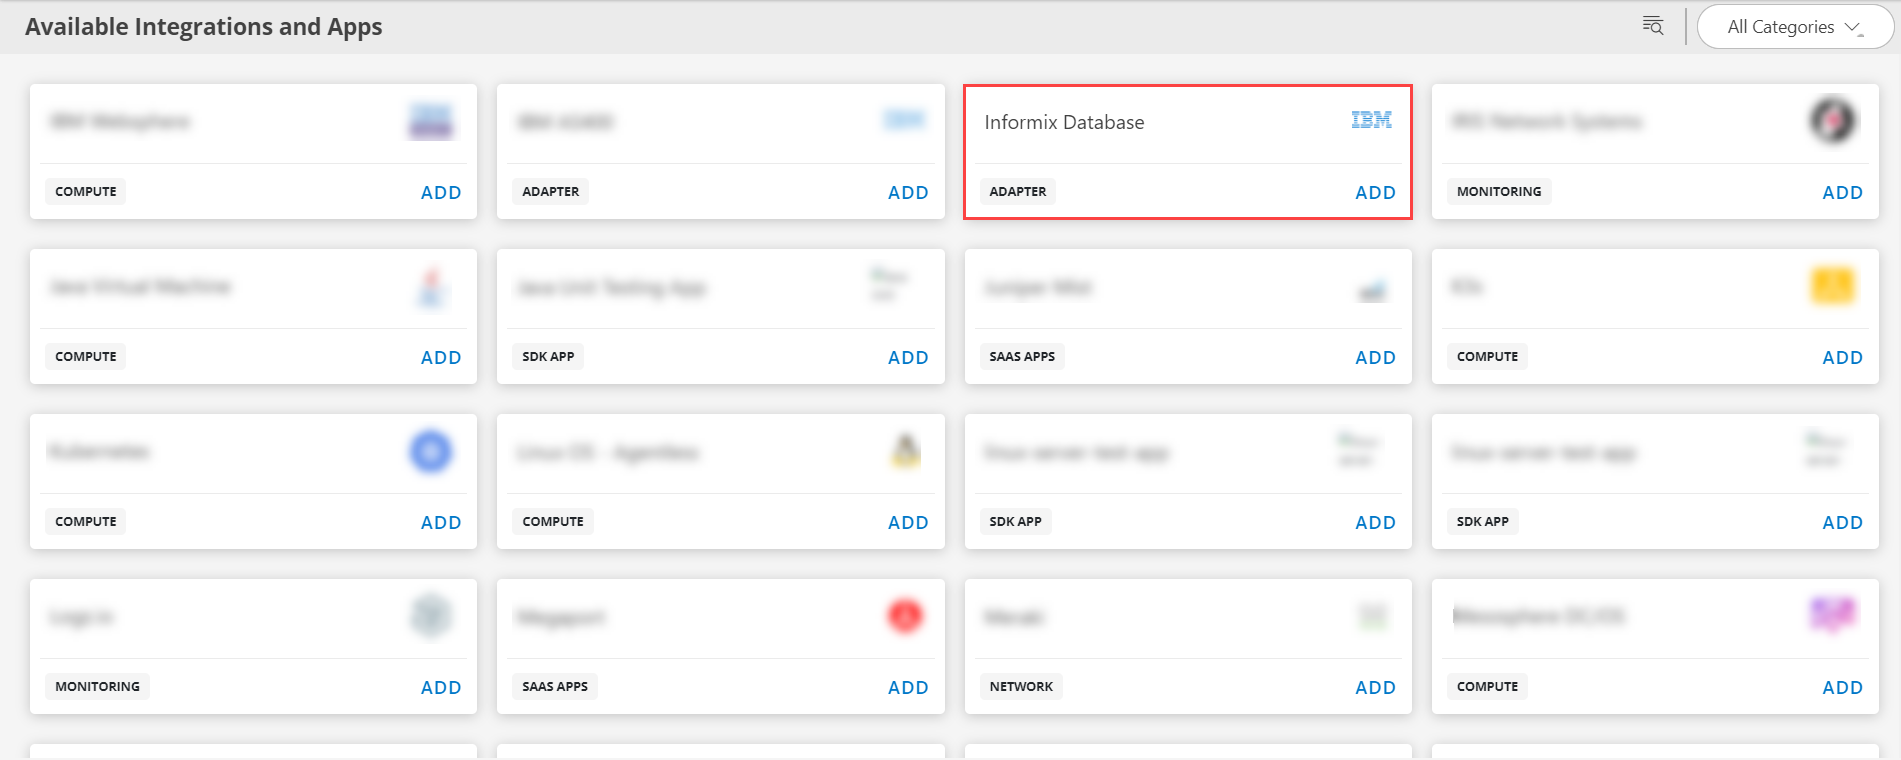
- Click ADD on the Informix Database tile.
- From the Configurations page, click + ADD. The Add Configuration page appears.
- Enter the below mentioned BASIC INFORMATION:
| Functionality | Description | Type |
|---|---|---|
| Name | Enter the name for the configuration. | String |
| Informix Database Host Name/IP Address | IP address/host name of Informix Database. | String |
| Server Path | Server path information Note: By default {"informixServers": [{"serverName":"", "serverPath":""}]} is the server path.The following is the Server Path example. Linux | String |
| Informix Database Credential | Select the Credential from the drop-down list. Notes:
| Dropdown |
| App Failure Notifications | When selected, you will be notified in case of an application failure such as Connectivity Exception, Authentication Exception. | Checkbox |
- Select the below mentioned Custom Attribute:
| Functionality | Description |
|---|---|
| Custom Attribute | Select the custom attribute from the drop down list box. |
| Value | Select the value from the drop down list box. |
Note: The custom attribute that you add here will be assigned to all the resources that are created by the integration. You can add a maximum of five custom attributes (key and value pair).
- In the Native Types section, select the native types to be discovered.
- In the DISCOVERY SCHEDULE section, select Recurrence Pattern to add one of the following patterns:
- Minutes
- Hourly
- Daily
- Weekly
- Monthly
- Click ADD.
The configuration is saved and displayed on the configurations page after you save it.
Note: From the same page, you may Edit and Remove the created configuration.
Under the ADVANCED SETTINGS, Select the Bypass Resource Reconciliation option, if you wish to bypass resource reconciliation when encountering the same resources discovered by multiple applications.
Note: If two different applications provide identical discovery attributes, two separate resources will be generated with those respective attributes from the individual discoveries.
Click NEXT.
(Optional) Click +ADD to create a new collector by providing a name or use the pre-populated name.
Select an existing registered profile.
Click FINISH.
The application is installed and displayed on the INSTALLED INTEGRATION page. Use the search field to find the installed integration.
Modify the Configuration
See Modify an Installed Integration or Application article.
Note: Select the Informix Database application.
View the Informix Database Details
To discover resources for Informix Database:
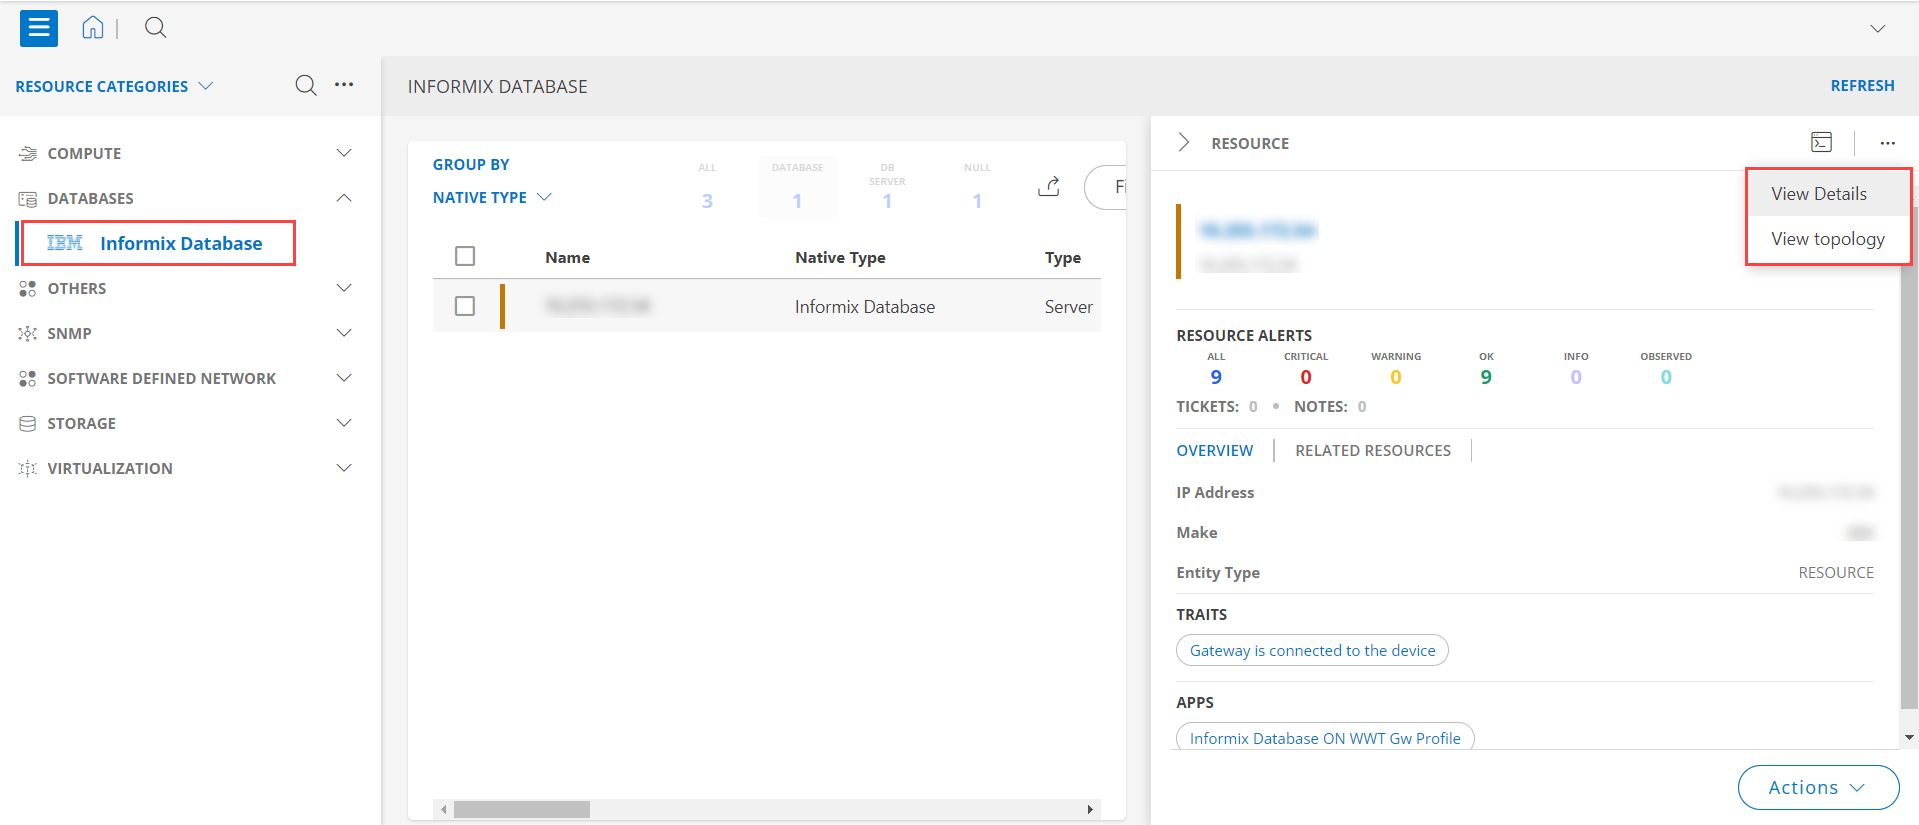
- Navigate to Infrastructure > Search > Databases > Informix Database.
- The Informix Database page is displayed, select the application name.
- The RESOURCE DETAILS page appears from the right.
- Click the ellipsis (…) on the top right and select View details.
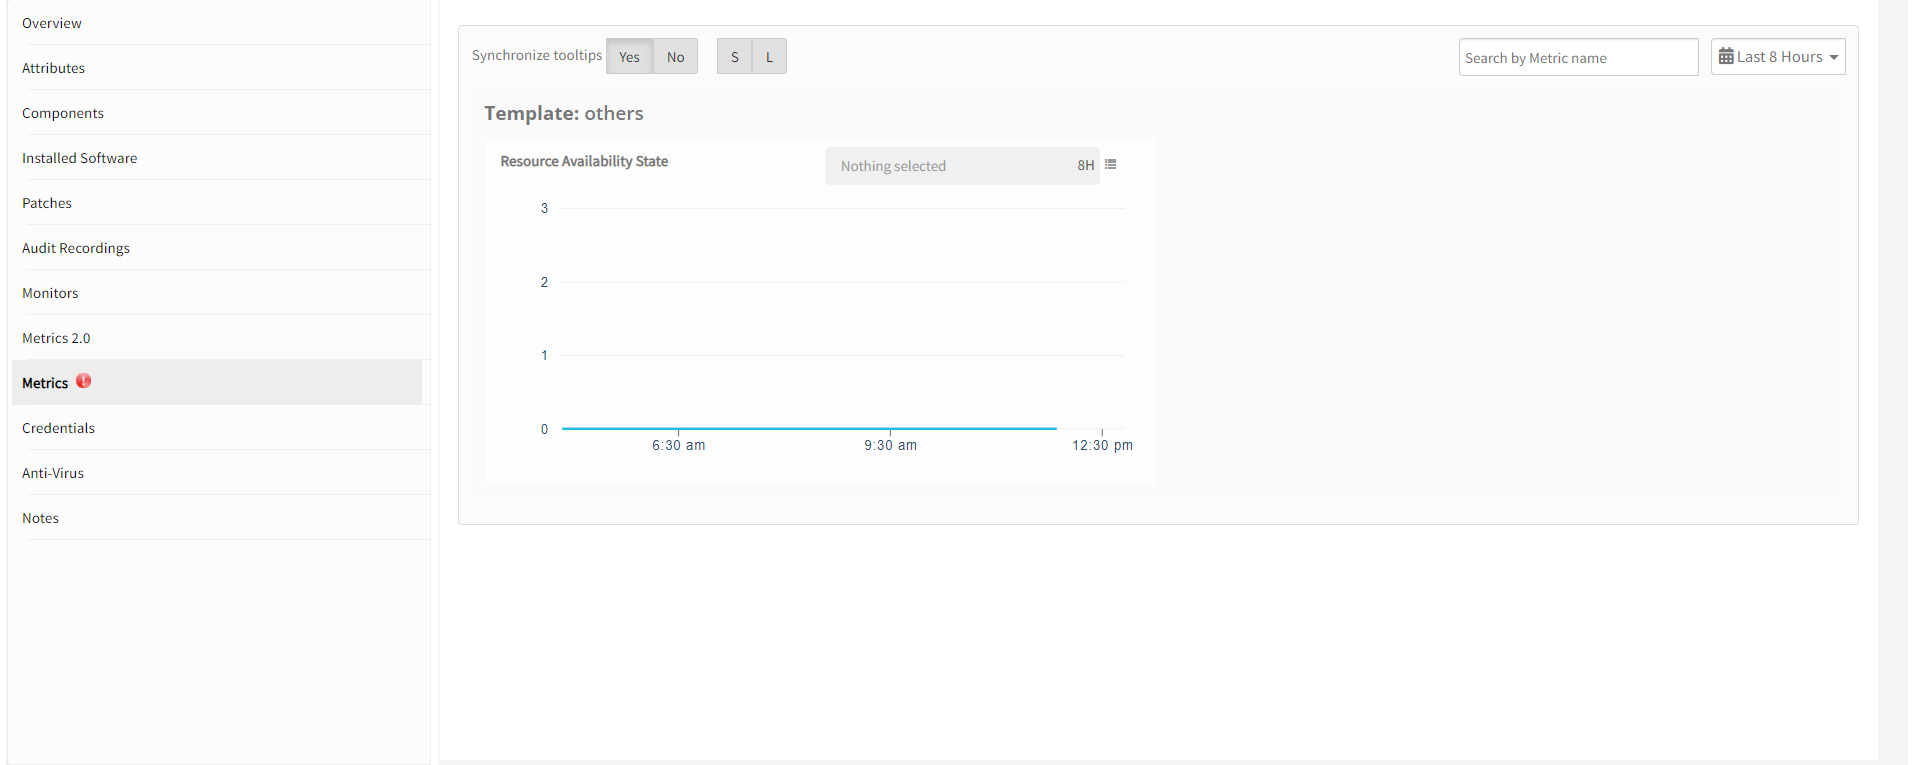
- Navigate to the Attributes tab to view the discovery details.
- Click the Metrics tab to view the metric details for Informix Database Server.
Resource Filter Input Keys
Click here to view the Supported Input Keys
| Resource Type | Resource Type |
|---|---|
| All Types | resourceName |
| hostName | |
| aliasName | |
| dnsName | |
| ipAddress | |
| macAddress | |
| os | |
| make | |
| model | |
| serialNumber | |
| Informix DB Server | version |
Supported Alert Custom Macros
Customise the alert subject and description with below macros then it will generate alert based on customisation. Supported macros keys:
Click here to view the alert subject and description with macros
${resource.name}
${resource.ip}
${resource.mac}
${resource.os}
${resource.type}
${resource.make}
${resource.model}
${resource.serialnumber}
${Custome Attributes in the resource}
Risks, Limitations & Assumptions
- Application can handle Critical/Recovery failure notifications for below two cases when user enables App Failure Notifications in configuration:
- Connectivity Exception
- Authentication Exception
- Application will send any duplicate/repeat failure alert notification for every 6 hours.
- Using metric for monitoring the resources and generate alerts when the threshold values are breached.
- Application cannot control monitoring pause/resume actions based on above alerts
- Component level thresholds can be configured on each resource level.
- No support of showing activity log and applied time.
- Latest snapshot metric is available from gateway version 14.0.0.
- OpsRamp provides Informix Database discovery and monitoring support only for Linux operating systems.
- Monitoring data regarding metrics is pulled from SYSMASTER database
- Not provided Monitoring support for Informix Database Native Type.
- Privileges required for the monitoring user:
- CONNECT access to the sysmaster database.
- CONNECT access to the sysadmin database.
Version History
| Application Version | Bug fixes / Enhancements |
|---|---|
| 3.0.0 |
|
| 2.0.1 |
|
| 2.0.0 | Conversion of SDK 1.0 into SDK 2.0. |
| Supported Target Versions |
|---|
| IBM Informix 14.10 |