This page provides detailed, step-by-step instructions on how to install the MicroK8s agent within a custom namespace.
Step 1: Prepare Your Environment
- Make sure you have access to a Kubernetes cluster.
- Ensure you have the necessary permissions to create namespaces and deploy resources within them.
Step 2: Create a Custom Namespace
- Use the following command to create a new namespace.
microk8s kubectl create ns {namespace-name}Step 3: Install the Microk8s Integration
If you have already installed Microk8s integration, skip this step and proceed to the 4th step below. Otherwise, refer to the document for installing the Microk8s integration.
Step 4: Configure the Integration
- Create a YAML file within your cluster. Name it
agent.yaml. - Paste the configuration content copied from the portal into the
agent.yamlfile. - Replace all instances of
namespace: OpsRamp-agentwith the name of the newly created namespace. - If the namespace already exists, remove the section in the YAML file responsible for creating the namespace.Example of the edited YAML file:
apiVersion: v1
kind: Namespace
metadata:
  name: monitoring

---
# Your other configurations here with namespace replaced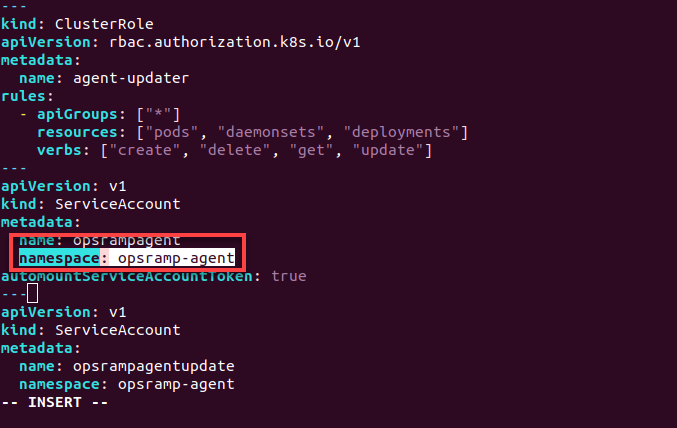
- Following is the example of the ServiceAccount namespace:
- ServiceAccount
- ClusterRoleBinding
- DaemonSet
- Deployment
- ConfigMap in OpsRamp Agent YAML
- Apply the edited configuration using the following command.
microk8s kubectl apply -f agent.yaml - Verify the installation status of the agent within the namespace by running the following command.
microk8s kubectl get pods -n monitoring
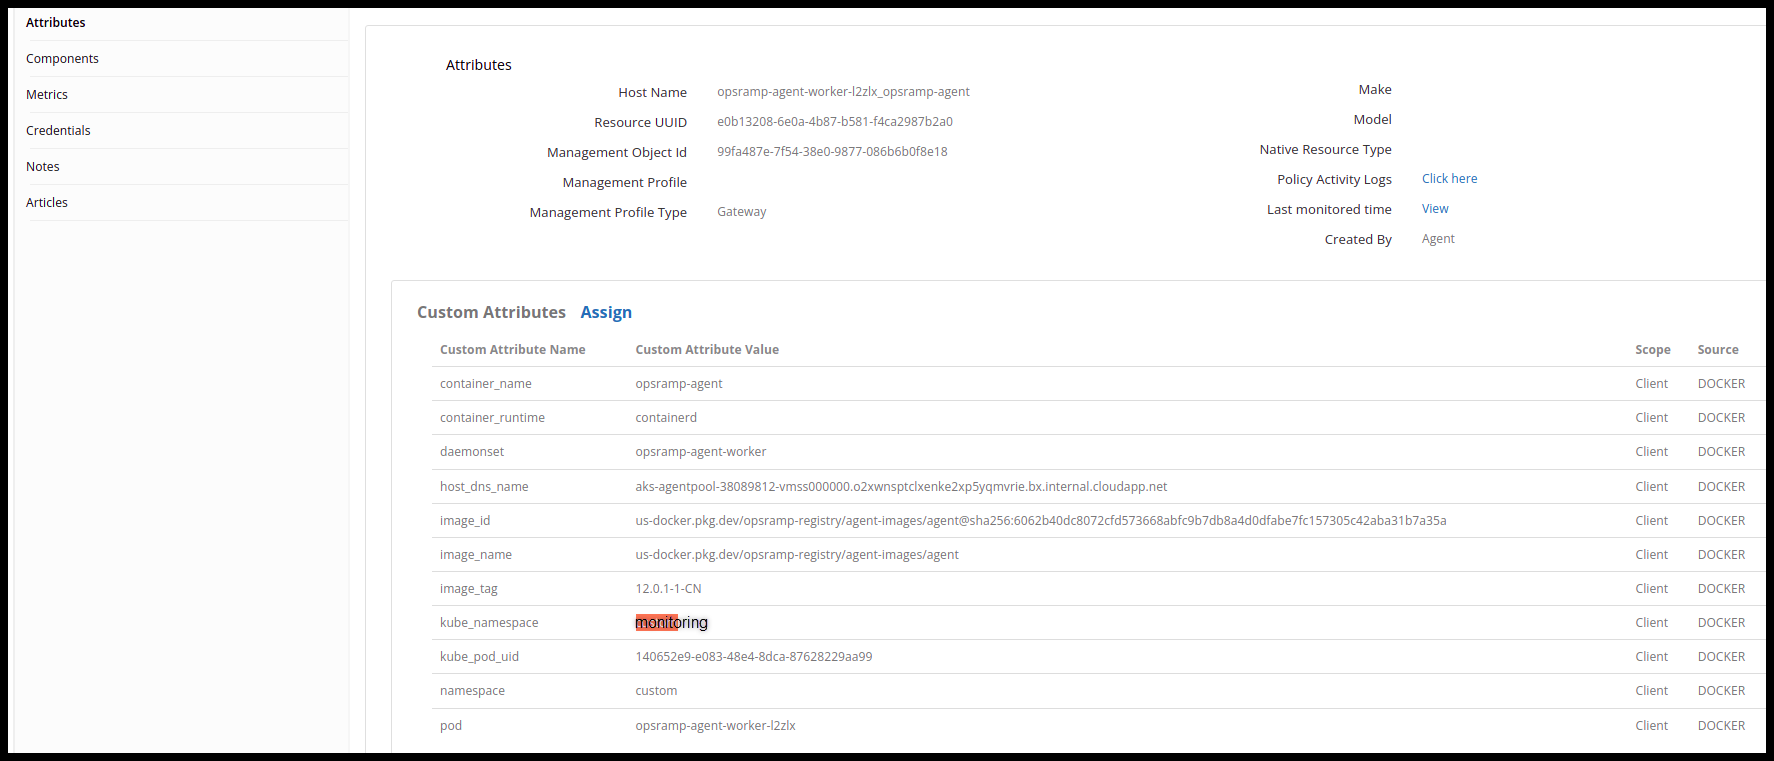
Step 5: Check the Status of Namespace in OpsRamp
- Navigate to Infrastructure > Resources.
- In the left side of the page, click Kubernetes to expand it.
- Expand the Nodes and click Container.
- Under Attributes, you can view the status of your newly created namespace.
OpsRamp Agent yaml
| Default yaml we get from portal | Changes that are to be done to install in a different namespace |
|---|---|
| |