Azure AD uses cross-domain Identity Management (SCIM) and Security Assertion Markup Language (SAML2.0). SCIM uses REST APIs to communicate between Azure AD and OpsRamp. The SCIM schema is used to handle end-to-end user management such as creating, updating, and deleting user accounts.
Prerequisites
- Register with OpsRamp to get OpsRamp login credentials.
- Your custom URL (such as
<yourwebsitename>.opsramp.com).
Azure AD configuration
The Azure AD configuration process involves the following steps:
Create Enterprise Application
Create an enterprise application in Azure AD to establish the integration with OpsRamp.
- Log in to Azure AD.
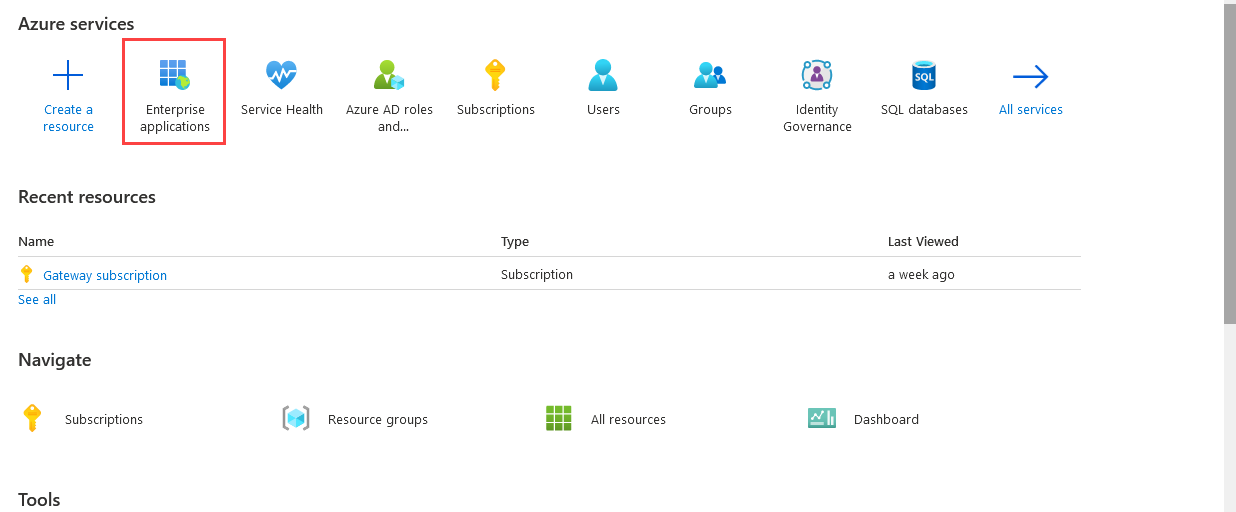
- From the Azure AD console, select Azure Active Directory.
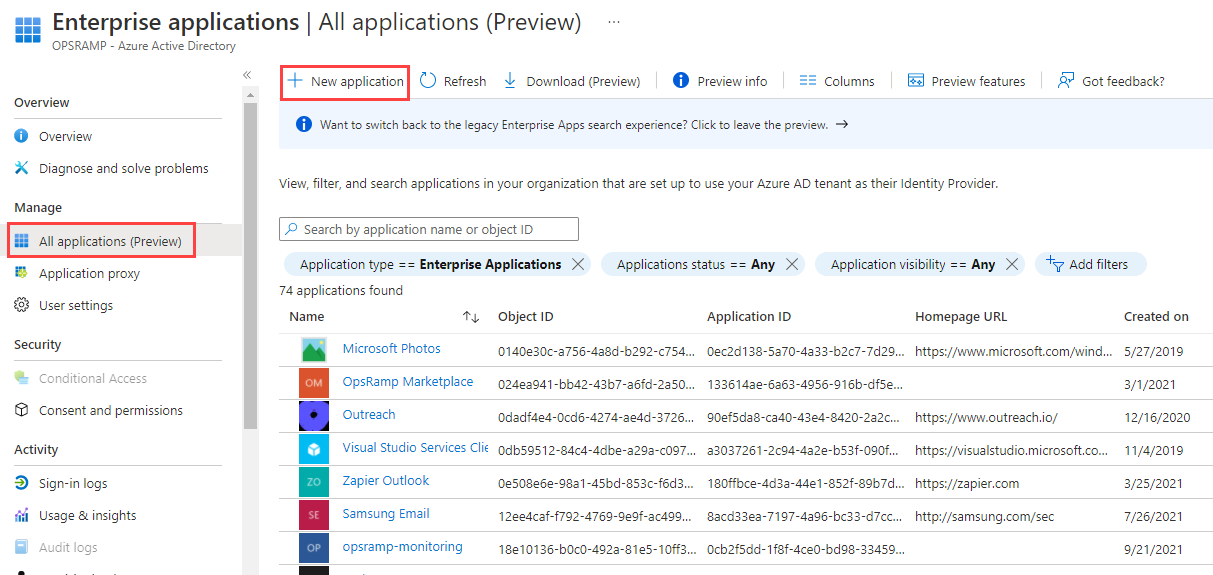
- From Default Directory, select Enterprise applications > All applications > +New application.
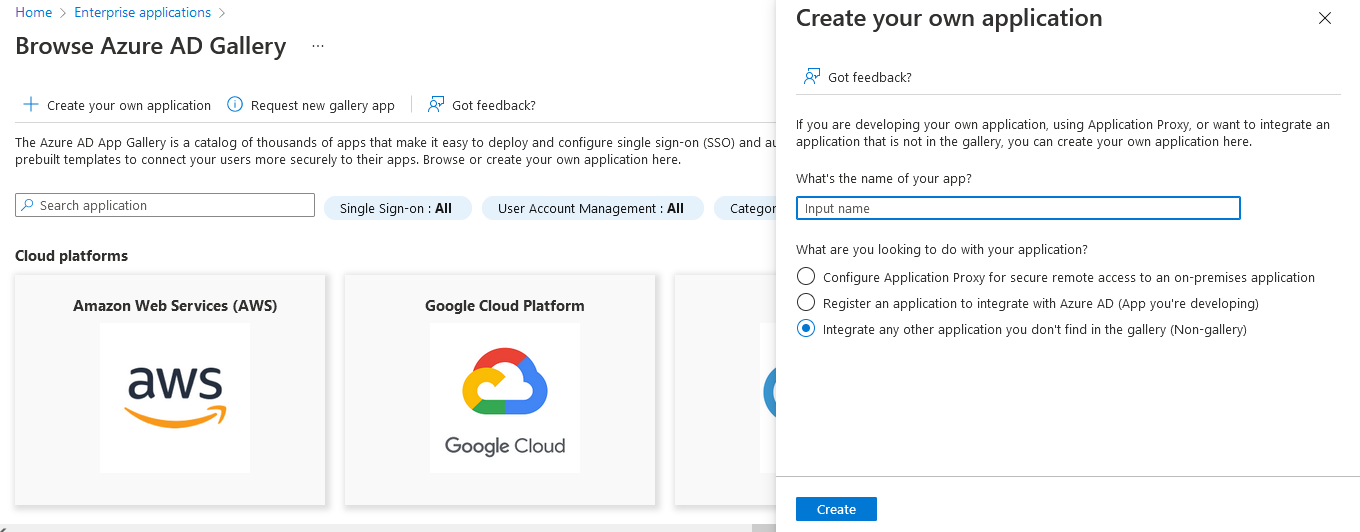
- Click Create your own application. Under Create your own application page, enter the following details:
- Provide a name of the application.
- Select the appropriate option describing the purpose of the application.
- Click Create.
Configure Single Sign-On (SAML)
Configure Single Sign-On (SSO) in Azure AD to enable users to securely access OpsRamp.
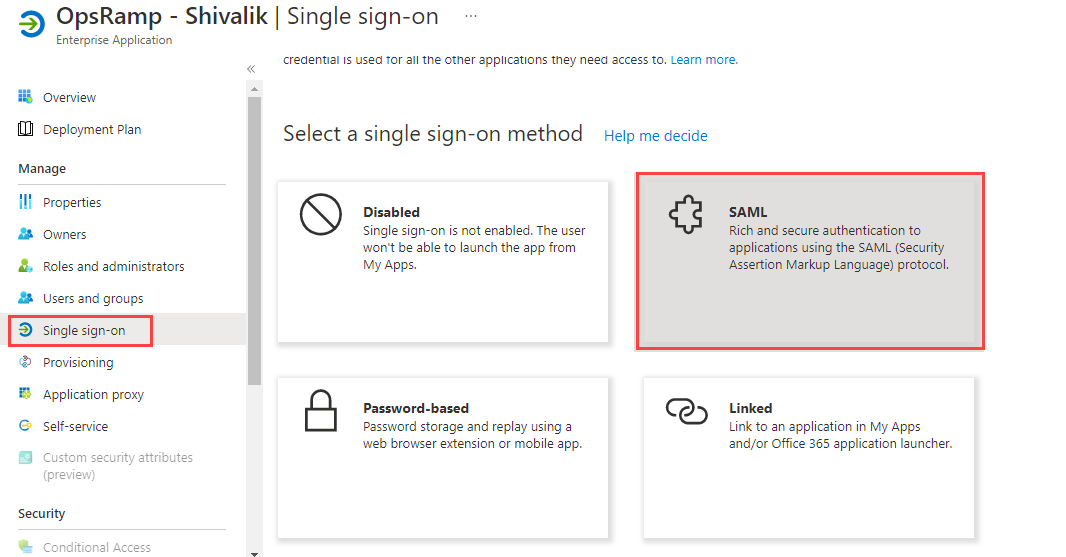
- From the application you created, select Single sign-on.
- Select SAML as the sign-on method.
In the Set up
section, enter the following details: - Identifier (Entity ID): Custom branding URL in OpsRamp. The URL in each case is formed from the custom branding configured in OpsRamp for the client or the standard partner URL appended with saml.do
(For example,https://<OpsRamp Custom Brand URL>/saml.do) - Reply URL (Assertion Consumer Service URL):
https://<OpsRamp Custom Brand URL>/samlResponse.do(For example:https://azuread.opsramp.com/samlResponse.do) - User Identifier:
user.userprincipalname
- Identifier (Entity ID): Custom branding URL in OpsRamp. The URL in each case is formed from the custom branding configured in OpsRamp for the client or the standard partner URL appended with saml.do
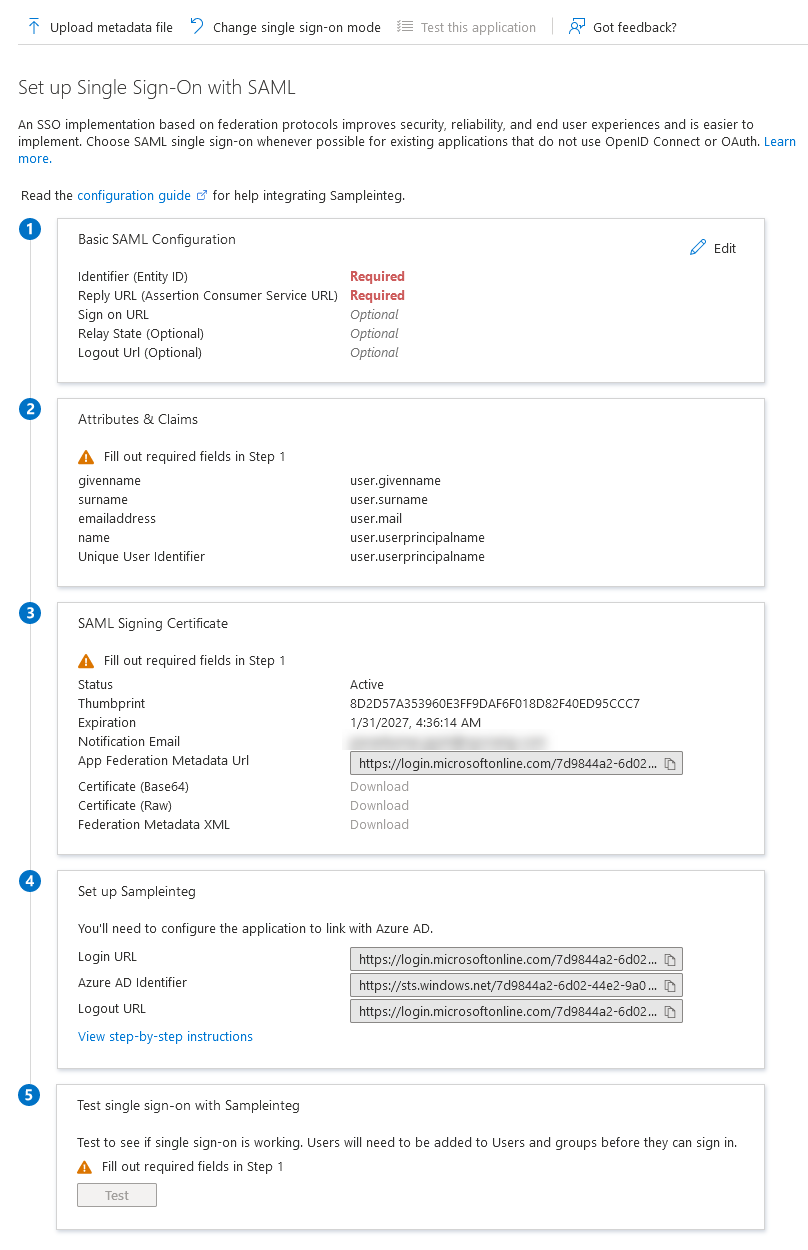
Copy the following information required for OpsRamp configuration:
- Login URL
- Azure AD Identifier
- Logout URL
Click Download on Certificate (Base64) field. The certificate is required for OpsRamp configuration.
From the SAML Signing Certificate screen:
- Right-click the certificate name.
- Select Make Certificate active from the certificate dropdown option, if the Status is Inactive.
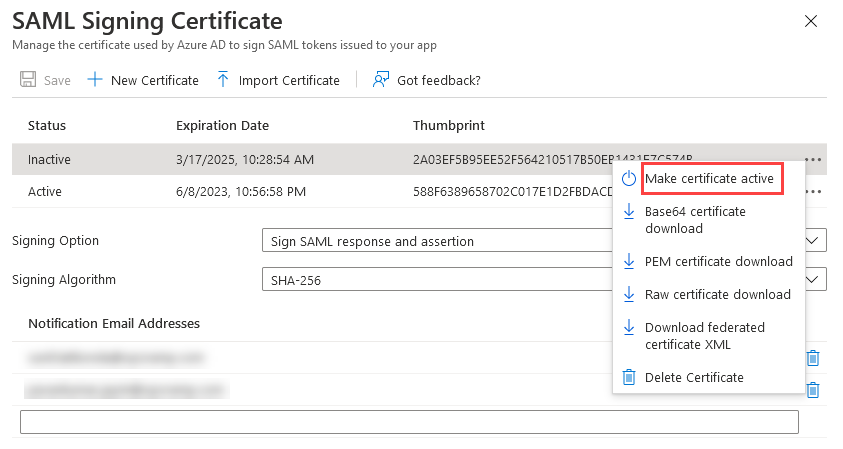
- Enter the following details and click Save:
- Signing Option: Sign SAML Response and assertion
- Signing Algorithm: SHA-256
Configure Provisioning
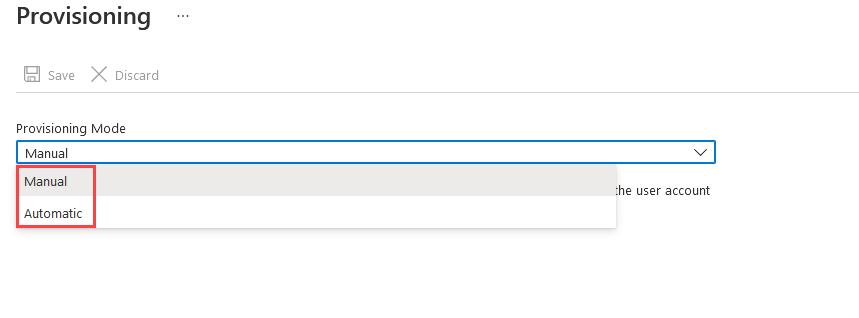
Configure provisioning in Azure AD to enable automatic user and group synchronization with OpsRamp.
- Click Provisioning from the left-hand navigation pane.
- Click Get Started.
- Specify the Provisioning Mode as Automatic
- In the Admin Credentials pane, enter the following details:
- Tenant URL
- Secret Token

- Click Test Connection to validate the token settings.
- After validating the token settings, click Save. The Mappings and Settings panes are automatically populated.
- Configure the following:
- Mappings: Mappings allow you to define how user data flows between Azure Active Directory and OpsRamp. For more information, see Attribute Mapping.
- Settings: Enter the following:
- Notification Email: Enter a valid email address to receive failure notifications.
- Scope: Select the scope for synchronizing user data. OpsRamp recommends selecting Sync only assigned users and groups.
- Set the Provisioning Status to On.
This enables synchronization of user data. - Click Save.
Users and Groups
The users and groups associated with the Azure AD Enterprise Application are synchronized with OpsRamp by the provisioning schedule. Define Users and Groups and then add/assign these to the Enterprise Application.
In the following example, two groups are defined and users are assigned:
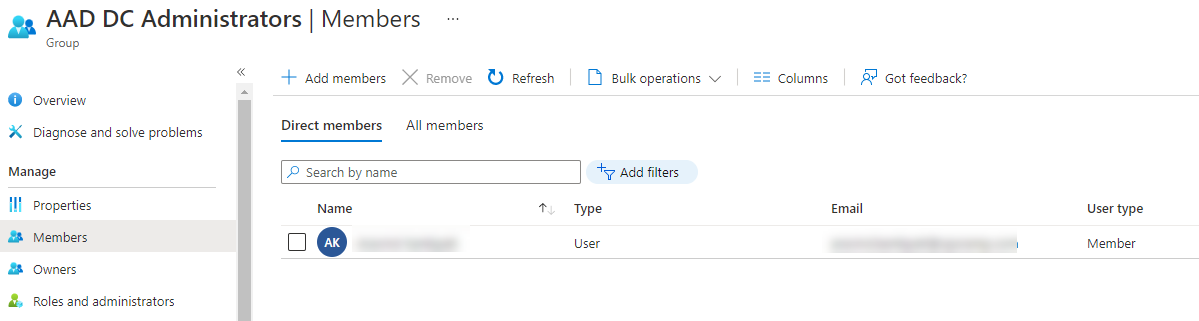
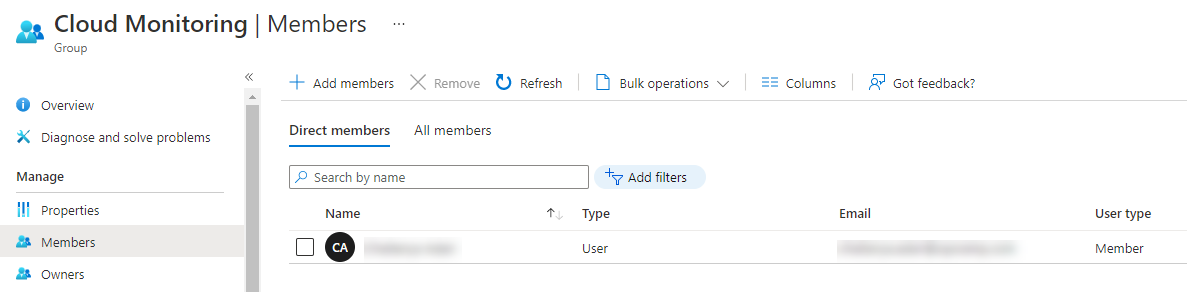
Groups are defined:
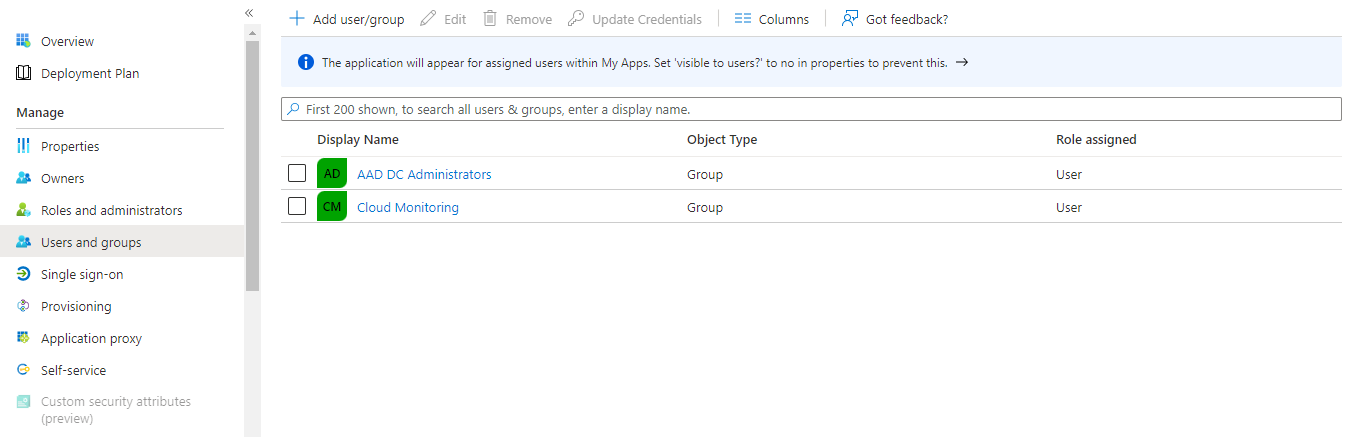
Users are assigned:
Note
The Group name can be used to assign the desired role in OpsRamp based on the Integration mapping.The groups and users will be created in OpsRamp when provisioning occurs.
Provision a user
User Provisioning is an identity management process that ensures user accounts are created, given appropriate rights and permissions, modified, deleted, etc., to access an organization’s resources/applications. To provision a user:
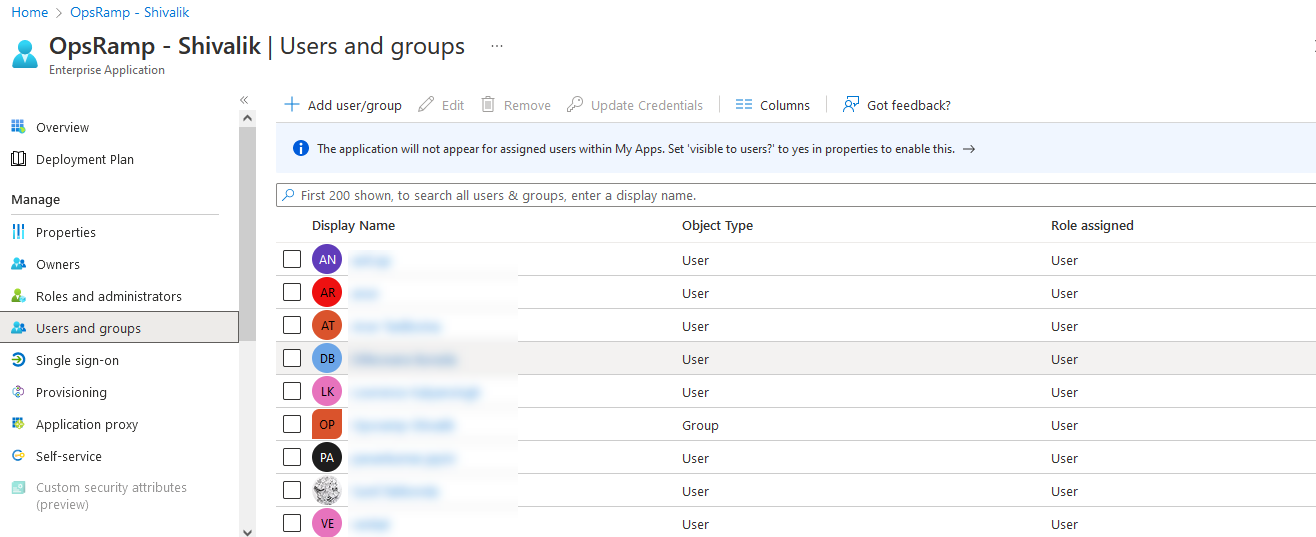
- After adding your application, on the Overview screen, click Users and groups using the left hand navigation pane. The Users and groups screen is displayed showing the existing users/groups, if any.
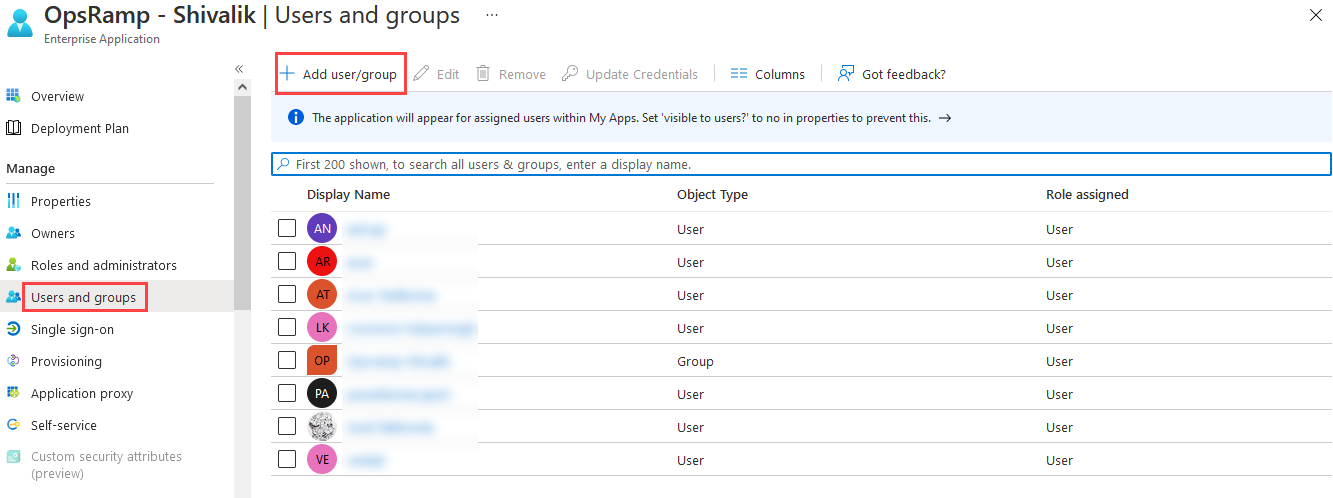
- Click Add user/group. In Add Assignment screen, click None Selected under Users and groups. The Users and groups search window displays.
- Enter the user name in the Search box and click Select.
Note
Only the first 50 search results are shown.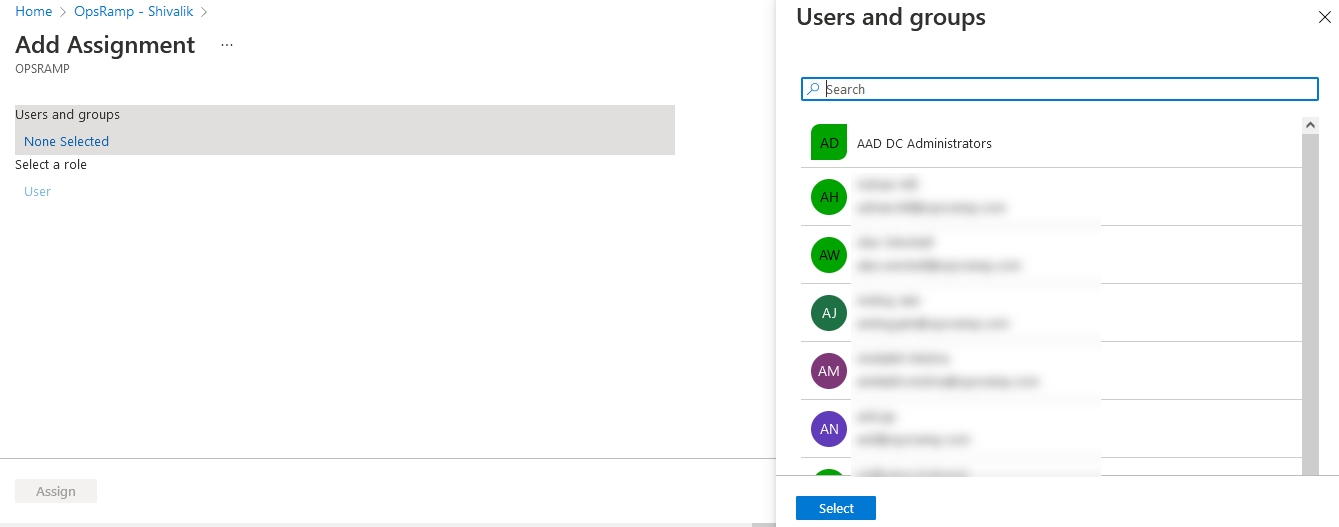
After clicking Select, the selected users are displayed under Users and groups in the Add Assignment screen.4. Click Assign. The user is assigned and displayed in the user/group list.
Provision a group
Provisioning a group follows the same process as provisioning a user. The steps below are provided for completeness, with group-specific selections.
- After adding your application, on the Overview screen, click Users and groups from the left-hand navigation pane. The Users and groups screen is displayed, showing the existing users and groups, if any.
- Click Add user/group. In Add Assignment screen, click None Selected under Users and groups. The Users and groups search window displays. Type the group name in the Search box and click Select.
Note
Only the first 50 search results are shown.
After clicking Select, the selected groups are displayed under Users and groups in the Add Assignment screen.
Click Assign. The group is assigned and displayed in the user/group list.
Attribute Mapping
- To map attributes for users and groups, click the Provision Azure Active Directory Groups or Provision Azure Active Directory Users links from the Mappings pane.
The Attribute Mapping screen is displayed, where you can edit, add, or delete attribute mappings.
Enter the following details to define attribute mappings:
- Azure AD Entity: Enter the source object type exactly as configured in your mapping source, for example
UserorGroup. - Azure AD Property: Enter the exact source attribute name or expression from Azure AD. Attribute names are case-sensitive.
- Azure AD Property Value: Enter the exact incoming value to match from the Azure AD payload. Avoid leading/trailing spaces.
- OpsRamp Property: Select the destination field in OpsRamp where the matched value should be written.
- OpsRamp Property Value: Choose the value to assign in OpsRamp when the Azure AD value matches. For role mapping, this must match an existing OpsRamp role.
Format guidance:
- Usernames and email values should be entered in a valid email format, for example
user.name@company.com. - Phone values should include only valid phone digits and optional country code as provided by your Azure AD data source.
- For expression-based source values (for example
Switch(...)orJoin(...)), copy the expression exactly without modification. - SCIM path targets (for example
emails[type eq "work"].value) must match the exact path format expected by the integration.
Manage Attribute Mappings
Edit an Attribute
Click the attribute.
The Edit Attribute dialog is displayed.Select the following as required:
- Mapping type
- Source attribute
- Target attribute
- Other applicable options

- Click OK. The attribute mapping is saved.
Add an Attribute
- Click Add New Mapping.
- Select the required options.
- Click OK.
The attribute is saved and added to the list.
Delete an Attribute
- Click Delete.
- Click Save to confirm the changes.
To undo the delete operation, click Discard.
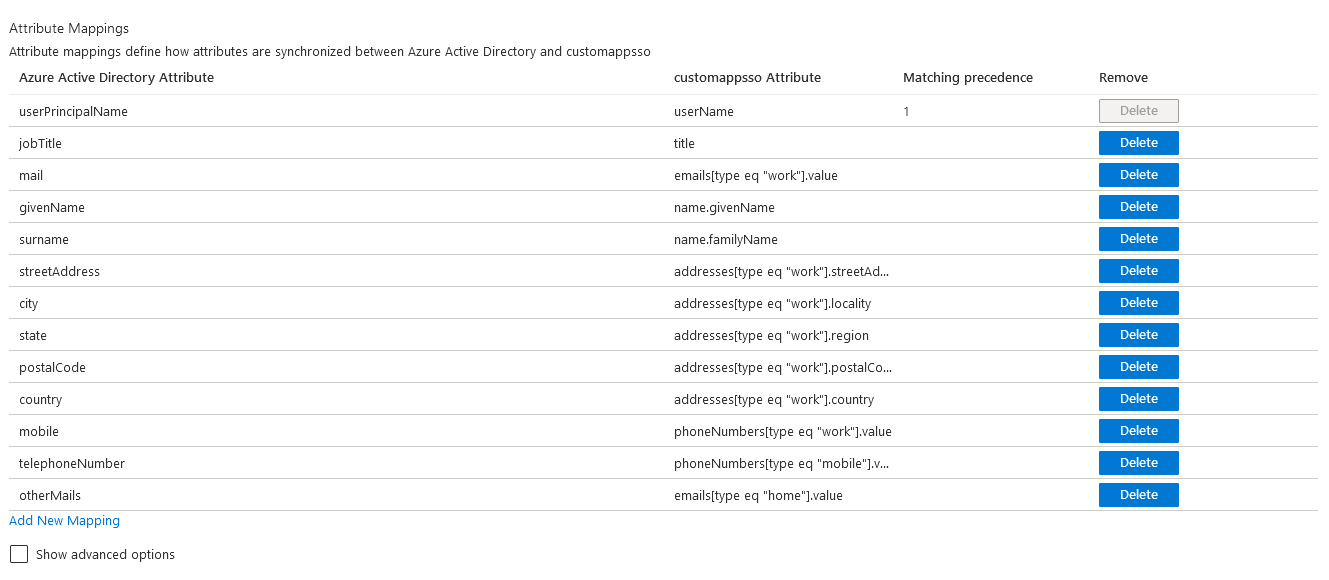
Supported Attribute Mappings
By default, Azure AD includes mappings that are not supported by OpsRamp, which can cause multiple updates during SCIM provisioning. OpsRamp supports only the following mappings:
How to read the mapping table:
- Azure Active Directory Attribute: Source attribute or expression in Azure AD.
- customappsso Attribute: SCIM target path used in provisioning payloads.
- OpsRamp Attribute: Final destination field in OpsRamp.
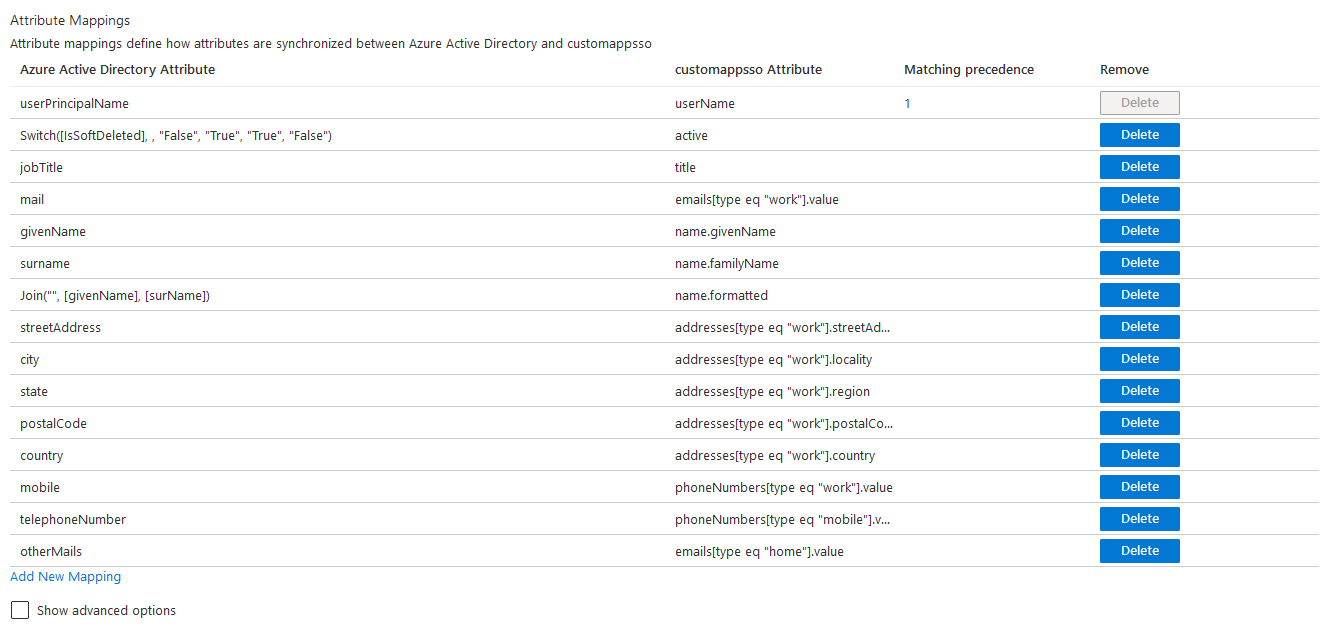
OpsRamp supports only following default mappings for Azure AD integration. If there are any additional mappings, OpsRamp ignores those during provisioning.
| Azure Active Directory Attribute | customappsso Attribute | OpsRamp Attribute |
|---|---|---|
| userPrincipalName | userName | Login Name |
| Switch([IsSoftDeleted], , "False", "True", "True", "False") | active | active |
| jobTitle | title | Designation |
| emails[type eq "work"].value | Primary Email | |
| givenName | name.givenName | First Name |
| surname | name.familyName | Last Name |
| Join("", [givenName], [surName]) | name.formatted | name.formatted |
| streetAddress | addresses[type eq "work"].streetAddress | Address |
| city | addresses[type eq "work"].locality | City |
| state | addresses[type eq "work"].region | State |
| postalCode | addresses[type eq "work"].postalCode | ZipCode |
| country | addresses[type eq "work"].country | Country |
| mobile | phoneNumbers[type eq "work"].value | Mobile Number |
| telephoneNumber | phoneNumbers[type eq "mobile"].value | Phone |
| otherMails | emails[type eq "home"].value | Alternate Email |
OpsRamp configuration
OpsRamp configuration generates the URL and secret token required to complete the configuration in Azure AD.
Install Azure AD Integration
- From All Clients, select a client.
- Navigate to Setup > Account.
- Select the Integrations and Apps tab. The Installed Integrations page displays all installed applications.
Note
If there are no installed applications, it will navigate to the Available Integrations and Apps page.- Click + ADD on the Installed Integrations page. The Available Integrations and Apps page displays all the available applications along with the newly created application with the version.
- Search for Azure AD using the search option available. Alternatively, use the All Categories option to search.
- Click +Add on the Azure AD tile.
Configure SSO Settings
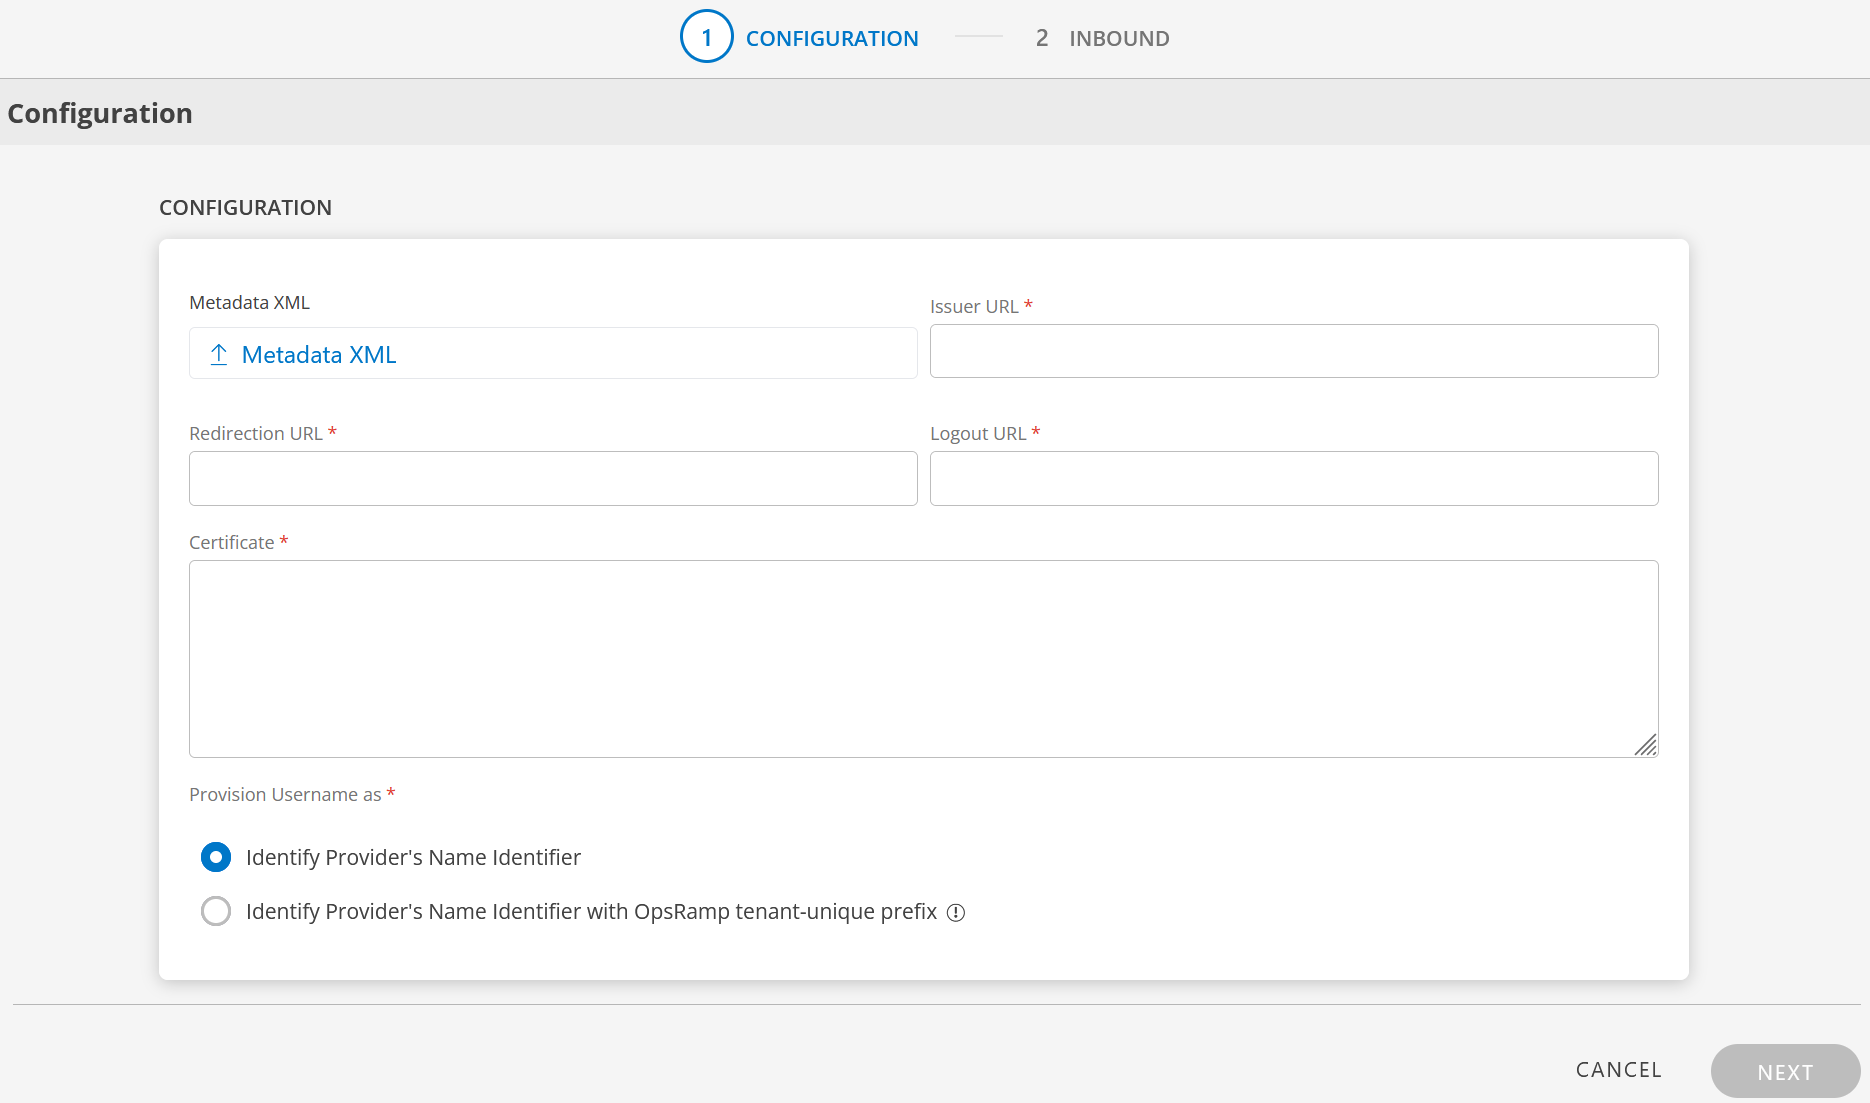
- Enter the following information in the Configuration page:
- Metadata XML: Upload the XML file. This file will have all the information related to Issuer URL, Redirection URL, Logout URL, and Certificate. After you upload the Metadata XML file, these fields are automatically populated.
Alternatively, you can enter the information in the fields manually. - Issuer URL: The unique identifier URL of the identity provider (IdP). This is provided by Azure AD and is used by OpsRamp to verify the source of SAML assertions.
- Redirection URL: The SAML endpoint URL where OpsRamp sends authentication requests. This must match the HTTP-POST binding endpoint configured in Azure AD.
- Logout URL: The URL to which OpsRamp redirects users after they sign out, to complete the single logout flow with Azure AD.
- Certificate: The x.509 public key certificate downloaded from Azure AD. OpsRamp uses this to validate the signature on incoming SAML responses.
- Metadata XML: Upload the XML file. This file will have all the information related to Issuer URL, Redirection URL, Logout URL, and Certificate. After you upload the Metadata XML file, these fields are automatically populated.
Configure Username Provisioning
Provision Username as:
There are two ways to provision a user. Select the appropriate option:
Identity Provider’s Name Identifier (default):
The user created in the SSO portal is reflected in OpsRamp.Identity Provider’s Name Identifier with OpsRamp tenant-unique prefix:
This option allows you to:- Create usernames with a unique 3-digit alphanumeric prefix generated automatically
- Install the same identity provider across multiple OpsRamp tenants
Note
Once you enable this option and install the integration, you cannot revert the changes.Example:
Three partners (P1, P2, and P3) each have usernames with unique 3-digit alphanumeric prefixes:
g0z.username1 (P1), p0w.username1 (P2), and t9q.username1 (P3)
- Click Next.
- The Inbound page contains two sections: USER PROVISION and MAP ATTRIBUTES.
User Provision
OpsRamp supports the following user provisioning methods to onboard users from identity providers such as Azure AD:
- SCIM Provisioning
- JIT Provisioning
- NONE: Only existing users can log in
SCIM Provisioning
This section describes SCIM provisioning in detail.
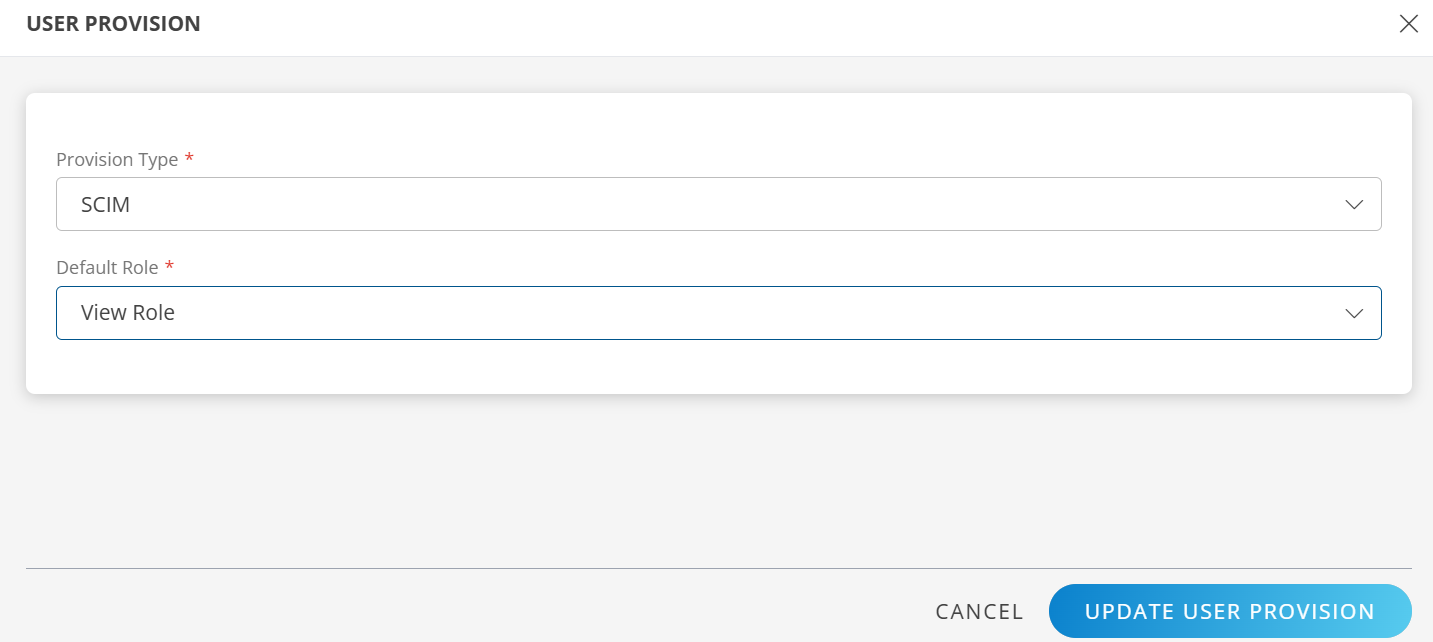
Configure SCIM Provisioning
- Click the Edit icon in the USER PROVISION section.
- Select the following details and click UPDATE USER PROVISION:
- Provision Type: SCIM
When configuring the integration, select SCIM to synchronize users and groups during provisioning. - Default Role:
Select the required user role.
- Provision Type: SCIM
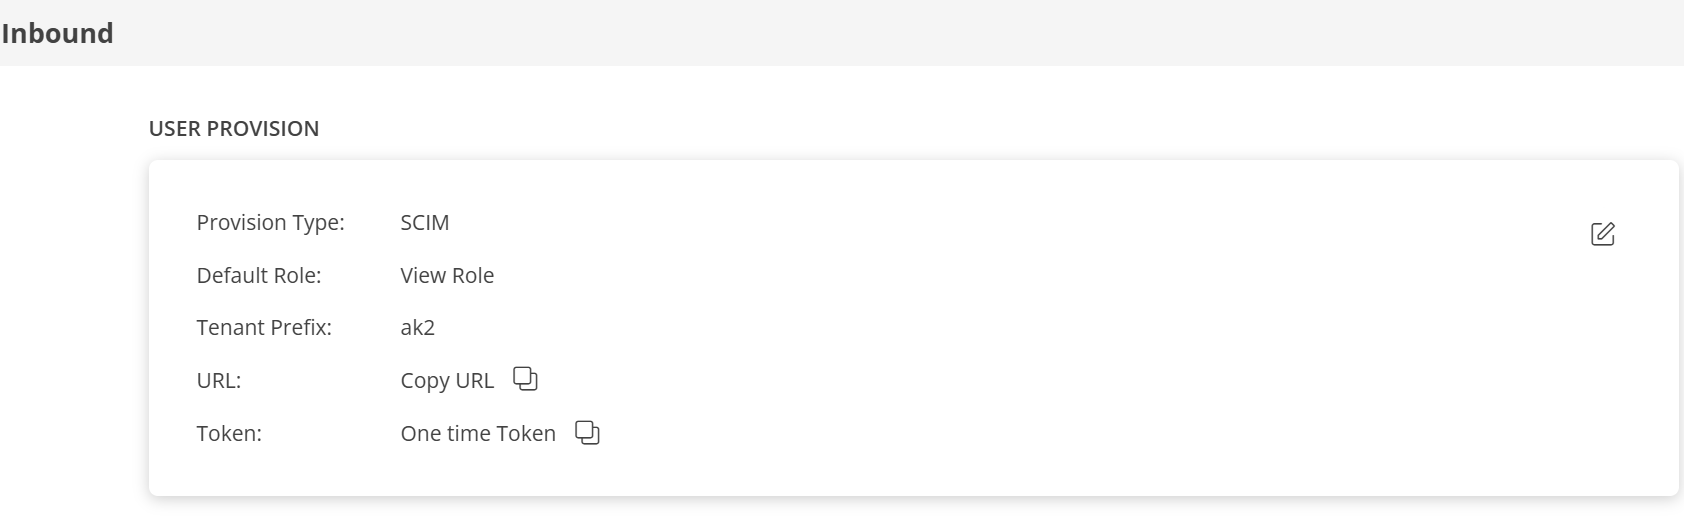
- After updating the configuration, the USER PROVISION section displays the following details:
- Tenant Prefix
- URL
- Token
- Copy the URL and Token.
These values are required when configuring Azure AD provisioning settings.
Map Attributes
Define attribute mappings to control how user and group data from Azure AD is mapped to OpsRamp.
Note
- For SCIM: The Role OpsRamp property is required.
- For JIT: The OpsRamp properties Primary Email, First Name, Last Name, and Role are required.
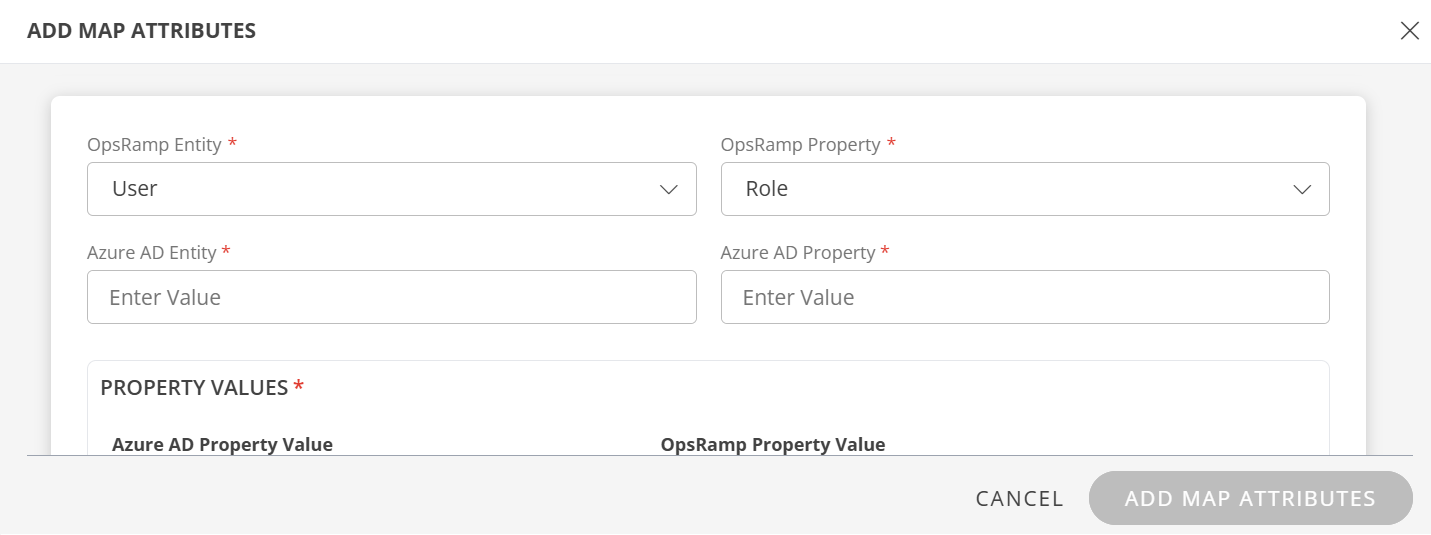
Add Attribute Mapping
- Click + Add in the Map Attributes section.
- In the Add Map Attributes window, enter the required information.
User Mapping
Enter the following details:
- OpsRamp Entity: Enter the entity type for which you want to define the mapping. For example, select User.
- OpsRamp Property: Enter the destination field in OpsRamp where the matched value should be written. For role mapping, select Role.
Role mapping is required for both User and User Group.
Enter the following:
Azure AD Entity: Enter the source object type from Azure AD. For user role mapping, use
User. The source object type is case-sensitive and must match the value in the provisioning payload.Azure AD Property: Enter the user attribute from Azure AD that OpsRamp should evaluate for matching, for example
userPrincipalName. The attribute name is case-sensitive and must match the value in the provisioning payload.
In the PROPERTY VALUES section:
Azure AD Property Value:
The user details in the request payload received by OpsRamp contain the required field information.
Ensure that you provide the value of the field in this box.Example payload:
{
    "schemas": [
        "urn:ietf:params:scim:schemas:core:2.0:User"
    ],
    "userName": "user.name1@opsramp.com",
    "name": {
        "givenName": "user",
        "familyName": "name1"
    },
    "emails": [
        {
            "primary": true,
            "value": "user.name1@opsramp.com",
            "type": "work"
        }
    ],
    "phoneNumbers": [
        {
            "primary": true,
            "value": "1234567890",
            "type": "work"
        }
    ],
    "addresses": [
        {
            "primary": true,
            "country": "IN"
        }
    ],
    "timezone": "india",
    "externalId": "00upcikgqpH6esdAN0h7",
    "groups": [],
    "password": "o6p5MVRK",
    "active": true
}
- OpsRamp Property Value: Select the appropriate role corresponding to the Azure AD Property Value.
- Click Save. The mapping is saved and displayed. To add more property values click +Property Value.
- Use the Filter option to filter the map attributes.
- Similarly, map attributes for other entities.
Note
If a mapping for Time Zone is not provided, the organization time zone is used by default.
User Group Mapping
- Select OpsRamp Entity as User Group and OpsRamp Property as Role.
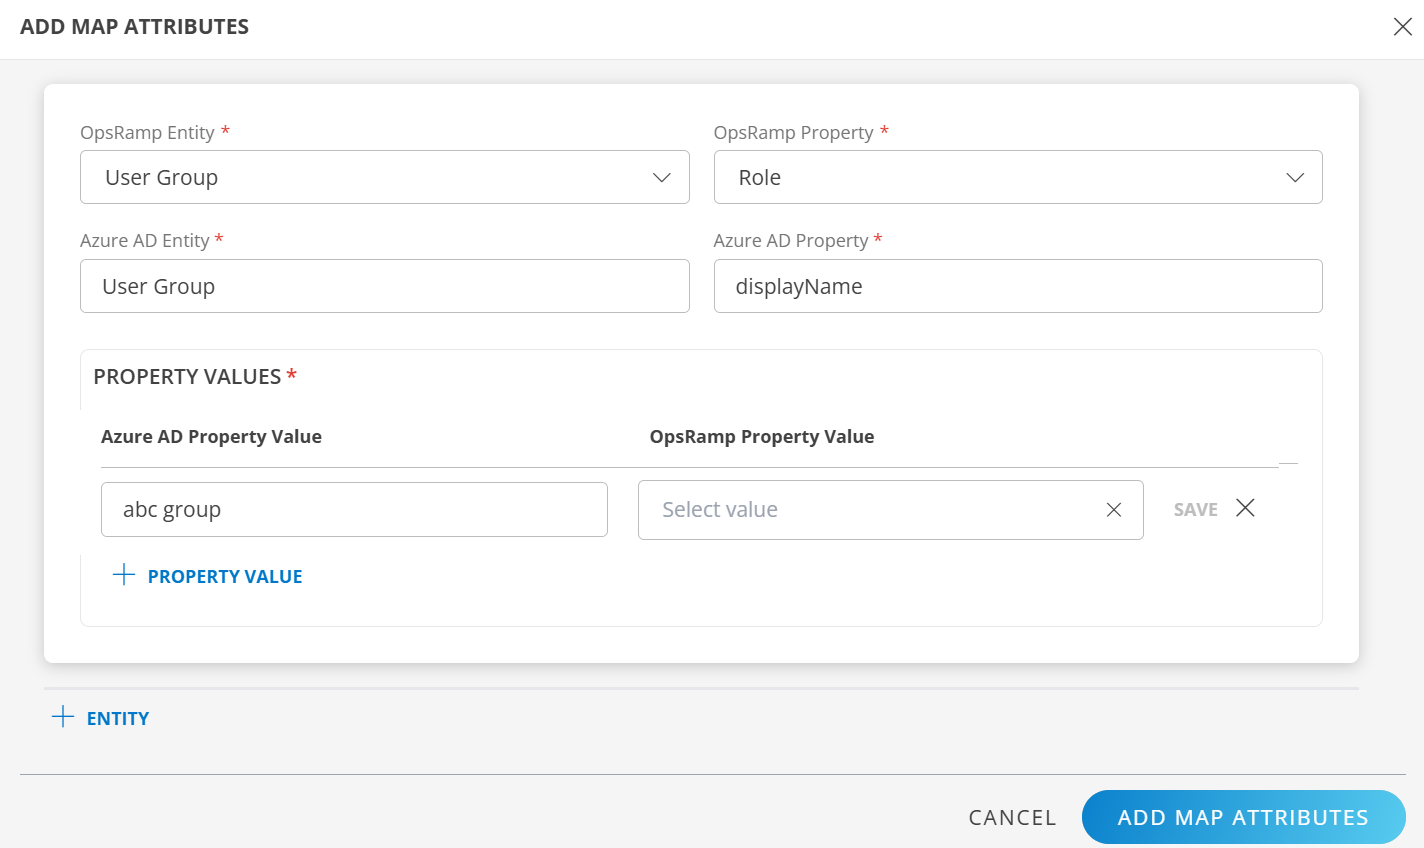
- Azure AD Entity: Enter the source object type from Azure AD. For user group role mapping, use
Group. - Azure AD Property: Enter the group attribute from Azure AD that OpsRamp should evaluate for matching, for example
displayName.
In PROPERTY VALUES section: - Azure AD Property Value: Enter the exact value of the selected Azure AD property from the request payload. The value is case-sensitive and should not include extra spaces.
Example payload
{
    "schemas": [
        "urn:ietf:params:scim:schemas:core:2.0:Group"
    ],
    "displayName": "abc group",
    "members": [
        {
            "value": "USR0002265918",
            "display": "user.name1@opsramp.com"
        },
        {
            "value": "USR0002398463",
            "display": "user.name2@opsramp.com"
        }
    ]
}
In this case, enter abc group as the value for Azure AD Property Value. If there is a match, OpsRamp provisions the user group accordingly.
- Click Save. The mapping is saved and displayed.
To add more property values, click +Property Value. - Click Add Map Attributes.
- Click the three dots (menu icon) available at the end of each row to edit or delete a map attribute.
If the Role is not configured in the Map Attributes section, the Default Role provided in the User Provision section is considered for SSO.
JIT Provisioning
This section describes JIT (Just-In-Time) provisioning in detail.
Configure JIT Provisioning
In the Inbound page:
- Click the Edit icon in the USER PROVISION section.
- Select the following details and click UPDATE USER PROVISION:
- Provision Type: When configuring the integration, select JIT to synchronize users during provisioning.
- Default Role: Select the required user role.

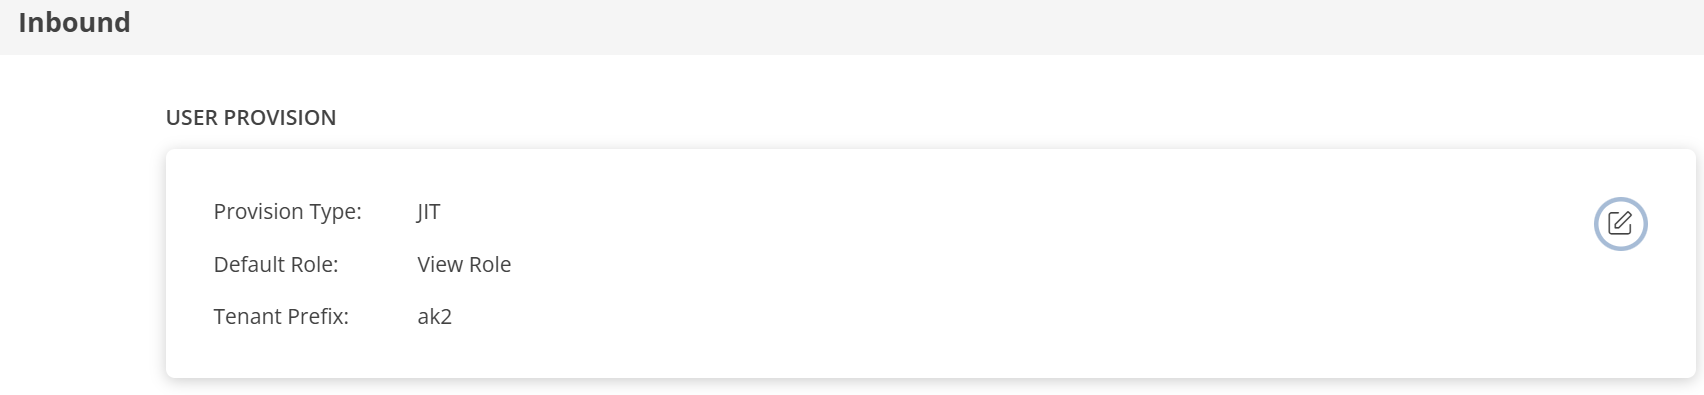
- After updating the configuration, the USER PROVISION section displays the unique Tenant Prefix.
These details are used when configuring Azure AD provisioning settings.
- Define the attribute mappings by following the steps in the Map Attributes section.
- Click Finish. The integration is installed.
Actions on Integration
You can perform actions like View Logs, Export, Edit, and Uninstall on the integration. See Actions on Integration for more information.
Audit Logs
View Inbound logs from the View Logs option for the integration. You can view if the event was successful or not. See Audit Logs for more information.
Synchronize with Azure AD
To synchronize with Azure AD, select Current Status > Refresh from the Azure AD Provisioning screen.
The refresh operation executes a REST API call from Azure AD to synchronize user and group data with OpsRamp.
Synchronization Behavior
- If the REST-defined user attributes match the OpsRamp user attributes, the user information is updated in OpsRamp.
- If the REST-defined user attributes do not match the OpsRamp user attributes, they are updated based on the mappings defined in the Map Attributes section.
- If the REST-defined user attributes do not match the defined mappings, the API response fails, synchronization fails, and the user is not created in OpsRamp.
Azure AD displays the synchronization progress and results.
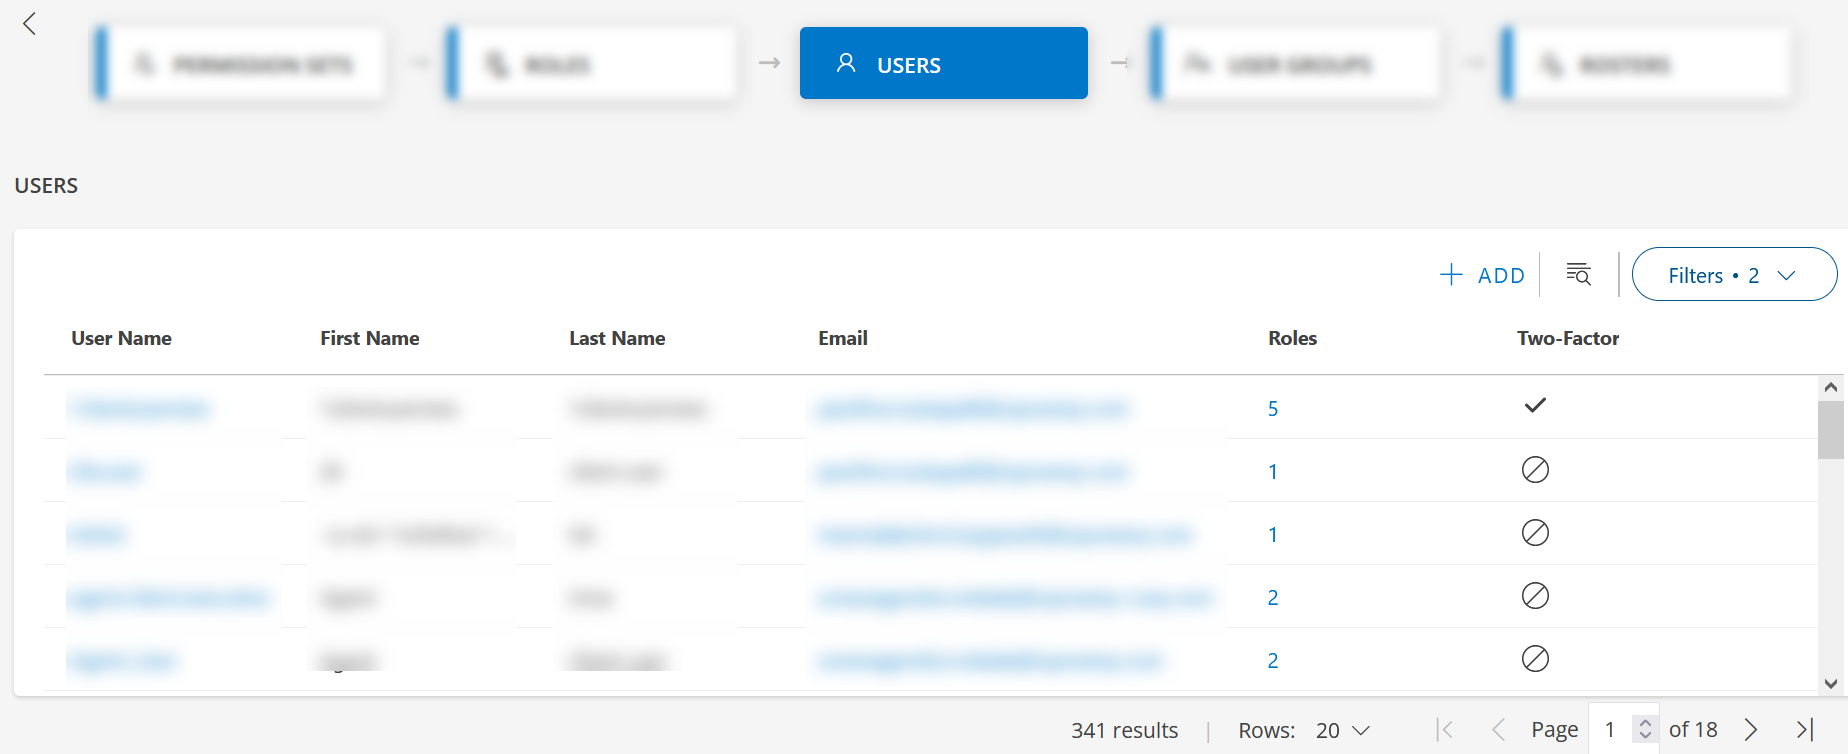
Users and groups are updated in OpsRamp after successful synchronization:
Limitations
Azure AD supports changing login names; however, OpsRamp does not support changing login names after a user is provisioned. Updating a login name in Azure AD prevents the user from logging in to OpsRamp.
OpsRamp does not support multiple role assignments for a user when using SCIM provisioning. However, multiple roles are supported for JIT provisioning in Azure AD integration.