Use a custom integration framework to create webhook integrations to build data ingestion and capture events in OpsRamp. Use either OpsRamp APIs or user interface to build webhook integration.
Configure using OpsRamp API
Configure webhook integration using OpsRamp API.
API endpoint: https://{api-url}/api/v2/tenants/{tenantId}/integrations/install/CUSTOM
Example alert payload in JSON from third-party applications
{
    "severity" : "Warning",
    "eventDetails" : "Test Description",
    "eventResourceName" : "Test ResourceName 1",
    "eventAlertMetric" : "Test Metric",
    "shortDescription" : "Test API Alert for custom webhook integration"
}
Example API endpoint URL and payload
Given below is the example payload for the above-mentioned JSON sample webhook event to install a custom integration with Webhook authentication and sample webhook mappings. With this payload, the default Alert Source is saved as Custom.git:
{
    "displayName": "API Testing",
    "category": "Monitoring",
    "inboundConfig": {
        "authentication": {
            "authType": "WEBHOOK"
        },
        "mapAttributes": [{
            "name": "Alert state",
            "thirdPartyAttrName": "severity",
            "entityType": "ALERT",
            "thirdPartyEntityType": "Event",
            "attrValues": [{
                "attrValue": "Ok",
                "thirdPartyAttrValue": "Ok"
            }, {
                "attrValue": "Warning",
                "thirdPartyAttrValue": "Warning"
            }, {
                "attrValue": "Critical",
                "thirdPartyAttrValue": "Critical"
            }, {
                "attrValue": "Info",
                "thirdPartyAttrValue": "Info"
            }]
        }, {
            "name": "Alert description",
            "thirdPartyAttrName": "eventDetails",
            "entityType": "ALERT",
            "thirdPartyEntityType": "Event"
        }, {
            "name": "Alert resource name",
            "thirdPartyAttrName": "eventResourceName",
            "entityType": "ALERT",
            "thirdPartyEntityType": "Event"
        }, {
            "name": "Alert metric",
            "thirdPartyAttrName": "eventAlertMetric",
            "entityType": "ALERT",
            "thirdPartyEntityType": "Event"
        }, {
            "name": "Alert subject",
            "thirdPartyAttrName": "shortDescription",
            "entityType": "ALERT",
            "thirdPartyEntityType": "Event"
        }]
    }
}
Configure using web interface
From the OpsRamp console, install a monitoring configuration and configure for webhook authentication.
Install custom integration for Monitoring
From All Clients, select a client.
Go to Setup > Account.
Select the Integrations and Apps tab.
The Installed Integrations page, where all the installed applications are displayed. Note: If there are no installed applications, it will navigate to the Available Integrations and Apps page.
Click + ADD on the Installed Integrations page. The Available Integrations and Apps page displays all the available applications along with the newly created application with the version.
Note: You can even search for the application using the search option available. Also you can use the All Categories option to search.Click ADD in the Custom Integration application.
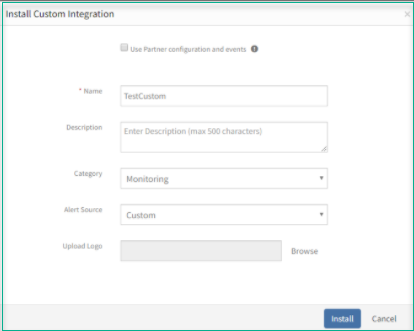
Enter the following details and click Install:
Name
Description
Category: Select Monitoring.
Alert Source: Select Custom if you do not find the source already available on the list. Based on the selection, the alerts are filtered in the OpsRamp Alerts section. To add a source on the list to filter alerts, contact support.
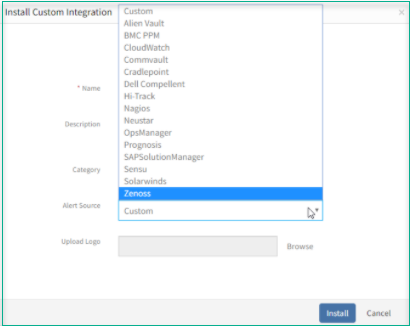
Upload Logo
When a client needs an integration that is already installed for the partner, the option, Use Partner configuration and events is displayed. If you select the option, the custom integration automatically inherits details about Name, Description, and Logo as defined for the integration by the partner.
Configure the custom integration for webhook
The custom integration category allows inbound (Inbound Custom Monitoring to OpsRamp)) communication.
Select Webhook as Authentication Type.
Verify the default Role.
You can execute only those APIs that are associated with the selected role.Click Save and make a note of Token and webhook URL.
Both are required while configuring a third-party application.Expand Map Attributes, select OpsRamp Entity Alert from the drop-down available and click + to define mappings.
- Field mapping: Maps the fields from your application entity attributes to OpsRamp entity attributes. For example, if you are trying to integrate events as OpsRamp alerts, alert subject, alert description, alert time, alert resource, and hostname are field mapping attributes.
- Field value mappings: If an attribute has multiple values to map, that attribute falls under field value mappings. for example, when trying to integrate events as OpsRamp alerts, alert state (with values critical, warning, Info) and alert metric are field value mapping attributes.
Select Additional settings.
Admins can configure event ingestion integrations to post events only if the resources are managed by OpsRamp. For resources that are not managed, the events are dropped and not processed.
Select templates from Monitoring of Integrations if you want to monitor integration failures. See monitoring integration failures for more information.
View logs from the Audit Logs tab.
Logs are visible only after successful API calls.
View Alerts
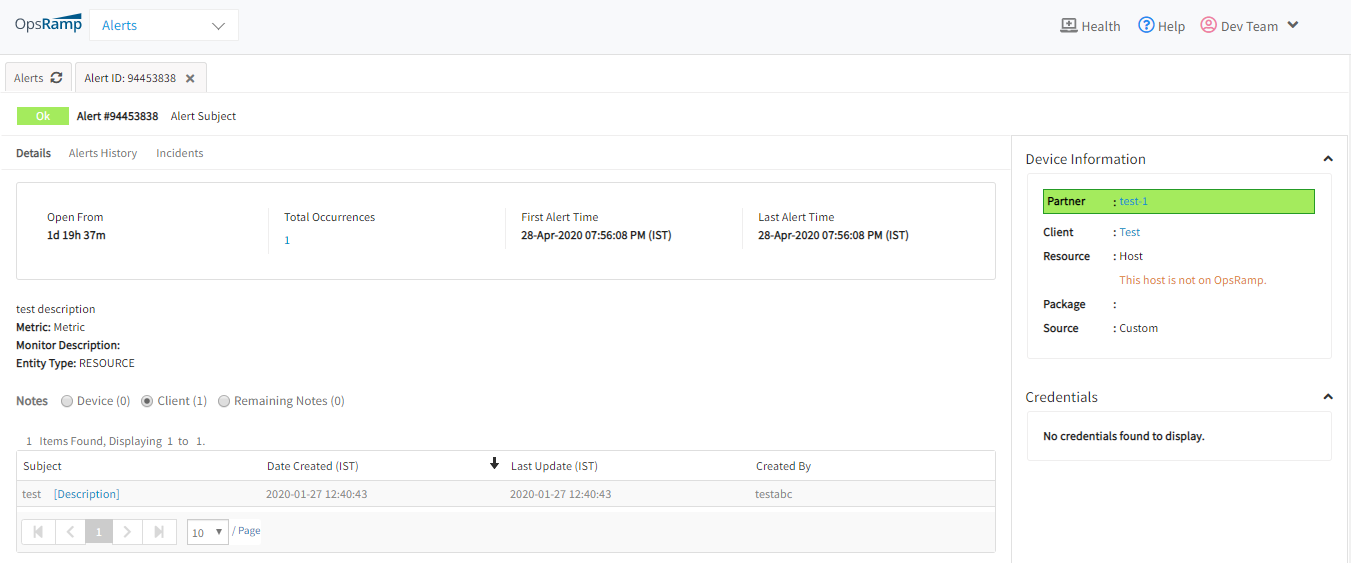
Validate
Validate the configurations using any API development tool, for example, POSTMAN.
Example request payload
{
"Alertstate" :"Ok",
"Description":"test description",
"serviceName":"Metric",
"ResourceName":"Host",
"Subject" : "Alert Subject"
}
Post alert through Postman
- Enter webhook URL copied from OpsRamp.
- Change the method to POST.
- Add the mentioned headers ‘Content-Type: application/json’ and ‘Accept: application/json’.
- Enter the JSON request payload in the body section.
- View failure or success result.