A Major Gateway Appliance Upgrade involves completely replacing your existing Gateway appliance with a new appliance that comes pre-installed with the latest operating system (OS), patches, and Gateway software versions. This upgrade approach is necessary when:
- Your Gateway is no longer supported by OpsRamp (below N-2 version).
- The current Gateway OS (for example, Ubuntu) has reached its End of Life (EOL), meaning it no longer receives security updates or support.
This process is a clean-slate upgrade. Instead of applying patches or incremental updates to the existing appliance, you deploy a fresh Gateway environment and migrate your configuration and monitoring data to it. This approach helps maintain system stability, performance, and security over time.
This guide provides a step-by-step process for upgrading your Gateway Appliance firmware for OpsRamp ISO or OVA deployments. The Gateway Appliance acts as a crucial component in your infrastructure, facilitating monitoring and communication with managed resources.
Note
- Gateway Appliance Upgrade cannot be applied directly to the existing Gateway. Instead, you must deploy a new Gateway appliance with the updated firmware, and then switch traffic over.
- If an existing Gateway has triggered a CRITICAL or WARNING alert that resolves during migration, the new Gateway may not trigger a recovery alert immediately. This is because the new Gateway begins monitoring in an OK state while the resource remains flagged on the old Gateway. The new Gateway will send a new alert appended to the existing one.
Prerequisites
Before you begin the upgrade process, ensure the following:
Supported Gateway Model:
Confirm your current Gateway appliance model is one of the supported types, such as:- VGVMA
- VGAMI
- VGAZU
- VGGCE
- VGPHY
- OGVMAU18
- OGAMIU18
- OGAZUU18
- OGGCEU18
- OGPHYU18
Backup Configuration Details:
Before upgrading, document your existing Gateway appliance configuration to ensure a smooth and accurate migration to the new appliance. Save the following information:- Number of CPU cores
- Memory allocated
- Disk size and data store name in use
- Number of virtual networks on Virtual Appliance
- Details of vSwitches that are connected to the virtual appliance
Verify Gateway Tunnel Mode: Verify that your Gateway tunnel is in TLS mode before you start the migration process. The SSHD tunnel-based Gateway does not support Gateway migration
Upgrade Procedure
Step 1: Get the current Gateway configuration data
In a web browser, enter the Gateway URL. For example:
https://<Gateway IP address>:5480.Log in using your username and password. Contact Support for default login credentials.
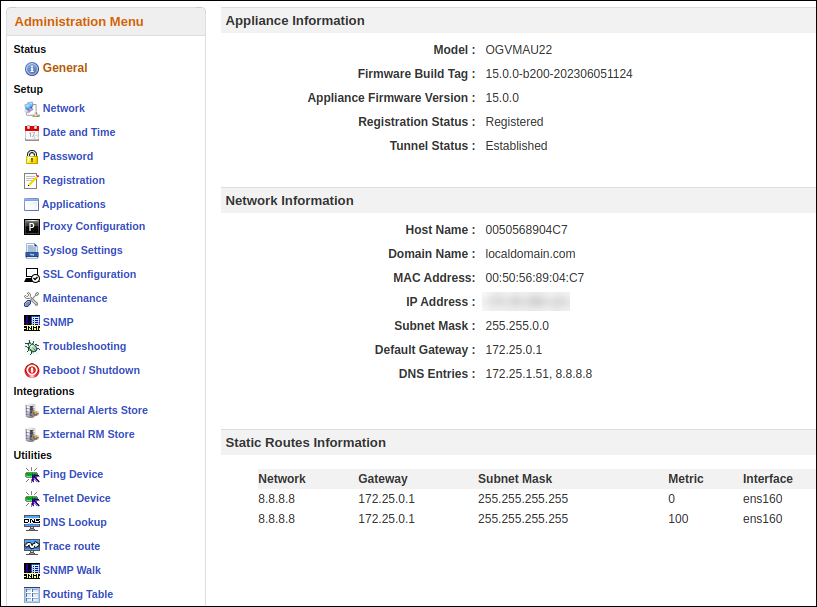
In the Administration Menu, note the following configuration setup data, which you need to configure the new Gateway:
- IP Address
- Network Configuration
- Date & Time
- Registration details
Log out from the gateway.
Step 2: Download the current Gateway image
To download the Classic Gateway image, follow the steps below:
- In the OpsRamp portal, select your client from All Clients.
- Navigate to Setup > Account > Collector Profile.
- On the Collector Profiles page, click + ADD.

- On the Add Gateway Collector Profile page, enter the following details:
- Profile Name: Provide a name for the profile you are creating.
- Profile Type: Select Standard.
- Description (Optional): Add a short description for the profile.
- Gateway Collector: Select one of the image options for Classic Gateway.
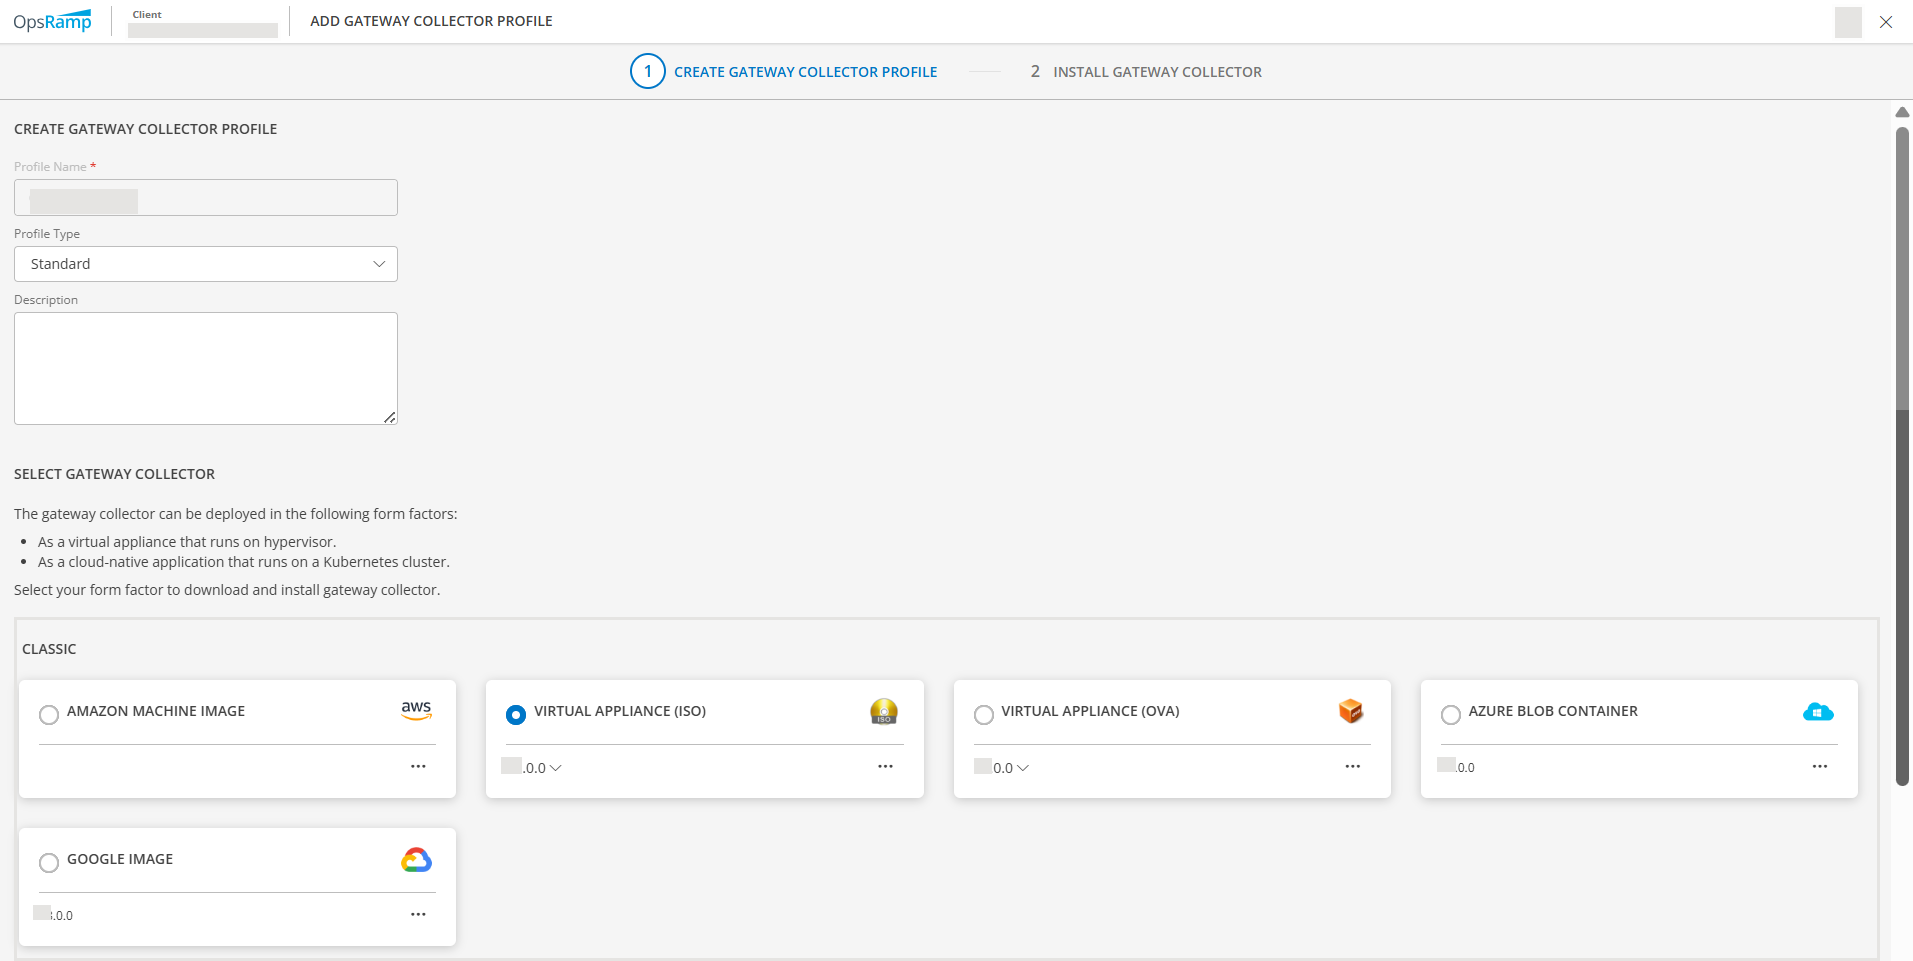
- Click NEXT.
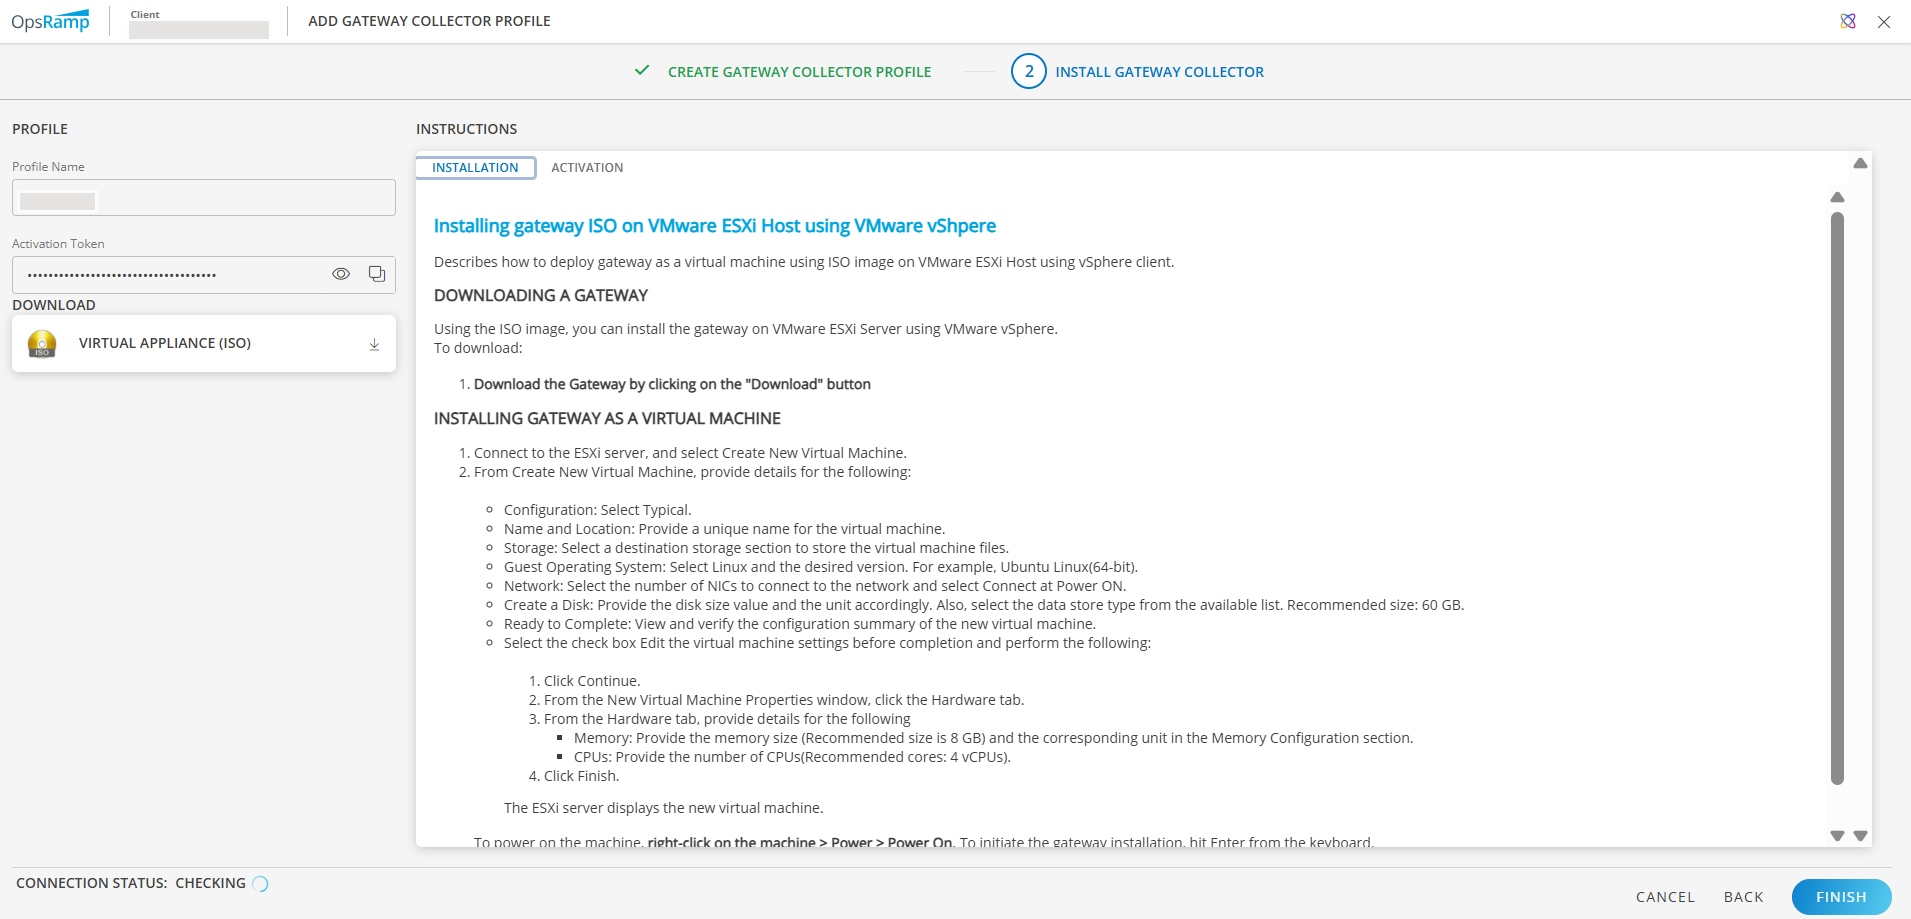
- Click VIRTUAL APPLIANCE (ISO) in the left pane to download.
The classic gateway image is downloaded to your local system.
Step 3: Detach the existing Gateway
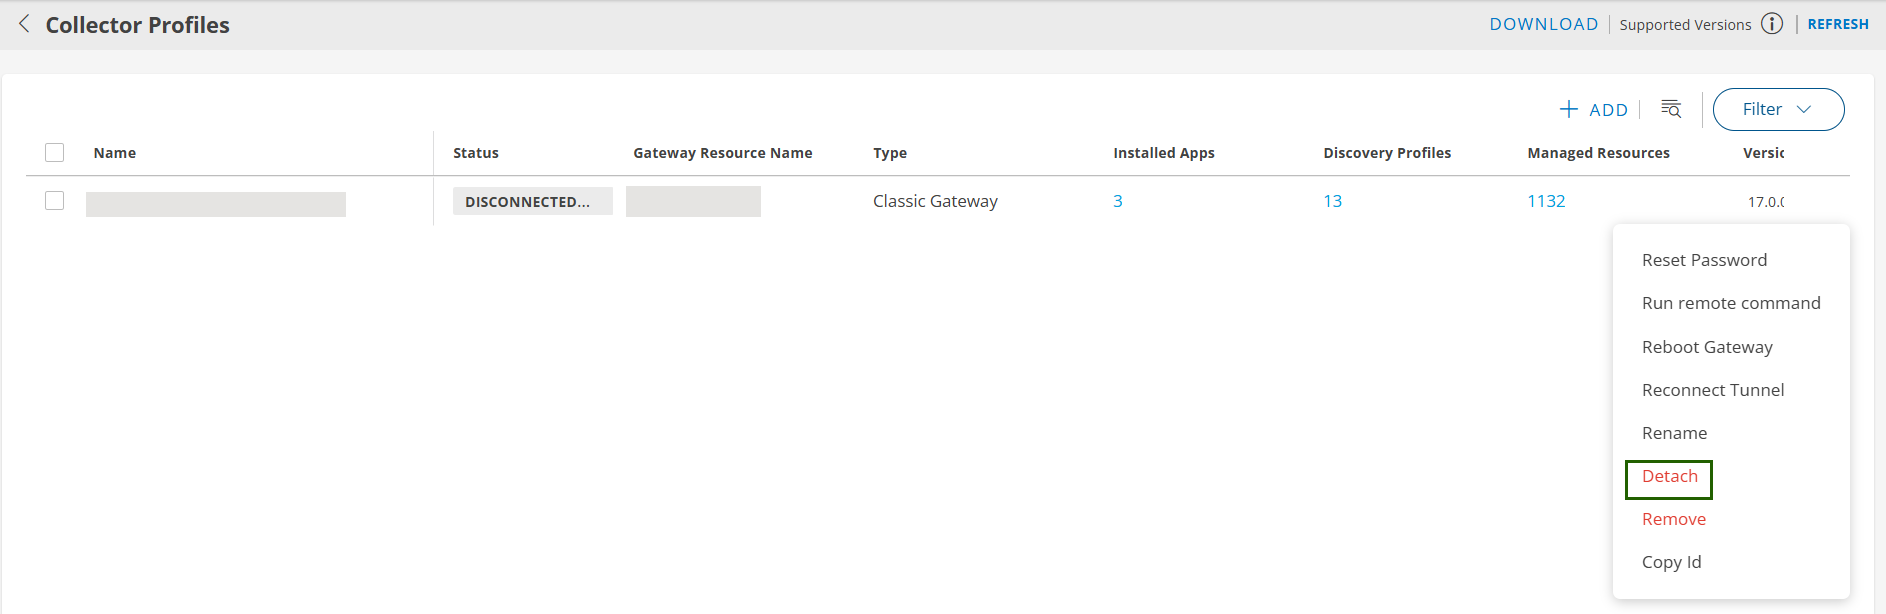
- Navigate to Setup > Account > Collector Profiles in the OpsRamp console.
- Select the collector profile associated with the Gateway you want to replace and click Detach Gateway.
Step 4: Spin up a new virtual machine
Create a virtual appliance using the saved resource configuration information of the existing Gateway. Configure the new virtual appliance using the configuration setup data.
- Log into the Gateway web user interface.
- In the Administration Menu, enter the configuration setup data:
- Network
- Date
- Time.
- Click Save.
Step 5: Attach the new Gateway
- In OpsRamp, navigate to Setup > Account > Collector Profiles.
- Select the Collector profile from which you detached the old Gateway.
- Click Reinstall. Step 6 below contains the gateway registration steps, but for more detailed instructions, refer to the Registering the OpsRamp Classic Gateway section.
Step 6: Configure the new Gateway
- Select Administration Menu > Registration.
- In the Registration window, note the OpsRamp Server URL.
- Enter the information for the following options:
- Activation Key: The OpsRamp -generated activation key.
- OpsRamp Server: The OpsRamp server IP/URL.
- Click Activate
- After activation completes, click Register Appliance Now. The Gateway registration status changes from Not Registered to Registered:
If your previous Gateway was used as a proxy for agent communication, you need to create the new Gateway using the same IP address and manually start the proxy service from the Gateway web user interface.
Step 7: Verify the upgrade
Verify the following options:
- Gateway status shows Connected under the Collector Profile Status.
- Under Registration Details, verify the Gateway model ID begins with OG (e.g., OGVMAU22).
- Confirm the firmware version reflects the latest update.
- Wait
5–10minutes, then check monitoring graphs for the Gateway and managed devices. - If a Gateway is used as a Proxy server for Agents, verify that the Agents are in the Active state and verify recent graphs.
- If a Gateway is used for monitoring Web Services or SIP, verify recent graphs.