Introduction
EMC VMAX Series is a family of large enterprise storage arrays designed for SAN environments.
OpsRamp manages the EMC VMAX resource using the EMC SMI-S Provider. The ECOM service must be on either a host or the Symmetrix Service Processor.
Create a credential
- From All Clients, select a client.
- Go to Setup > Accounts > Clients.
- On the client’s Credentials tab, add the credential information.
The following describes some of the credential settings:
- Type: EMC VMAX
- Use Password Vault: If enabled, specify
Policy Mapping, otherwise, specify a password.- Policy mapping enables integration of a Password Manager application with credentials.
- Password is the authentication password to access a resource.
- Namespace: Use
root/emc.
Configure and install the integration
- From All Clients, select a client.
- Go to Setup > Account.
- Select the Integrations and Apps tab.
- The Installed Integrations page, where all the installed applications are displayed.
Note: If there are no installed applications, it will navigate to the Available Integrations and Apps page. - Click + ADD on the Installed Integrations page. The Available Integrations and Apps page displays all the available applications along with the newly created application with the version.
Note: You can even search for the application using the search option available. Also you can use the All Categories option to search.
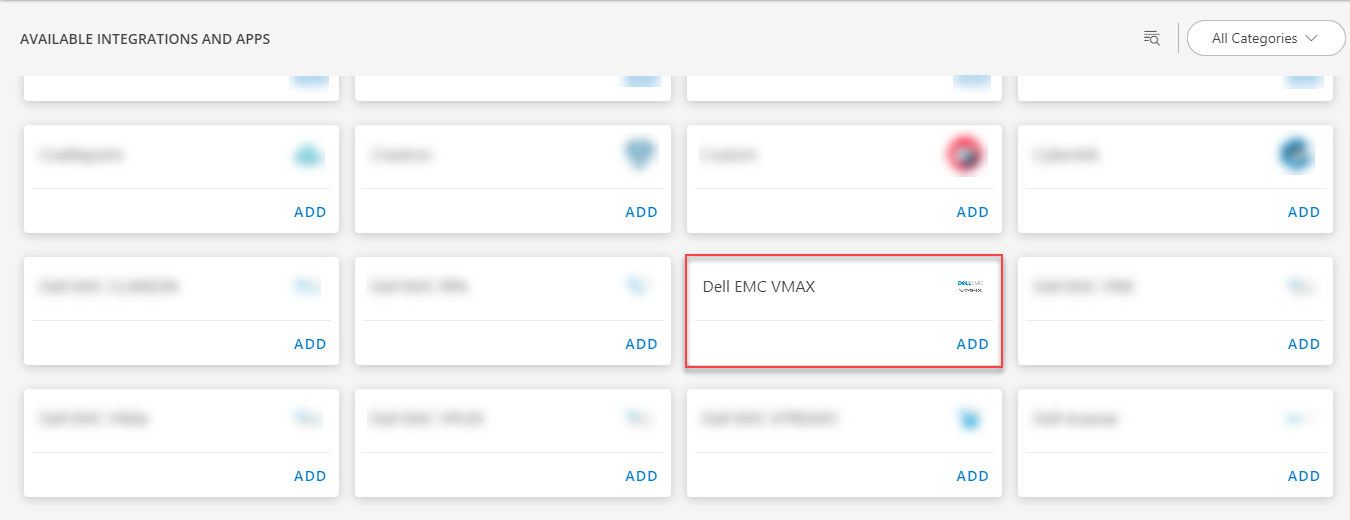
- Click ADD in the Dell EMC VMAX application.
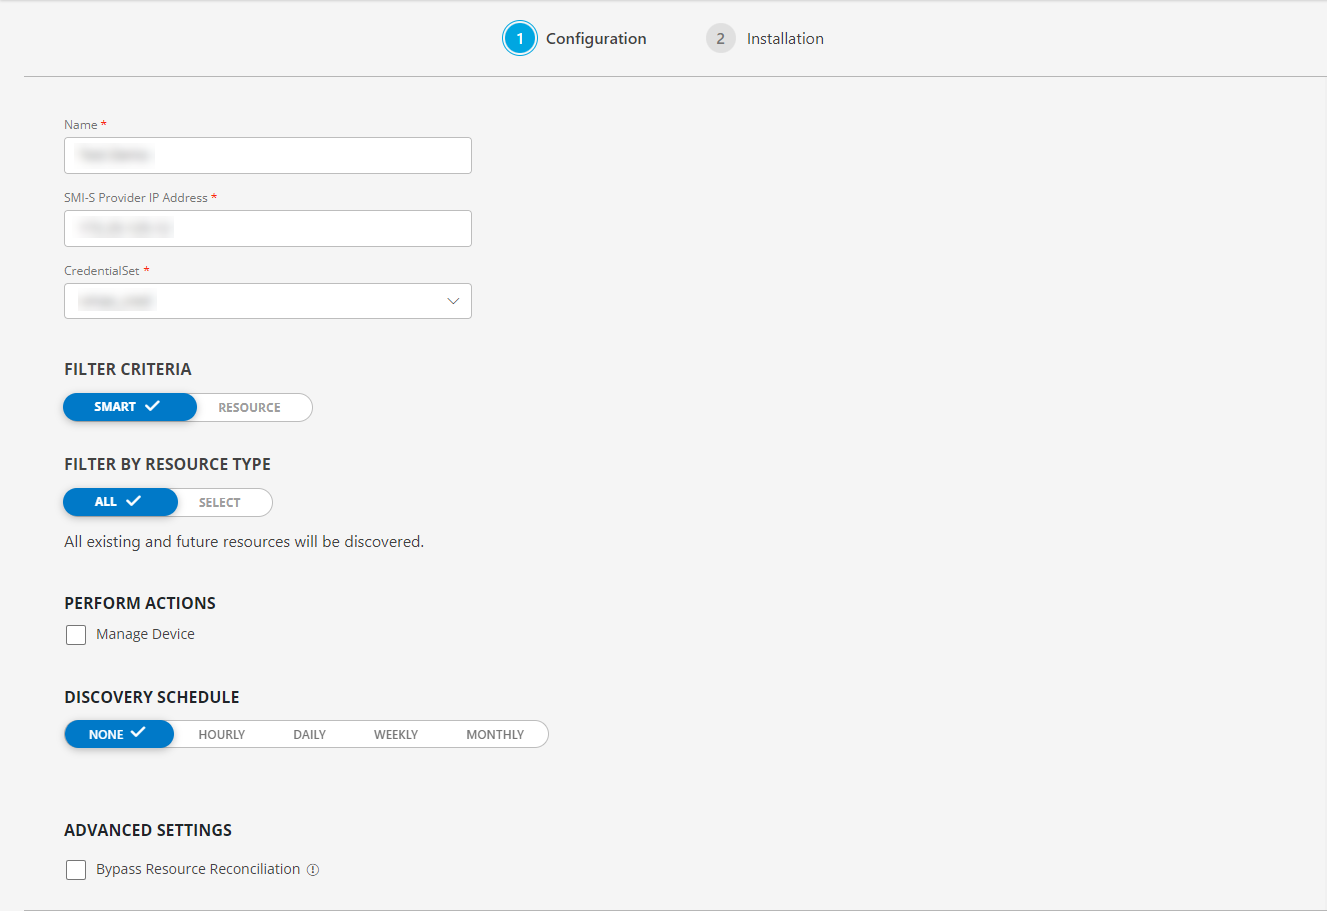
- In the Configuration page, enter the below information:
| Functionality | Description |
|---|---|
| Name | Enter the name for the configuration. |
| SMI-S Provider IP Address | Enter the SMI-S IP address. |
| CredentialSet | Select the CredentialSet from the drop-down list. Note: Click + Add to create a credential. |
From the FILTER CRITERIA section, select:
- SMART: Use to filter resources based on the resource type.
- RESOURCE: Use to filter resources based on certain resource attributes.
In the FILTER BY RESOURCE TYPE section, select:
- ALL: All the existing and future resources will be discovered.
- SELECT: You can select one or multiple resources to be discovered.
- Enter the Key, Operator, and Value information.
From the Perform Actions section, choose Manage Device to set the resources as managed.
In the DISCOVERY SCHEDULE section, select recurrence pattern to add one of the following patterns:
- Minutes
- Hourly
- Daily
- Weekly
- Monthly
(Optional) Under the ADVANCED SETTINGS, Select the Bypass Resource Reconciliation option, if you wish to bypass resource reconciliation when encountering the same resources discovered by multiple applications.
Note: If two different applications provide identical discovery attributes, two separate resources will be generated with those respective attributes from the individual discoveries.
Click NEXT.
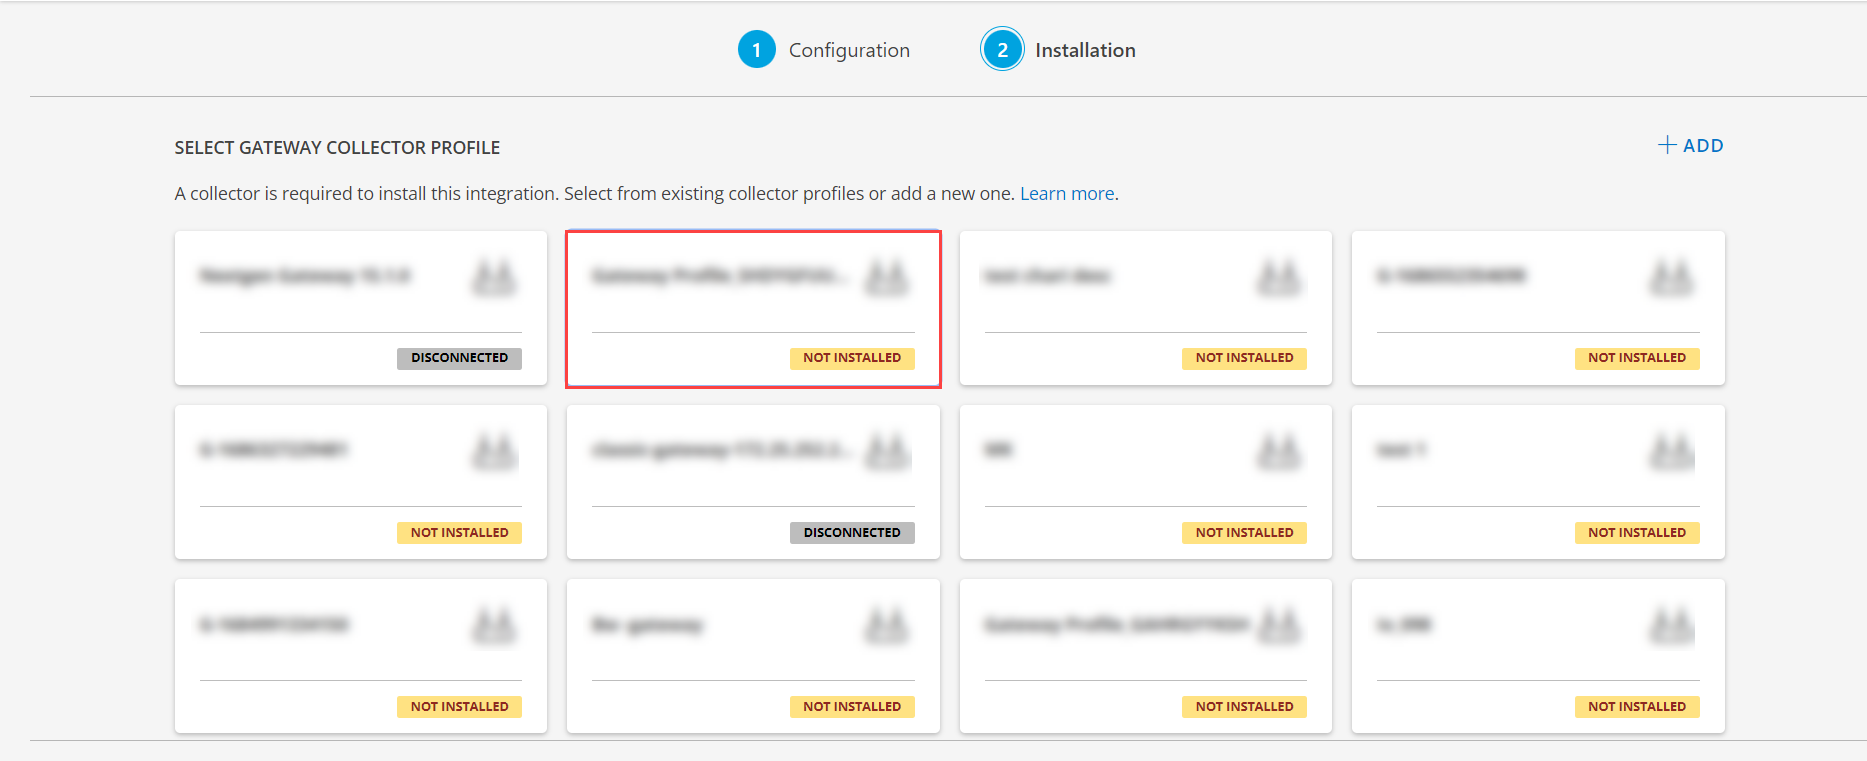
- (Optional) Click +ADD to create a new collector by providing a name or use the pre-populated name.

- Select an existing registered profile, and click FINISH.
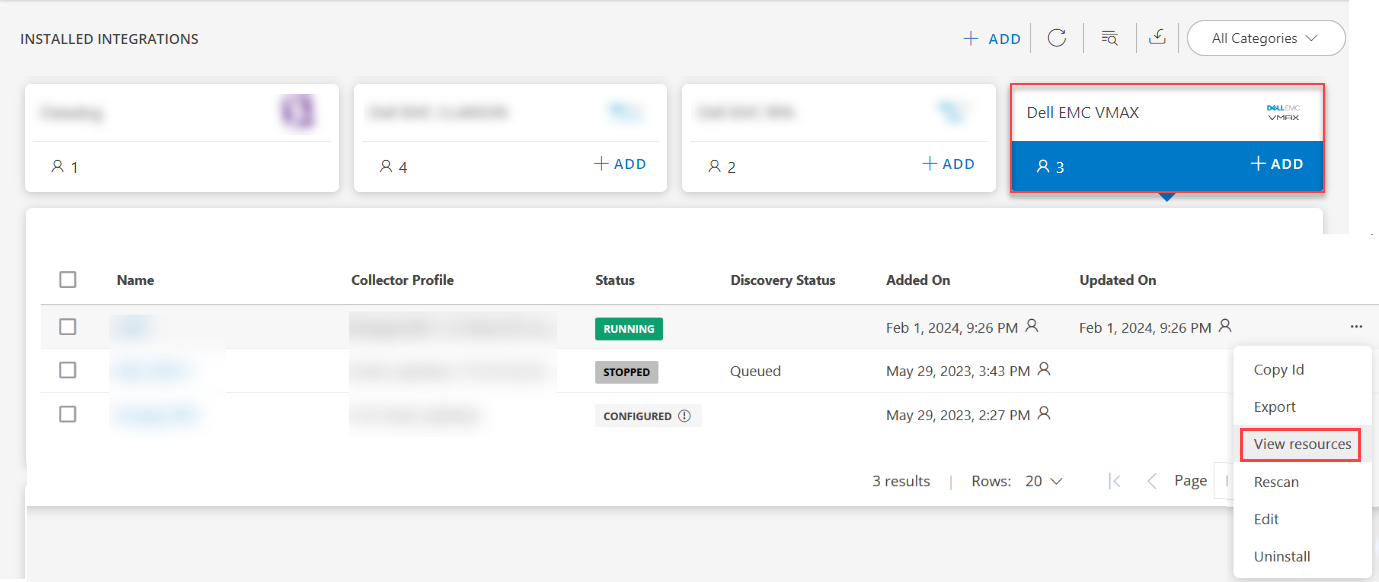
The application is now installed and displayed on the INSTALLED INTEGRATIONS page. Use the search field to find the installed application.
- (Optional), Select the Dell EMC VMAX Integration.
- (Optional), Click the ellipses and choose the View resources option.
View the EMC VMAX details
The EMC VMAX integration is displayed in the Infrastructure > Resources > Storage. You can navigate to the Attributes tab to view the discovery details, and the Metrics tab to view the metric details for EMC VMAX.