You can monitor events generated from integration failures in inbound and outbound configurations. Integration failure monitoring provides the following capabilities:
- Generate alerts when integration failures occur
- Provide metrics to track integration failures
- Create and assign Monitoring Templates for integration monitoring
You can monitor integration failures for the following types of integrations:
| Integration Type | Example Apps |
|---|---|
| Monitoring Integration | SolarWinds, Nagios, Zabbix |
| Collaboration Integration | ServiceNow, Jira, Microsoft Teams |
| Email Alert | Alert emails from external monitoring tools |
| Email Incident | Incident notifications from ticketing systems |
| Custom Integration (API) | Any integration using OpsRamp’s REST APIs |
Step 1: View metrics
To view integration failure metrics, follow these steps:
- Navigate to Setup > Monitoring > Metrics.
- Search for the required metrics.
- From Collector Type, select Integration.
The following metrics are available for monitoring integration failures:
| Metric | Description |
|---|---|
| integration.email.failures.count | Counts email failures. |
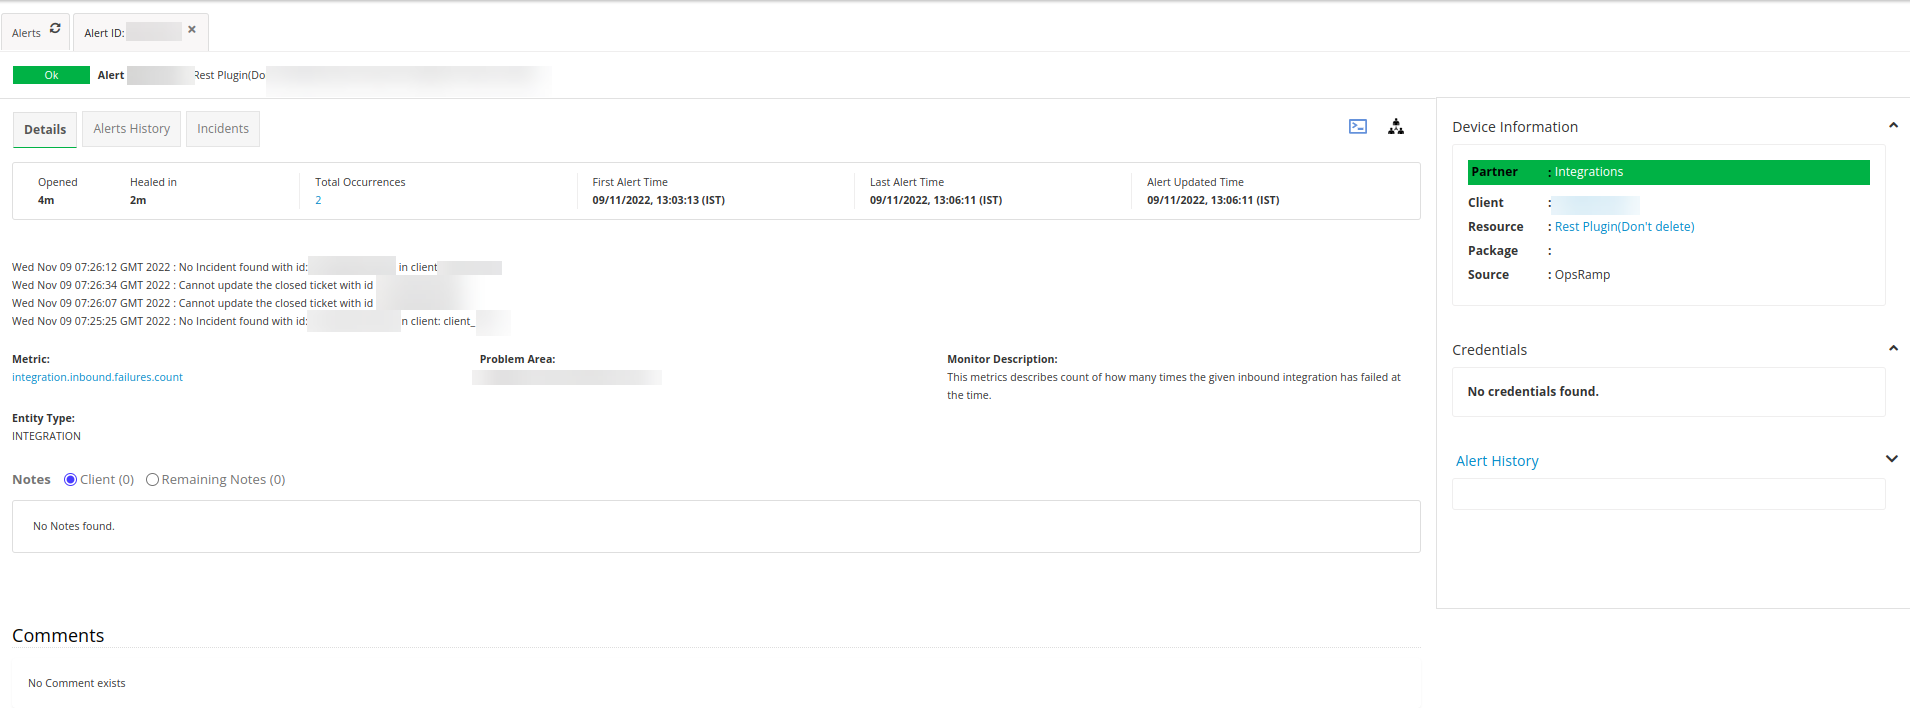
| integration.inbound.failures.count | Counts failures during inbound data flow. |
| integration.inbound.reqs.throttled | Counts inbound requests that are throttled. |
| integration.outbound.failures.count | Counts failures during outbound data flow. |
| integration.outbound.time-outs | Counts timeouts during outbound data flow. |
Step 2: Create monitor
To create a monitor for integration failures, follow these steps:
- Navigate to Setup > Monitoring > Monitors and click +Add.
- Enter the following information:
- Monitor Scope: Select Partner Monitor or Client Specific Monitor
- Partner: (auto-populated)
- Client: Select your client
- Adapter Type: Select Integration
- Name: Enter the monitor name
- Description: Enter a brief description
- Metrics: Click Add Metrics to add integration failure metrics
- Select all required metrics and click Add Metrics
- Click Save.
Step 3: Create Monitoring Template
To create a Monitoring Template for integration failure monitoring, configure the following fields:
| Field Name | Field Type | Description |
|---|---|---|
| Select Template Scope | Dropdown | Select the template scope: Service Provider Template or Partner or Client Templates. Additional fields appear for Partner or Client scope. |
| Partner | Dropdown (Read-only) | Displays the partner name when you select Partner or Client Templates as the scope. Automatically populated. |
| Client | Dropdown | Select the target client for template application. Visible only when you select Partner or Client Templates. |
| Collector Type | Dropdown | Select the collector type (e.g., Cloud, Gateway) used for monitoring data collection. |
| Applicable For | Dropdown | Select the resource type (e.g., Kubernetes Master, Windows Server) to which this template applies. |
| Template Name | Text | Enter a unique name for the template. |
| Description | Text Area | Provide a brief description of the template's purpose. |
| Generation | Text (Read-only) | Indicates the generation/version model of the template. This is system-generated and cannot be modified. |
| Version | Text (Read-only) | Displays the current version number of the template. |
| Tags | Text | Optional tags for organizing or filtering templates. |
| Prerequisites | Text | Specify any prerequisite conditions or configurations required before applying this template. |
| Status | Dropdown | Select whether the template is Active or Inactive. |
| Notes | Text Area | Optional notes or comments for internal reference. |
| Template Family Name | Text | Group related templates under a common family name for easier management. |
| Deployment Type | Dropdown | Select the deployment model for the template (e.g., Standard). |
Click Save.
Step 4: Assign Monitoring Template to integration
You can assign Monitoring Templates to integrations at the partner and client levels.
To assign a Monitoring Template:
- Click the Actions menu (three dots) for the integration and select Assign template.
- In the Assign template window, search for the required template.
- Select the template and click Assign Template.
The template is assigned successfully.
Note
If you are at the partner level, a checkbox appears in the Assign template window. If you select this checkbox, the template is inherited by all client integrations.To unassign a Monitoring Template:
- Click the Actions menu (three dots) for the integration and select Assign template.
- In the Assign template window, search for and select the template.
- Click Unassign.
Note
Alternatively, you can select a different template and click Reassign. The previously assigned template is automatically unassigned and the new template is assigned.Step 5: View alerts
To view alerts generated from integration failures, follow these steps:
- Go to Alerts.
- Click Edit Criteria and select the Partner and Client.
- Select Alert Type > Monitoring and click Apply.
All alerts generated from integration failures for the selected partner and client display.
- Click the alert to view details.
- Click the Alert History tab to view complete alert details.
Alert information
Alerts are triggered when integration failures occur. The alert description includes a timestamp and an error message.
Note
The timestamp format is: Day Month Date Time (hours:minutes:seconds) Time Zone Year. For example: Mon Jun 08 14:30:45 UTC 2026.